Category Archives: Salads
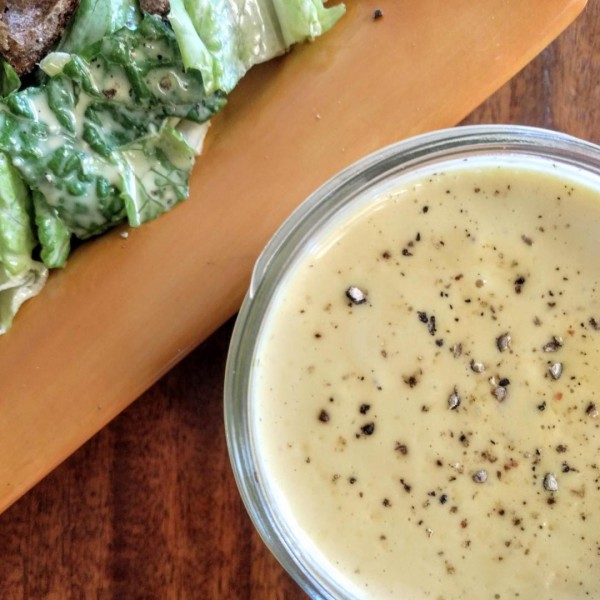
Tasty—And Healthy—Caesar Salad Dressing
It’s a summer classic!
Who doesn’t love a good Caesar salad when the romaine is garden fresh, the croutons are toasty crisp, the Parmesan is salty and plentiful, and the dressing is tangy, lemony, and nicely briny? Just add some grilled chicken on a steamy summer evening, pour yourself a frosty beer or wine cooler, and dig in to this perfect hot summer treat.
Or, as we do here, pile up a batch of luscious grilled shrimp with some shredded romaine, some pickled onions, and your homemade Caesar dressing on warm tortillas and treat the family to the best fish tacos EVER!
That’s how we do it.
The Caesar palette is something with which we’re all familiar; fresh, crisp romaine, shaved Parmesan, garlicky croutons—you do make your own, right?—and that classic salty dressing. It just cries out for a cold beer in a frosty mug, doesn’t it?
But ah, you say, the dressing! Mayo, egg yolk, oil? Healthy?
Here’s a different take; it’s creamy and delicious, and I guarantee your guests will never know the difference.
We’ve eliminated the mayo and egg, reduced the amount of oil, and come up with a perfect Caesar dressing for the 21st century, when getting healthy is something that will serve all of us well.
But can’t that dressing be fussy? I say, NOPE! Just grab a food processor, dump, and Voilà! Tangy heaven. Here’s the scoop…
Ingredients:
1/3 cup freshly grated Parmesan cheese
Juice from 1 lemon
1 garlic clove, sliced thin (do not smash it)
½ tablespoon Dijon mustard (we use stone-ground Dijon)
2 anchovy filets (don’t skip the anchovies—anchovy paste from a tube works well here—about a 2-inch ribbon)
1 tablespoon GOOD extra-virgin olive oil
5 tablespoons 0% fat Greek yogurt
1/8 teaspoon kosher salt
Freshly ground black pepper (more than you think you need)
Preparation:
Simply dump all the ingredients into a food processor–it’s just the right amount for a mini-chopper–and whiz until it’s smooth. That’s it!
It works out really well to make the dressing in the morning and allow the flavors to marry, but it’s not necessary.
Shrimp Tacos

And if you want it, here’s the fast scoop on the tacos: Season the shrimp with salt and pepper; melt butter and oil in a large skillet, saute one pound of shrimp, two minutes on each side, in butter and olive oil; add some lemon juice, garlic, red pepper flakes, and freshly chopped parsley, and toss to combine. Turn off the heat. Then pile the shrimp, salad, and some pickled red onions on warm tortillas (flour tortillas are better for this recipe), and serve immediately.
Mmmmm Mmmmm Good!
Epicure Market Vinaigrette Salad Dressing

It’s as easy as it gets, and even better to put on a salad.
It’s the vinaigrette salad dressing that changed the salad-eating habits of Miami Beach folk forever. Before this small beauty came along, salad dressing meant Wishbone or Milano French dressing. Out in Vegas they were creating Caesar dressing, but in South Florida this was the magic, and it was oh, so simple. You can keep the memory alive with this simple dressing, just the way we made it.
Ingredients:
6 ounces first cold-pressed extra-virgin olive oil
2 ounces red wine vinegar
1 teaspoon agave sugar (granulated will do in a pinch)
1 tablespoon freshly squeezed lemon juice
1 garlic clove, smashed but not chopped
1 teaspoon Dijon mustard
1/2 teaspoon kosher salt
1/4 teaspoon freshly ground black pepper
1 teaspoon dried marjoram
Preparation:
Make the dressing 24 hours in advance.
Place all the ingredients except the olive oil and the garlic clove in a stainless steel or other non-reactive bowl and mix well. Pour into a glass jar, add the garlic clove, cover and refrigerate for 24 hours.
Immediately before serving, remove the garlic clove, pour the dressing back into the sam bowl, beat rapidly with a wire whisk, and slowly drizzle the olive oil into the bowl to incorporate the ingredients. Add the garlic clove back into the dressing, pour into a serving vessel like a gravy boat, and serve immediately.
The dressing can be made ahead with the olive oil incorporated, but you will need to bring it to room temperature and whip rapidly before serving.
Cold Sesame Noodle Salad Perfected
I can’t believe I’ve done it.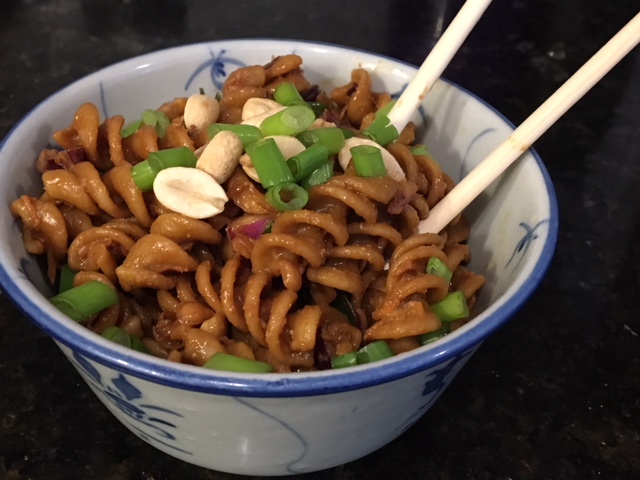
I’ve spent the past 35 years in search of the perfect recipe for cold peanut/sesame noodle salad. I’ve tried recipes from restaurants, cookbooks, friends, enemies, the Internet…you name it, I’ve tried it. I’ve experimented with numerous methods and techniques, different types of noodles, flavor combinations native to different nationalities–Chinese, Thai, Vietnamese, Korean, Burmese. I’ve tried different levels of spice and heat. I’ve experimented with the participants in cooking classes I’ve taught.
And each time there seemed to be some element of the recipe missing. I always thought: good, but not just perfect.
Until now.
I think I’ve done it.
Recognizing, of course, that each of you has your own version of what’s perfect in this classic–it’s one of those recipes that you use to gauge how good an Asian restaurant is. This is one of mine.
I started my quest with my long-time friend Vicki (are you still with me, Vicki Corey? I bow in your general direction), who shared with me the basic concept of “threes.” Three tablespoons of this, that, and the other, three teaspoons of this and that. And this recipe, which I still have and which is reproduced way back in the early pages of this blog (here’s the link: https://jeffskitchen.net/?s=Vicki%27s, or search on Vicki’s Noodles), has served me extremely well. No matter where or which recipe I tried I kept coming back to this one as being as close to perfect as I had found. It even once won me a “Philly’s Best” award when I was making it for a small gourmet shop in Ardmore, PA, a place known for good food.
It’s (in my view) just the right amount of spicy/hot for everyone, but if you like it spicier/hotter, add more chili oil or some Sriracha to suit yourself. In this version of the recipe I’ll recommend specific ingredient brands, most of which are available at your local Asian grocery store.
Also, when you read my recommendation for the noodles to use, you’ll holler, “WHAT??? THAT’S NOT ASIAN!” Okay, I know that. But what are you expecting? Authentic or perfect? I’ll opt for perfect.
Try it. You’ll like it. Guaranteed!
Spicy Sesame Peanut-Noodle Salad
Ingredients:
1 box (13.25 oz) rotini or fusilli whole wheat noodles, cooked al dente’
3 Tablespoons premium light (or dark, if you dare) soy sauce
3 Tablespoons brown rice vinegar
1 Tablespoon fish sauce
2 Tablespoons toasted dark sesame seed oil
2 teaspoons sesame chili oil
3 Tablespoons dark brown sugar
3 Tablespoons Crazy Richard’s crunchy peanut butter
1/3 cup chopped red cabbage
1 medium carrot, shredded fine
1/3 cup chopped green onion, divided
1/3 cup chopped peanuts, divided
½ cup FRESH(!) bean sprouts
Preparation:
- Whisk the next seven ingredients (soy sauce through peanut butter) until they are completely blended.
- Cook the noodles per package, 1 minute LESS than the recommended al dente’ time; drain 5-10 minutes, but DO NOT RINSE.
- Place the noodles in a large bowl, add the sauce and toss to coat all the noodles well.
- Add the cabbage, carrot, ¼ cup green onion, ¼ cup peanuts, and bean sprouts and toss again to coat all the ingredients. If you wish a more Thai flavor, add ¼ cup shredded fresh Thai basil or chopped cilantro.
- If you wish to add a protein—slices of grilled chicken, steak, shrimp, or tofu, do it now.
- Allow to stand until the salad reaches room temperature.
Garnish with the remaining peanuts and green onion and serve at room temperature or refrigerate for later, but allow to return to room temperature for serving (garnish when serving).
And by the way, if you’re truly interested in an authentic Sesame Noodle salad or if you’re allergic to nuts, replace the peanut butter with tahini. And for an authentic noodle, you can use either 8 ounces medium rice noodles, or Soba or Udon noodles.
Fabulous Summer Salads
So. Summer.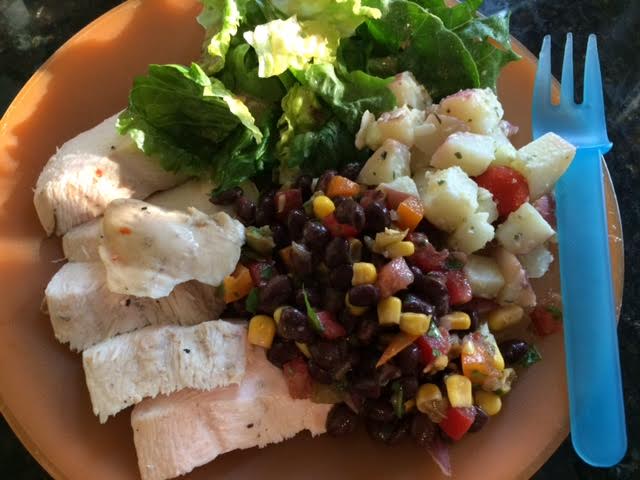
It’s hot out there; who wants to cook? Not me. So what I worked on this week are summer salads.
Ho hum, right? Potato salad, cole slaw, macaroni salad? Same old same old.
Not this guy.
I came up with two wonderful new recipes inspired by other, pre-existing recipes and worked them over into wonderful new dishes with my (and Ellen’s) personal twists to make a balmy summer evening absolutely sing with new flavors.
Standard ingredients, new applications. Here’s what we’ve got.
Among the things upon which Ellen and I agree is that we don’t much like creamy potato salads; you know the ones–potatoes, celery, mayonnaise, salt and pepper–not much about which to get excited.
Enter Eating Well magazine. Eating well is something I excel at, although “well” is a bit of a stretch. The magazine means healthy; to me, “eating well” generally means enjoying what we’ve made to the extreme. In this case, I’ll stick to (relatively) healthy–no mayo in this potato salad, just a beautious blend of herbs and spices that make a summer day feel like a celebration. This month’s issue of Eating Well features a choice of potato salads that are different from the norm almost as much as they are different from each other.
Our choice from this page was a luscious Greek potato salad with (or, in our case, without) beautiful Kalamata olives (Ellen doesn’t like olives, so we left them out, but I love them, so I say “put ’em in!” Here’s the plan:
The second recipe is a variation on a Mexican bean salad, with a tangy cumin/lime dressing that is similar to one that has long been one of our favorites. It’s like a bean salad I wrote about a couple of years ago, but with a twist in the dressing. The dressing started with the Food Network’s Ellie Krieger, but I’ve worked it over to my liking, and I sure do like it. Better, although the original is delicious.
I think you’ll like both recipes. We served them with grilled chicken and freshly torn romaine lettuce and the same dressing as in the beans. Fabulous!
Greek Potato Salad
Ingredients:
2½ pounds red or Yukon Gold potatoes
1 cup cherry tomatoes, halved
1/3 cup reduced-fat Feta cheese, crumbled
¼ cup Kalamata olives, quartered (optional! — NOT!)
1 medium cucumber, seeded and quartered and diced
2 tablespoons fresh oregano, chopped
¼ cup extra-virgin olive oil
3 tablespoons white balsamic vinegar
¼ cup finely chopped shallot
1 tablespoon Dijon mustard
Kosher salt and freshly ground black pepper to taste
Preparation:
Scrub and dice the potatoes to a ½-inch dice and place on a steamer basket above one inch of water in a large pot; steam until tender, 12-15 minutes. Place the potato dice on a baking sheet, sprinkle with ¼ teaspoon kosher salt and let cool for 15 minutes. Then gently place them in a large bowl.
In a separate bowl, whisk together olive oil, vinegar, shallot, mustard, and salt and pepper. Add the tomatoes, Feta, olives (or not ;), cucumber, and oregano to the potatoes, then drizzle the dressing into the bowl. Toss gently, so as not to break up the potatoes, and add salt and pepper to taste. Place the bowl in the fridge for at least two hours, then serve.
Mexican Black Bean and Tomato Salad
Ingredients:
2 cans black beans, rinsed well
4 fresh San Marzano (or Roma) plum tomatoes, ½-inch dice
1 orange (or yellow) bell pepper, seeded and pith removed, ½-inch dice
1 4-ounce can chopped green chiles, drained
½ red onion, diced
1 10-oz package of frozen corn, thawed, rinsed, and drained
¼ cup chopped cilantro
¼ cup extra-virgin olive oil
½ teaspoon freshly grated lime zest
1 ½ teaspoons freshly squeezed lime juice
1 ½ teaspoons freshly squeezed lemon juice
1 ½ teaspoons ground cumin
1/8 teaspoon ground chipotle pepper (more if you like your salads tangy!)
½ teaspoon salt
¼ teaspoon finely ground white pepper
Preparation:
Place the first seven ingredients (beans through cilantro) in a large bowl. In a separate, smaller bowl, add the zest, juice, cumin, chipotle pepper, salt, and white pepper, and stir to mix well. Slowly drizzle the olive oil into the dressing bowl whisking constantly to create a mixed dressing that thickens as you add the oil. Pour over the salad ingredients and toss to coat the salad well. Serve immediately to get all the flavor from the tomatoes and cilantro, or chill for later serving.
Both these recipes are tasty and reasonably healthy, and go well with anything grilled. Try ‘em both!
Israeli Couscous with Lemon, Cucumber, and Cilantro
I didn’t know what to make for supper, and I had only a half hour before it had to be ready. 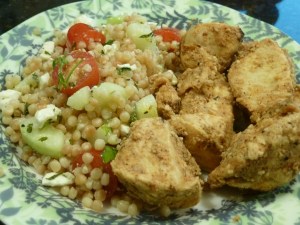 Life on the run, you know. I work, E works, L is at the theater all day, M is either swimming, hockeying, iPhoning, entertaining, being entertained—it’s all just overwhelming, and making dinner becomes a chore.
But you know that.
You deal with the same issues, or similar ones, just the names and the names of the activities are different.
And we just can’t bring ourselves to open a box or a can or face another plate of ho-hum chicken breasts. Sure we like to cook ahead, and we have on several occasions, most recently a couple of Sundays ago, when we whipped up bowls full of chicken Marsala, baked ziti, salmon cakes, a couple of meat loafs, and E’s most popular white-bean and turkey-sausage stew.
It’s 4:45, all the make-ahead packages are frozen solid, there’s one chicken breast in the fridge (left over from another recipe), and the pressure is on.
What’s in the cupboard?
What I found was a box of Trader Joe’s Israeli couscous, a carton of plain yogurt and lots of produce in the fridge, and the clock is ticking. I’m feeling a little bit like Ted Allen is hiding around the corner.
I’m likely to fail. Chopped.
I looked for and found a recipe for a cold couscous salad that looked promising, but it surely needed a jolt of pizzazz, and then I found a small container of grilled chicken souvlaki I made a while back—that will defrost in a hurry. I can pull this off?
The feature for me will be the couscous salad, because I can spice it up and make it sing. So here’s what I made:
Israeli Couscous Salad with Cucumber, Lemon and Cilantro
Ingredients:
1 teaspoon olive oil
1 ½ cups Israeli Couscous
1 ½ cups boiling water
1 large cucumber, peeled and seeded
¼ cup fresh cilantro, chopped coarsely
2 tablespoons fresh flat-leaf parsley, coarsely chopped
1 medium lemon
2 tablespoons extra-virgin olive oil
1 tablespoon white Balsamic or cider vinegar
1 clove garlic, minced
½ teaspoon kosher salt
Freshly ground black pepper, to taste
4 ounces feta cheese, crumbled
12 grape tomatoes, halved
Preparation:
1. Preheat a saucepan over medium heat with 1 teaspoon olive oil; when the oil is hot add the couscous and toast, stirring constantly, until it is lightly browned, 5-7 minutes. Carefully add the boiling water, reduce the heat to low, cover and steam for 12 minutes, or until the water is completely absorbed. Remove from the heat and set aside to cool.
2. Cut the seeded cucumber into quarters and then into ½-inch slices; place in a large bowl. Add the cilantro and parsley. With a fine-hole grater, zest the lemon peel into the cucumber. Set aside.
3. Squeeze the juice from the lemon into a small bowl, add the vinegar, olive oil, garlic, salt, and pepper. Whisk to combine the dressing and add it to the cucumber. Toss to coat well.
4. Add the cooled couscous, the feta, and the tomatoes, and toss gently to combine the ingredients. Adjust the salt and pepper to taste, and serve immediately or chill until ready to eat.
You can substitute mint, all parsley, or all cilantro to the salad as you wish.
Serve with chicken or lamb souvlaki. Here’s the recipe for that: Feel free to substitute lamb for the chicken, and try the tzatziki, too. It’s the bomb!
Souvlaki (Lamb or Chicken)
Ingredients:
½ cup olive oil
3 cloves garlic, chopped
1 tablespoon chopped rosemary
1 tablespoon chopped thyme
1 tablespoon chopped oregano
2 lemons, juiced
2 pounds lamb shoulder meat, trimmed of most (but not all) the fat, cut into 1-inch cubes
or
4 large boneless, skinless chicken breasts (similarly prepared)
Preparation:
Place all the ingredients in a zipper-close food-storage bag, mix well, and marinate in the refrigerator for at least 8 hours, and preferably overnight. Place the meat on soaked wood or steel skewers, and grill over direct heat, turning several times, until done, 15-20 minutes.
Serve over rice or couscous, and with this fabulous yogurt dipping sauce:
Greek Tzatziki
Ingredients:
32 ounces plain yogurt or 16 ounces plain Greek yogurt
1 large peeled, seeded and shredded English cucumber (or two regular ones)
5-8 cloves garlic, peeled and finely minced (you decide how many)
3 tablespoons white vinegar
¼ cup extra-virgin olive oil
½ teaspoon kosher salt
Preparation:
Place the plain yogurt in cheese cloth over a large bowl and strain in the refrigerator overnight (not necessary if you use Greek yogurt, but use half the amount of yogurt). Mix the cucumber and garlic with the salt and drain over a bowl for a half hour (this will remove moisture from the cucumber). Blend all the ingredients well in a large bowl.
Serve with the grilled souvlaki and a Greek salad.
Mexican Cold Bean Salad
Talking Fresh
Talking Fresh has taken a left turn. I hope you will stay with me, because I find this new phase of the column liberating.
A bit of history:
Make this as spicy (or not spicy) as you wish. Add more Tabasco sauce, jalapeno peppers, whatever–or not!
Talking Fresh came about as the result of a conversation I had at church one Sunday morning with Jen Kopf, one of the editors at the erstwhile “Lifestyle” section of the Lancaster Sunday News. I admire Jen and her remarkable writing, her sense of the history and culture of Lancaster, and her obvious love for Lancaster. I asked her why the paper didn’t have a restaurant critic, and if they would be interested in entertaining the idea. I pointed her toward my blog so that she could get a sense of my writing, my style, my sensibility, and my slight leaning toward anarchy (I should point out that before I gave her the URL, I had to clean it up a bit—I’d been blogging for a couple of years at that point, and I tend to write in frenetic bursts, thinking that everything I write is just what everyone else wants to read—my bad!).
A few weeks later Jen got back to me with several reasons why the paper didn’t think a restaurant critic was on their radar, and admittedly, the reasons were sound. But she liked what she read on the blog—she actually used the word “interesting.” I was ecstatic. But not yet a published writer here in Lancaster.
A couple months later I got an email from another editor at Lifestyle, Lynn Schmidt Miller, who suggested that they might be interested in running a semi-weekly column if I could present it just as I present entries in the blog.
“Why sure I can,” I responded. Ulp. Suddenly I’m a food writer in Lancaster, with you all and the rest of the county as my readers, and I owe a column every other week.
No matter what.
With photos.
Of stuff I made myself.
Ulp!
But I took up the challenge, went in to the offices of the paper on King Street, got a photo taken of my former fat self, balloon chin and all, and suddenly I’m a columnist in Lancaster.
In the same newspaper as Gil Smart and Louis Butcher and Larry Alexander and Jeff Hawkes and Tom Murse and all the other fabulous writers we are blessed with in this town.
Ulp.
For me, because Lynn asked me to write the column just as I had been writing my blog, I took that to mean that I was wanted as much for my writing as for my recipes. The truth is, I always considered the blog—and now the column—as an outlet for my writing, and the recipes were simply the device to get people to read the entries. To this day, I don’t know, and don’t really care, whether they were more interested in the writing or the recipes.
Being on a word count made it all the more challenging, but for me it was always about the essay up front. My wife always reminded me that the column had to be about something.
“What’s it about?” she always asked.
When space was tight and the columns got edited, it was always the writing that got snipped, which made me feel a little sad. But I understood—still do—the demands of space in the paper, and half a recipe is worthless.
Which brings me back full circle to this column, which is that I now feel liberated, because the restriction of word counts is off, and now my only task is to be interesting and produce wonderful food and recipes. If I bore you half way down the column, that’s on me.
But I’ll continue to write the column, and continue to love doing it, and hope you continue to read it and to share it with your friends—Facebook and otherwise—so that maybe I can gather some steam for the column and gain some readership.
Here’s hoping.
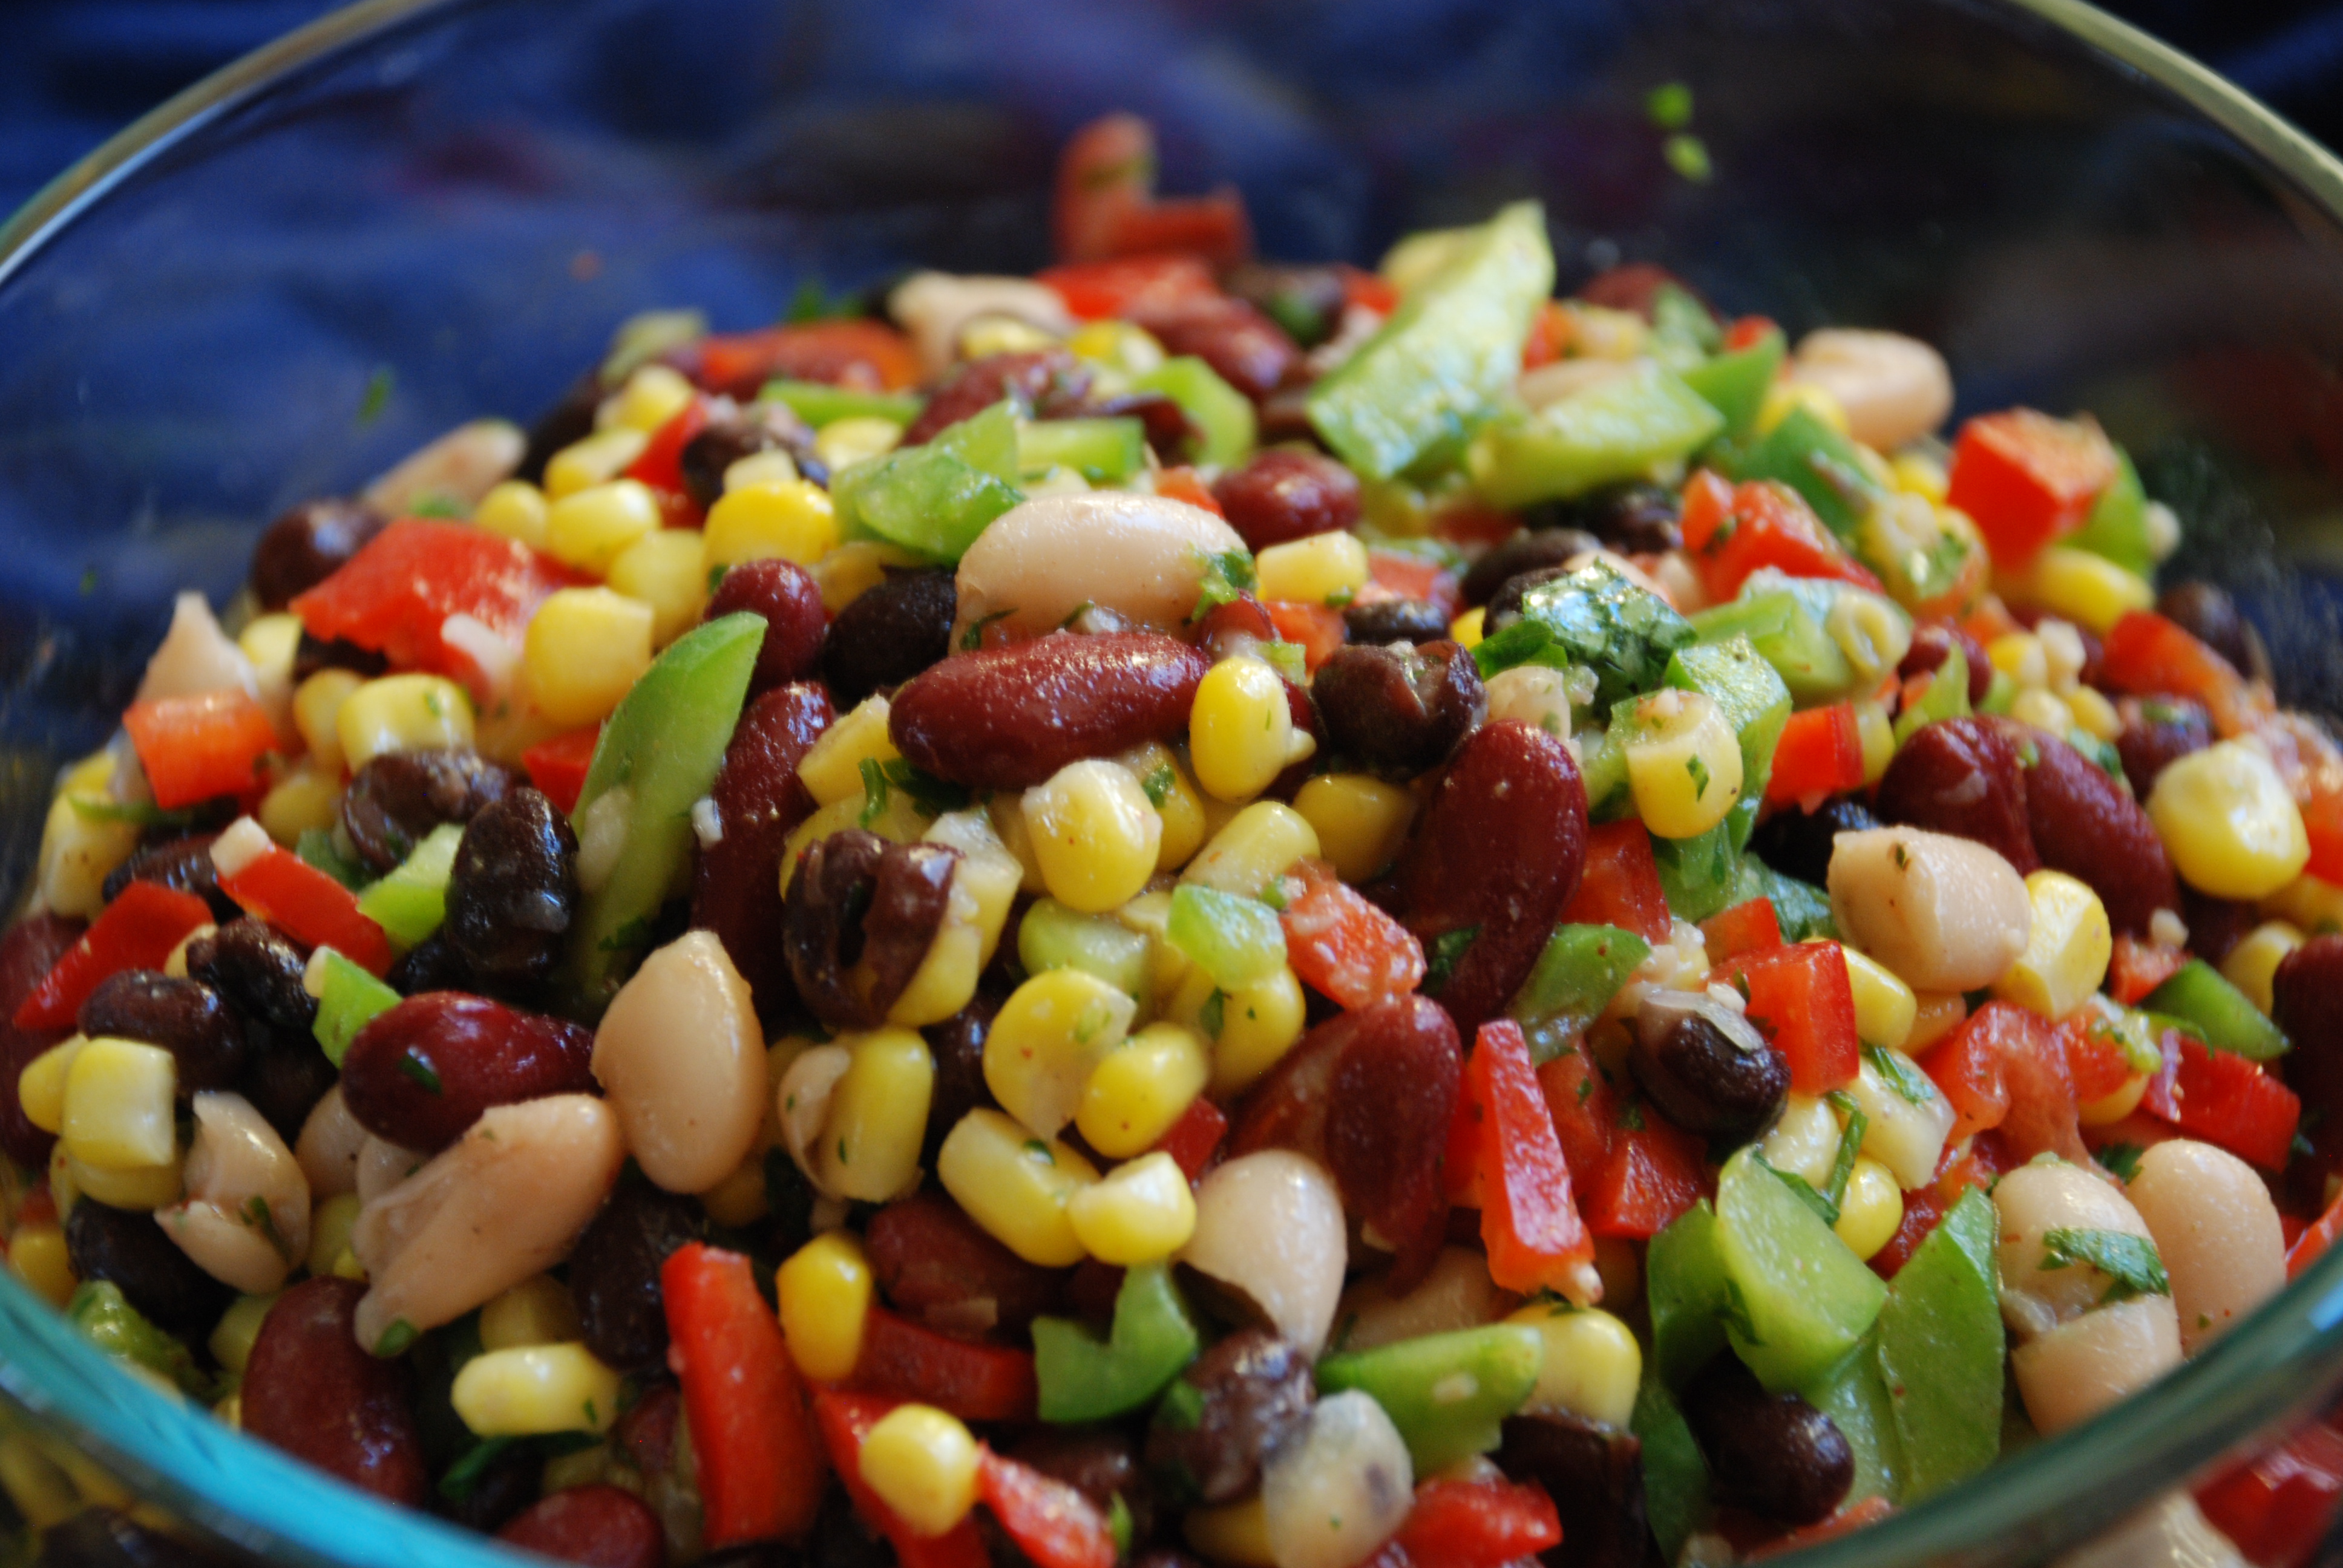
As I’m writing this, I munching on one of my all-time summer favorites, a Mexican Bean salad Ellen conjured up from her little tin recipe box about which I’ve written more than once. This salad is a killer. It’s cool and spicy and flavorful and filling and simple and festive and…for now I’ve run out of adjectives, but suffice it to say make it, and it will become one of your go-to summer dishes. Lots of ingredients, but lots of flavor. It’ll win raves!
Mexican Bean Salad
- Make this as spicy (or not spicy) as you wish. Add more Tabasco sauce, jalapeno peppers, whatever–or not!
Ingredients:
1 15-oz can black beans
1 15-oz can red kidney beans
1 15-oz can cannellini (white) beans
1 green bell pepper, cored, seeded, ribs removed, and diced
1 red bell pepper, cored, seeded, ribs removed, and diced
1 yellow bell pepper, cored, seeded, ribs removed, and diced
1 medium spicy yellow banana pepper, cored, seeded, ribs removed, and diced
2 ears of corn, lightly steamed, cut from the cob
or
1 10-oz package frozen corn, defrosted
1 red onion, diced
2-3 scallions, white and light green parts only, 1/2-inch chop
½ cup extra-virgin olive oil
½ cup red wine vinegar
2 tablespoons freshly squeezed lemon juice
2 tablespoons freshly squeezed lime juice
1 tablespoons white sugar
2 cloves finely minced garlic cloves
¼ cup chopped fresh cilantro
½ tablespoon ground cumin
½ teaspoon freshly ground black pepper
1 dash (or more—wayyyyy more) red pepper (read: Tabasco) sauce
1 teaspoon chili powder
Preparation:
In a large bowl, combine beans, peppers, corn, and red onion.
In a small food chopper, add all remaining ingredients and pulse until they are well mixed. Pour dressing over salad fixin’s and toss well to coat. Chill thoroughly and serve cold.
Serves 8
- Make this as spicy (or not spicy) as you wish. Add more Tabasco sauce, jalapeno peppers, whatever–or not!
Thanksgiving With a Lighter Touch
For anyone watching their weight, Thanksgiving has become a day filled with potential pitfalls and dietary disappointments. The original Pilgrim celebration of gratitude for having enough food to survive the coming winter has evolved into an all-day, all-you-can-eat extravaganza. Many families spend the day parked on their couches, watching parades followed by football, snacking whether they are hungry or not, before sitting down to an enormous meal.
Contrary to popular opinion, it is possible to prepare and serve a light, healthy Thanksgiving dinner without depriving your guests of their traditional favorites or letting them go hungry. By making a few simple changes to your menu, it is easy to make a meal you and your guests will enjoy and remember, without the morning-after regret that too often accompanies this special day
Suggestion One: Cut the fat.
The centerpiece of Thanksgiving dinner is almost certainly the turkey, which is an easy place to cut fat without cutting flavor. Unless you are entertaining a dozen or more people, a turkey breast may be a better choice than a whole turkey. White meat is far leaner than dark meat, and turkey cooked on a grill (breast or whole bird) will release much of its internal fat during the cooking process. Brining a turkey can compensate for any moisture lost through decreasing the fat. This recipe is for a 12-15 pound turkey. If you have a larger turkey, double the brine recipe.

Grilled turkey
Ingredients:
Brine:
1 gallons water
1 ½ cups apple cider
¾ cup kosher salt
1 cups brown sugar
2-3 bay leaves
2 branches fresh rosemary, stripped from the branch
5-10 whole pepper corns
2-3 cloves fresh garlic
Peel of 1 navel orange, coarsely chopped
Preparation:
The day before cooking, bring one-half gallon of water and all other ingredients to a brisk boil; immediately turn off the heat, cover and allow the brine to cool to room temperature. Half way through the cooling process, add the remaining half-gallon of cold water.
When the brine is completely cooled, place the turkey, breast side down, in a brining bag, a food-grade bucket or large soup pot. Pour the brine over the turkey and refrigerate covered for 8-16 hours, turning the turkey over two-thirds of the way through. Leaving the turkey in the brine for more than 16 hours may leave the turkey mushy when finished.
Before cooking, remove the turkey from the brine and pat dry.
Dry Rub:
2 tablespoons kosher salt
1 1/2 teaspoons finely ground white pepper
2 tablespoons granulated garlic
1 tablespoon ground ginger
1 teaspoon Bell’s poultry seasoning
1 teaspoon smoked paprika
Olive oil in a spray can
Preparation:
Start with a dry rub. Wash the turkey and pat dry. Rub the turkey inside and out with this rub or any favorite combination of spices. Spray the turkey with the olive oil, then place it, unstuffed, on the grill with the coals or burners not directly underneath. Include a pan to catch the drippings. Cook the turkey until the legs can be jiggled loosely from the thighs, (180°F on a thermometer inserted into the thigh) or in the case of a breast, until a meat thermometer inserted deep into the meat (but not touching the bone) reads 180° F. Remove the turkey from the grill, cover with foil, and allow to rest 15 minutes before carving.
Suggestion Two: Slow down and enjoy the company.
Many families load the Thanksgiving table with multiple options for entrees and side dishes. Dinner begins with the circulation of bowls and platters around the table, allowing each guest to take their portion before passing it on. By the time everyone is served, the food is cold and everyone is tired of waiting to eat.
By serving Thanksgiving dinner in courses, it is easy to fill up on low-calorie, vegetable-based dishes before confronting the tempting entrees and side dishes. An added benefit will be the wonderful conversations your family and guests will have in between each course.
Start with a soup course (a corn soup is perfect for Thanksgiving), serving it in cups or small bowls. Then serve an autumn salad, made with butternut squash, cranberries, pumpkin seeds and fresh greens, with a tangy-creamy dressing.
Try these recipes, which use traditional ingredients that were used in the 1600s.

Curried Corn Soup
Ingredients:
2 tablespoons olive oil
½ cup finely chopped green bell pepper
½ cup finely chopped red bell pepper
¼ cup minced shallots
2 teaspoons curry powder
½ teaspoon kosher salt
3 cups fresh corn or one 16-ounce bag frozen corn, thawed
1 cup vegetable stock
½ teaspoon freshly ground pepper
3 cups soy milk, 2% milk or evaporated skim milk, divided
½ cup shredded reduced fat cheese, divided (optional)
Preparation:
Heat the oil in a large soup pot over medium-high heat. Add the bell peppers, stirring occasionally, until soft. Add the shallots and stir 2 minutes. Add the curry powder and salt, and stir to combine. Stir in the corn, stock, and pepper; bring to a boil, reduce the heat to medium, cover and cook ½ hour.
Transfer 2 cups of soup to a blender, add 1 cup milk, and process until smooth. Return the blended corn soup to the soup pot, add the remaining milk, and stir gently until the soup is hot.
Serve immediately, garnished with the optional cheese and some chopped chives or parsley.
Adapted from soyfoodcouncil.com

Roasted Squash Salad with Tahini Dressing
Ingredients:
1 medium butternut squash
Olive oil spray in a can
½ teaspoon paprika
4 tablespoons pumpkin seeds
¼ cup dried cranberries
8 ounces feta cheese, crumbled
2 tablespoons fresh parsley, chopped
2 cups spring mix
2 tablespoons plain Greek yogurt
1 ½ tablespoons tahini
2 tablespoons fresh lemon juice
1 small garlic clove, finely minced
½ cup boiling vegetable stock
Preparation:
Preheat the oven to 375°F. Peel the squash, halve, remove the seeds, and cut into 1-inch cubes. Lightly spray a roasting pan with olive oil, spread the squash on the pan, sprinkle with paprika, salt, and pepper, and spray with oil. Roast 35 minutes, stirring halfway through, until the squash is tender. Put the pumpkin seeds on baking sheet and bake for the last five minutes of the cooking time.
While the squash is roasting, make the dressing: whisk together the yogurt, tahini, lemon juice, and garlic. Slowly stir in 1-2 tablespoons stock, until the dressing reaches the consistency of buttermilk.
Plate the salad greens, top with the squash, pumpkin seeds, cranberries, feta cheese, and parsley, and sprinkle the dressing on top. Season with salt and pepper and serve immediately.
Adapted from redonline.co.uk
Suggestion Three: Limit options and focus on vegetables.
In order to make your dinner lighter and healthier, consider limiting the number of options you present your guests, featuring one or two interesting new recipes in which vegetables play the starring role rather than laying out the full cast of customary starchy favorites. No one needs stuffing, mashed potatoes and sweet potato casserole, after all. New flavors may encourage new behaviors, as serving old favorites can entice your guests to heap too-large portions on their plates simply because they are accustomed to doing so.
Here is a vegetable dish that is out of the ordinary, yet made with many of the familiar ingredients of traditional Thanksgiving dinners. It is easy to make, beautiful to serve, nutritious, and much more interesting than the customary green-bean casserole with cream of mushroom soup and canned onion rings. And so much better tasting!

Polenta Dome with Roasted Autumn Vegetables
Ingredients:
4 cups vegetable stock
1 ½ teaspoons salt
2 teaspoons olive oil
Olive oil spray in a can
2 cups diced onions
3 garlic cloves, minced or pressed
2 cups cornmeal
1 medium butternut squash, peeled, seeded, and shredded
1 tablespoon fresh sage, chopped (1 teaspoon dried)
2 teaspoon ground fennel seeds
½ teaspoon freshly ground black pepper
Preparation:
In a covered pot, bring the stock and 1 teaspoon salt to a boil. Spray a medium-sized mixing bowl.
While the stock heats, heat olive oil in a heavy skillet on medium heat. Cook the onions, garlic, and remaining salt for about 25 minutes, until the onions are caramelized. Stir the squash, sage, fennel, and pepper into the sautéed onions and cook for 3-4 minutes. Remove from heat and cover.
When the stock boils, gradually pour in the cornmeal, stirring vigorously. Reduce the heat until the thickening cornmeal simmers gently. Cook, stirring frequently, until the polenta is thick (but still pourable), adding hot water as necessary, and tastes done. Fine cornmeal cooks in a few minutes; courser meal takes longer. The consistency is key.
When the polenta is done, stir in the sautéed vegetables and cheese. Pour into the oiled bowl and set aside to cool for at least 30 minutes, until set.
About a half hour before serving, turn the cooled polenta dome onto a baking pan or ovenproof platter sprayed with olive oil and bake for 30 minutes, until hot. Serve on a bed of steamed spinach or Swiss chard and surround with toasted autumn vegetables.
Roasted Autumn Vegetables
Ingredients:
Marinade:
1/3 cup olive oil
2 tablespoons Balsamic vinegar
5 cloves garlic, minced
½ teaspoon kosher salt
¼ teaspoon freshly ground black pepper
1-2 teaspoons fresh rosemary or sage, chopped
Vegetables:
2 medium onions, peeled, cut into 8 pieces
1 cup baby carrots
2 sweet potatoes or ½ seeded butternut squash, cut into 1-inch pieces
1 red and 1 yellow bell pepper, cut to 2-inch squares
2 cup tiny patty pan squash or 2 medium zucchini, 1-inch slices, halved
8 ounces fresh whole cremini, baby portabella or white mushrooms, halved
6 firm, fresh plum tomatoes, halved
Preparation:
Preheat the oven to 425°F.
In a bowl mix together the marinade. Toss the hard vegetables (onions, carrots and potatoes) in the marinade, and spread on a baking sheet. Roast for 20 minutes, turning once. Toss the remaining vegetables in the marinade. Lower the heat to 400°F, place on a second baking sheet and roast another 20 minutes, turning once, and turning the hard vegetables again. Serve on a large platter around the polenta dome. Watch carefully that the vegetables don’t burn.
Adapted from Moosewood Restaurant Celebrates
Suggestion Four: Change Your Thinking about Stuffing and Gravy
Probably the most troublesome parts of the Thanksgiving meal for people endeavoring to eat light and healthy are the stuffing and the gravy. The notion that stuffing and gravy are integral to the meal is deeply ingrained in our consciousness. A simple way to cut some of the fat from stuffing is to bake it outside of the turkey. Likewise, traditional gravy can be made without calorie-laden pan drippings. Even better, try a new approach to stuffing and gravy altogether, replacing bread cubes with high-fiber whole grains such as quinoa or barley and combining interesting new flavors into an almost fat-free gravy.

Wild Mushroom Barley Stuffing
Ingredients:
2 tablespoons kosher salt, divided
1 ½ cups uncooked pearled barley
2 teaspoons olive oil, divided
1 medium onion, chopped
5 slices turkey bacon
2 small carrots, diced
1 pound fresh wild mushrooms, assorted varieties
2 cloves garlic, minced
2 tablespoons fresh thyme, minced
2 tablespoons fresh sage, chopped
¼ teaspoon freshly ground pepper
2 cups vegetable broth, heated to a simmer
1 tablespoons fresh parsley, chopped
Preparation:
Bring eight cups of water and 1 ½ teaspoons salt to a boil in a large saucepan; add barley. Cover, reduce the heat, and simmer until tender, about 30 minutes; drain.
Meanwhile, heat 1 teaspoon oil in a large pot over medium-high heat; add onion, bacon, and carrots. Cook, stirring often, until onion is lightly browned and almost tender, about five minutes. Add mushrooms and garlic; cook, stirring often, until the vegetables are tender, about five minutes more.
Stir in herbs, pepper, remaining salt and olive oil. Reduce heat to low, stir in broth and barley, toss to coat. Remove from heat, transfer to a serving bowl, and sprinkle with parsley.
From weightwatchers.com

Caramelized Onion Gravy
Ingredients:
2 teaspoons olive oil
6 cups thinly sliced sweet or Spanish onions
1 tablespoon sweet paprika
½ teaspoon salt
¼ teaspoon dried thyme or ¾ teaspoon fresh thyme, chopped
½ teaspoon fresh rosemary, minced
½ teaspoon dried marjoram
¼ teaspoon nutmeg
3 tablespoons dark soy sauce
2 cups vegetable broth
¼ cup dry sherry wine
2 tablespoons cornstarch
¼ teaspoon freshly ground pepper
Preparation:
Warm the oil in a large saucepan on medium-high heat. Add the onions and sauté for 2-3 minutes, until the onions are coated with oil. Add the paprika, salt, herbs, and nutmeg. Reduce the heat to medium and continue to cook, uncovered, stirring occasionally, for about 30 minutes, until the onions are limp and very brown. You should have about a generous cup of caramelized and very sweet onions.
Add the soy sauce, 1 ¾ cups broth, and the wine to the onions; bring to a simmer. Dissolve the cornstarch in the remaining broth and mix into the gravy in a slow but steady stream. Stir constantly until the gravy is thickened.
From Moosewood Restaurant Celebrates
Suggestion Five: Serve smaller plates and individual portions
A cherished part of Thanksgiving for many is filling one’s plate with heaps of good food. Slow everyone down a bit by serving your meal on smaller salad plates rather than dinner plates. Your guests will retain the pleasure of combining delicious foods together without committing themselves to more than they can – or should—eat in one sitting. If, by some chance, they are still hungry after cleaning their plate, they are welcome to come back for more.
 The same strategy works well with dessert. Instead of baking a pumpkin pie, bake the pumpkin custard (substituting egg whites and evaporated skim milk to lower the fat) in ramekins. Serve each guest their own portion with a ginger snap in a ramekin, saving them the fat and calories of the crust and the temptation to eat more dessert than they should.
The secret to losing weight or maintaining a healthy weight is to make a series of small changes and then be consistent in retaining those changes; but in the end, food and the experience of sharing a meal with loved ones should still be pleasurable. This Thanksgiving, try one or two of these tips to save yourself unnecessary fat and calories without losing any of the enjoyment of spending this special day with the people you love. Who knows? Maybe you will be creating new, healthier traditions for years to come.
Are You Growing Your Own Herbs?
Are you growing your own herbs?
In my opinion, the foundation of any good kitchen is the tools and supplies you have on hand that find their way into all the cooking that you do. This includes knives, pots and pans, basic condiments–salt, pepper, garlic, ginger, ketchup, mustard, mayonnaise–and the basic ingredients you use on a regular basis.
This includes, of course, herbs and spices.
Spices I will leave for another discussion, but what I’m about here is herbs. The ones you use all the time, and maybe don’t even think about until either a recipe calls for a teaspoon of dried cilantro or dill or oregano, you reach for the little bottle in the cupboard by the stove and there’s not enough for the recipe. Do you know where your thyme came from? Your oregano? Your sage? Did they ride in a truck for hours? How many gallons of diesel fuel did they use? Were there pesticides on them? Were they washed? What do you really know?
I say, grow your own. Many of you probably do, and if so, you know that there’s not much better than whipping up a quick mushroom and cheese omelette and snipping a few chives to complete the dish. Homemade marinara with fresh parsley and basil? A snap, and so much better than store-bought.
Growing your own herbs is: a) simple; b) cheap; c) delicious; d) interesting–there are so many varieties of herbs to try, just sticking to the basics; we’ve grown three or four different basils and at least three different thymes; and e) rewarding–both in the sense of pride you feel from adding homegrown ingredients to your food, and for the compliments you’re likely to get from company who don’t know why that red sauce tastes better, but it does.
People who do their own herbs do it in all kinds of ways–herb-garden window boxes, and setting up a section of their vegetable garden are common. We grow ours in pots outside our kitchen door. A little water every day or two in the summer–not too much, herbs like to be a bit on the dry side– and a little advance planning, and you won’t be buying expensive little bottles of herbs at the grocery store any more. Where do those herbs come from anyway?
Grow any herbs you like, most will flourish here and where you live if you provide just a little bit of care. The real trick to successful herb gardens is to harvest often. Don’t let the herb plants get too big. Like any other plant, the more you prune the bigger the plant will get, so prune them often. Cut herb plants back frequently–usually when they outgrow the perimeter of the pot or when they look just a little out of control in the garden. Cut a large bunch, tie them up with string and hang them in a warm, dry, dark place–I do it in my garage–and forget about them for about three or four weeks. When they are dry to the touch and crumble easily, place the dried bunch in a large steel mixing bowl and crumble them to bits. Pick out and discard the stems and pour the dried leaves into nice little herb bottles you got at the dollar store or saved from when you ran out of thyme (get it?).
We grow thyme, oregano, basil, parsley, sage, cilantro, chives, and mint (actually, our mint is out of control in the backyard, but it grows really well in pots). We harvest them for dried herbs to use in the winter, but here’s an added bonus: if you grow them in small pots, bring them into the house in the fall and keep them as house plants and keep harvesting. What I’ve discovered, however, is that in spite of recommendations to the contrary, most herbs overwinter very nicely in a garage. Simply put the pots on a shelf in a cold (but not freezing) garage, near a window if you have one, give them a little water about once every two weeks, and in the spring after the freeze is gone, most of them will come back, usually even stronger. I haven’t done this with basil–we use enough basil all year long that I try to keep a pot of basil growing in the kitchen– so I’m not sure how that overwinters. Or, you can just let the basil go in September, harvest a bunch just before the first freeze, and make a load of pesto, for home use or for holiday gifts.
Fresh and local. What could be better?
