Category Archives: Baking
Avocado and Prawn Cocktail and Roasted Baby Potatoes with Romesco Sauce
From our “Around the World in Eight Courses” dinner comes the first two recipes from our tapas platter:
Avocado and Prawn Cocktail
Ingredients:
1 large avocados
5 oz. chopped prawns
1 tablespoon extra-virgin olive oil
1 scallion
1 clove garlic
Kosher salt
1.5 oz heavy cream
1.5 teaspoon extra-virgin olive oil
Preparation:
Peel the prawns and remove the heads. Season the bodies and fry in the oil. (The heads can be used to make the stock).
Peel the avocados, remove the pits and crush the flesh with the chopped spring onion, the peeled and finely chopped garlic, the olive oil and the cream to form a velvety smooth purée. Season to taste.
Drop a dollop of the avocado mix onto the platter and top with one shrimp (or the other way around.
Roasted Baby Potatoes with Romesco Sauce
Ingredients:
- 3 ounces whole blanched almonds
- 2 roasted red peppers
- 1 small garlic clove
- 1 teaspoon coarse salt
- 1/8 teaspoon smoked hot paprika
- 1 teaspoon sherry vinegar or red-wine vinegar
- 1 1/2 tablespoons extra-virgin olive oil
- 1 pound small red and yellow potatoes
Preparation:
- Preheat oven to 350 degrees. Spread almonds in a single layer on a rimmed baking sheet; toast in oven until lightly golden and fragrant, 7 to 8 minutes. Remove from oven, and let cool 15 minutes.
- Raise oven to 375 degrees. In a food processor, combine almonds, garlic, roasted red peppers, 3/4 teaspoon salt, paprika, mint, and vinegar. Process to a coarse paste, about 1 minute. With machine running, add 1 tablespoon oil in a slow, steady stream until sauce is smooth. Transfer sauce to a small bowl, and set aside.
- Place potatoes on a rimmed baking sheet, and toss with remaining 1/2 tablespoon oil and 1/4 teaspoon salt. Roast in oven until skins are slightly crisp and potatoes are tender, shaking pan once to turn potatoes, 20 to 30 minutes. Serve hot with sauce on the side.
Bacon-Maple Slow-Cooker Baked Beans
Got a hankering for baked beans.
Sure, it’s cute watching Jay Bush and his golden retriever Duke, who seems to be on a mission to sell the secret recipe, like any capitalist dog would be. Makes you want some beans. Or a golden retriever. Makes me want neither. Bush’s Beans are probably a perfectly fine product, but I’ve always been a B&M kind of guy, and I’m not particularly fond of dogs, although I’ve grown to love my wild and crazy German shorthaired pointers, Argos and Maggie (Argos, I should point out, has no interest in selling any of my recipes; he has a one-track agenda, which is to eat everything I cook. Maggie, on the other hand, would sell my recipes in a heartbeat if she thought she could turn a profit; she’s probably the most dedicated capitalist in the family).
But I digress (I hate when I do that).
I was reading someplace recently that some kid’s favorite food was baked-bean sandwiches–homemade baked beans on fresh homemade bread–and I got to thinking about that. Could that be nature’s perfect food? The writer was recounting how such sandwiches ignited his love of all things food and how they inspired him to become a chef. It started, he says, because he couldn’t find a pile of baked beans anywhere near as good as the scratch batches his grandmother made for him. I can relate. I was raised on the cooking of a wonderful woman who came from the Piedmont of Virginia, where home-grown pork and chickens and corn and cabbages and greens were on the table every day. She made her baked beans (and everything else) from scratch, and the tale of baked-bean sandwiches massaged a longing in me I hadn’t felt in quite a while.
Consequently, I got a hankering for baked beans.
Lily Jones was not available to make me beans, and I’ve never really worked up a recipe of my own. So I decided to do some research, find a recipe to start with, and then make it my own. Something hearty, flavorful, bold, and memorable.
I must have read 500 recipes. What I kept coming back to was a fabulous website chock full of recipes that use beer as the principal ingredient. Beer! That’s the ticket! But not just any beer. It needed to be thick, dark, malty, nutty–hair-raising. I found a recipe that resonated, and then kept reading, comparing each next one I found to the one that sang to me, and not one measured up.
And then, I made the beans. Incredible. Salved my hankering, my wife, the remarkable Ellen, followed up with a honey-Hefeweisen boule made with a locally brewed winter wheat beer, and voila! Baked-bean sandwiches for the Gods.
Next, I had to make the recipe my own. The recipe on the website is perfect as is. But it’s not mine, alas, and I thought I could improve it. Guess what: I couldn’t. It’s perfect as is. The only thing I did change was to use turkey bacon (we don’t eat much pork around here) cooked in two teaspoons of extra-virgin olive oil; and instead of a smoky porter I used Sierra Nevada Coffee Stout.
Try this if you want perfect beans. And if you want a perfect bean sandwich, make the bread, too. It’s almost as simple to make as the beans–no kneading, just rest and love.
Slow Cooker Maple Bacon Beer Baked Beans
Ingredients:
- ½ pound Great Northern beans
- ½ lbs Navy beans
- 4 strips thick cut bacon (I used turkey bacon)
- 1 large sweet onion, chopped
- 3 tablespoons full-flavor molasses
- ¼ cup real maple syrup
- 2 cups smoked porter beer (I used Sierra Nevada Coffee Stout)
- 2 cups water
- 1 teaspoon smoked paprika
- 1 tablespoon liquid smoke
- 1 teaspoon granulated garlic
- 3 tablespoon balsamic vinegar
- 2 teaspoon Worcestershire sauce
- 1 teaspoon kosher salt
- 1 teaspoon fine ground white pepper
- 1/2 teaspoon freshly ground black pepper
- 1 teaspoon dry mustard
Preparation:
- Place the beans in a large pot with 3 cups of water. Cover and bring the pot to a boil, and cook for 3 minutes. Remove from the heat and soak for 8-12 hours; overnight is good. Rinse with cold water and drain.
- Cook the bacon in a skillet over medium high heat, remove bacon from pan. Add the onions to the bacon grease, cook until soft, about 5 minutes. Chop the bacon.
- Add the bacon, onions, drained beans and remaining ingredients to a slow cooker. Cook for 8 hours on low, stirring once or twice during cooking. If beans are still firm after 8-10 hours, turn to high and cook for an additional 2 hours.
And now the bread:
Honey Hefeweizen Boule Loaf
Ingredients:
- 4 ¼ (19 wt oz) cups all-purpose flour
- 1 package (2 ¼ tsp) rapid rise yeast
- ¼ cup honey
- pinch salt
- 12 ounces wheat beer*
- egg wash (1 egg, 1 teaspoon water, beaten)
Preparation:
- In the bowl of a stand mixer fitted with a dough hook add the flour and yeast, mix to combine.
- Heat the beer to between 120 and 130F degrees.
- Add the beer and the honey to the flour, beat on high until dough gathers around the hook and is no longer sticky, about 6 minutes.
- Transfer the dough to a lightly oiled bowl, cover and allow to rise in a warm place until doubled in size, about 1 hour.
- Place a baking stone in the oven, preheat for 30 minutes prior to baking.
- Once the dough has risen, place a bread peel (or a sheet of parchment paper) on a flat surface, cover in cornmeal or semolina flour. Grab the dough in your heads, folding it into itself gently a few times, then form into a tight ball. Place on the peel (or parchment paper), allowing to rise for about 30 minutes.
- Brush the top with egg wash, slash an “X” on top of the loaf using a sharp knife.
- Transfer the dough to the pizza stone using either the peel or by simply placing the parchment paper on top of the heated stone (if you don’t own a bread stone, just place the parchment on top of a baking sheet and set that into the oven when you are ready to bake).
- Bake at 400 until top is a dark golden brown and makes a hollow “thump” sound when tapped, about 30 minutes.
- Allow to cool slightly before slicing.
Notes
*This recipe is for a very low IBU (low hop) beer. If all you have is a pale ale, IPA or hoppy wheat, use 3/4 cup beer and 3/4 cup hot water or the beer taste will be overpowering.
And to Jackie Dodd, “The Beeroness,” I offer a toast: Jackie (wwwthebeeroness.com), you’ve won my heart. Or more accurately, my appetite.
Fresh Fig and Almond Breakfast Cake
So what do you do with fresh figs? The Lancaster Central Market was literally bursting with fresh fruit, and the figs at Meck’s produce stand were big and beautiful, and hard to resist. A while back I made a wonderful chicken dish topped with a beautiful braised fig sauce, and it was as good as it sounds, but this time, E. was craving something sweet. So to the Internet we cruised and read through numerous cake, pudding, and tart recipes until we stumbled upon one that tickled both our fancies. And considering that it was a rainy Saturday afternoon with nothing (incredibly!) on the schedule, E. went into a frenzy of baking, making desserts, desserts, desserts! Out to the garden for a large bunch of rhubarb (her rhubarb crisp is the stuff of legend!), and away she went. The result, among other things, was this excellent breakfast coffee cake, which dazzled and didn’t make it past nine on Sunday morning. She made it in a spring form pan, but the original recipe was shown in a cast-iron skillet. I think the next time we make it I will try it that way. It took longer than recommended to firm up in the springform pan, so I think the skillet is probably the way to go. Try this one yourself–do it both ways and see which way you like it better–and report back. Can’t think of a better way to kill a fig.
Fresh Fig and Almond Breakfast Cake
Ingredients:
2 cups all-purpose flour
2 tsps baking powder
tsp baking soda
tsp salt
tsp ground cardamom
cup granulated sugar
2 large eggs
1 cups buttermilk
cup unsalted butter (melted and slightly cooled)
1 tsp pure vanilla extract
tsp almond extract (pure)
10 figs (fresh, depending on the size, sliced in half)
cup sliced almonds
3 tbsps turbinado (or granulated sugar for topping)
Preparation:
Place a rack in the center of the oven and heat oven to 375 degrees F. Butter and flour a 10-inch cast iron skillet. You can also use a 10-inch cake pan.
In a medium bowl, whisk together flour, baking powder, baking soda, salt, cardamom, and sugar. Set aside.
In a small bowl, whisk together buttermilk, eggs, and butter. Whisk in the vanilla and almond extract.
Add the buttermilk mixture all at once to the dry ingredients. Stir until just combined and no lumps remain. Spoon batter into the prepared pan. Top batter with fresh figs, gently pressing the figs part-way into the batter. Sprinkle with sliced almonds and then sprinkle generously with sugar.
Bake for 20-25 minutes, or until a skewer inserted in the center of the cake comes out clean. Allow cake to cool to room temperature before slicing to serve.
Cake will last, well wrapped in the refrigerator, for up to 3 days
From Joy Wilson, JoytheBaker.com
Mexican Chocolate Slice-and-Bake Cookies Recipe
Ellen found this recipe online. We made the cookies to pack in kids’ lunches. The recipe is extraordinary, and simple, too. Follow the instructions to the letter; they’re perfect. And so are the cookies!
What sets Mexican chocolate apart is the addition of cinnamon and sometimes other spices. It can be difficult to find, though, so we made our own custom blend of cocoa powder, cinnamon, and a touch of cayenne to add to this cookie dough. Form the dough into logs, refrigerate, and then slice-and-bake whenever you’re in the mood for a cookie with a deep, chocolaty flavor and a little kick of spiciness at the end.
Game plan: The dough logs can be frozen for up to a month—just wrap the plastic-covered logs tightly in aluminum foil before freezing. Thaw in the refrigerator overnight before slicing and baking.

- 1 1/2 cups all-purpose flour
- 1/2 cup Dutch-process cocoa powder
- 1 teaspoon baking powder
- 1/2 teaspoon ground cinnamon
- 1/4 teaspoon cayenne pepper
- 1/4 teaspoon fine salt
- 8 tablespoons unsalted butter (1 stick), at room temperature
- 1/2 cup packed light brown sugar
- 1/2 cup granulated sugar
- 1 large egg, at room temperature
- 1/2 teaspoon vanilla extract
- Whisk together the flour, cocoa powder, baking powder, cinnamon, cayenne, and salt in a medium bowl to break up any lumps; set aside.
- Place the butter and sugars in the bowl of a stand mixer fitted with a paddle attachment and beat on medium speed until lightened in color and fluffy, about 3 minutes. Stop the mixer and scrape down the sides of the bowl and the paddle with a rubber spatula.
- Return the mixer to medium speed, add the egg and vanilla, and beat until just incorporated. Stop the mixer and scrape down the sides of the bowl and the paddle with the rubber spatula.
- Turn the mixer to low speed and slowly add the reserved flour mixture. Mix until just incorporated.
- Turn the dough out onto a clean work surface and divide it in half. Roll each portion into a log about 1 1/2 inches in diameter. Wrap each log tightly in plastic wrap and refrigerate until firm, at least 2 hours and up to 3 days.
- When ready to bake the cookies, heat the oven to 350°F and arrange the racks to divide the oven into thirds.
- Remove the dough logs from the refrigerator, remove the plastic wrap, and slice the dough into 1/4-inch-thick rounds. Place the rounds about 1/2 inch apart on 2 baking sheets (about 20 cookies per sheet).
- Bake both sheets for 6 minutes. Rotate the baking sheets front to back and top to bottom and bake until the edges of the cookies are firm but the tops are still soft, about 6 to 7 minutes more.
- Place the baking sheets on wire racks and let cool for 5 minutes. Using a flat spatula, transfer the cookies to the wire racks to cool completely. Store in an airtight container at room temperature for up to 3 days.
SOURCE: http://www.chow.com/recipes/30524-mexican-chocolate-slice-and-bake-cookies
Caitlin’s Chocolate Beet Cake from the Blue Rock Farm
In my last post I waxed poetic about the Blue Rock Farm in Willow Street. Now, Caitlin Brady sends me this recipe for a sweet and tasty chocolate cake made with chocolate and beets. It’s incredibly rich, and you may never go back to “normal” chocolate cake again.
Caitlin’s Chocolate Beet Cake with Beet Cream Cheese Frosting
Makes one 8 or 9-inch 2 layer cake
Ingredients:
For the Cake:
2 medium beets, unpeeled and trimmed of their greens
1 teaspoon vegetable oil
6 ounces (3/4 cup) unsalted butter, softened, plus more for the pans
1 cup packed brown sugar
3/4 cup granulated sugar
2 large eggs
1 teaspoon pure vanilla extract
2 cups all-purpose flour, plus more for dusting the pans
2/3 cup unsweetened cocoa powder
1 teaspoon baking soda
1/2 teaspoon baking powder
1 teaspoon salt
1 1/4 cups buttermilk
For the Frosting:
1 cup (2 sticks) unsalted butter, softened
8 ounces (1 brick) cream cheese, softened
4 to 5 cups powdered sugar, sifted
2 tablespoons finely grated beets, mashed with a fork
1 teaspoon pure vanilla extract
1-2 teaspoons milk, depending on desired consistency
1/2 teaspoon fresh lemon juice
pinch of salt
Preparation:
Place a rack in the center of the oven. Preheat oven to 350 degrees F. Wash beets under running water, and trim their leaves. Place clean beets in a piece of foil and drizzle with just a bit of vegetable oil. Seal foil and place on a baking sheet in the oven. Roast until beets are tender when pierced with a knife, about 1 hour. Remove the beets from the oven and allow to cool completely.
Using a box grater, grate the peeled beets on the finest grating plane. Measure 3/4 cup of grated beets for the cake and 2 tablespoons for the frosting. Set aside. Use butter to grease two 8 or 9-inch round baking pans. Add a dusting of flour to coat the pan. Set pans aside while you prepare the cake.
In the bowl of an electric stand mixer, cream together butter and sugars. Beat on medium speed until pale and fluffy, about 3 to 5 minutes. Beat in eggs, one at a time, for one minute after each addition. Stop the mixer and scrape down the sides of the bowl as necessary. Once eggs are incorporated, beat in beets and vanilla extract until thoroughly combined. In a medium bowl, whisk together flour, cocoa powder, baking soda, baking powder, and salt.
Add half of the dry ingredients to the butter and egg mixture. Beating on low speed , slowly add the buttermilk. Once just incorporated, add the other half of the dry ingredients. Beat on medium speed until milk and dry ingredients are just incorporated. Try not to overmix the batter. Bowl can be removed from the mixer. and mixture folded with a spatula to finish incorporating ingredients. Cake batter will be on the thick side… not pourable.
Divide the batter between the two prepared cake pans. Bake for 23 to 25 minutes (for a 9-inch pan) or 30-32 minutes (for an 8-inch pan). Cake is done when a skewer inserted in the center comes out clean. Remove cakes from the oven and allow to rest for 10 minutes. Invert cakes onto a cooling rack to cool completely before frosting and assembling the cake.
To make the frosting:
In the bowl of an electric stand mixer, beat cream cheese for 30 seconds, until smooth. Add the butter and beat for another 30 seconds, until well combined. Beat in the beets. Add the powdered sugar, vanilla extract, milk, lemon juice, and salt. Beat on medium speed until smooth. Refrigerate the frosting for 30 minutes before frosting the cooled cakes.
To assemble the cake, place one layer of cake on a cake stand or cake plate. Top with a generous amount of pink frosting. Spread evenly. Place the other cake on top of the frosting. Top with frosting. Work frosting onto the sides of the cake. Refrigerate for an hour before serving.
Authentic San Francisco-style Sourdough Bread
I had a request that I just couldn’t refuse. I lived in San Francisco–actually, Mill Valley in Marin County–across the Golden Gate Bridge to work every day…WOW!–and more than virtually anything else, I fell in love with sourdough bread. On Sundays we would ride our bikes from Mill Valley through Marin City to Sausalito, then ride the ferry to Fisherman’s Wharf and eat crab legs and sourdough bread. I think that was one of the seminal 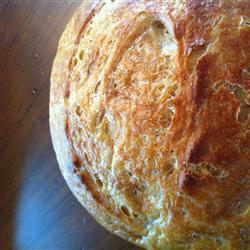 times in my life in terms of cementing my love for food. The really cool thing about that experience was that walking up and down the docks, one could sample the bread from different bakers the way we walk up and down the aisles at Roots and take little tastes here and there from vendors who truly love what they do and the product they represent, which really represents them. We all have favorite vendors at Roots and Central Market and Eastern Market and Millersville Farm Market, and all the others (not forgetting you, Alison Bryan!). The one thing they all have in common is that they try to stay true to their product, because their success and their reputation depends on quality product courteously presented. I’ve found that the vendors at these markets are fine representatives of our wonderful Lancaster way of life. And I appreciate it all the more because of my time in San Francisco, where the bread is the memory I carry with me every time I think about that time in my life.
Here, then is my favorite take on San Francisco sourdough bread. The thing that makes it what it is is that first, you make a starter. This starter is a piece of sour dough that gets added to the bread dough during the process, and then a piece of the new bread dough is separated and stored, to be used in the next loaf. In San Francisco, starters are generations old, always added to the new bread, then kept again for next time, thus keeping the original starter alive. Over time, it gets better and better, and divorces have been known to have the cup of starter be the single bone of custodial contention.
Make a starter. Make a bread. Keep your starter. Make some more bread. Share the secret. Share the love. And don’t forget the butter!
Sourdough Starter
Ingredients:
2 cups all-purpose flour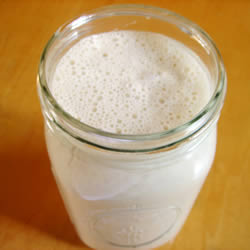
2 cups warm water
1 (.25-oz) package active dry yeast
Preparation:
- In large non-metallic bowl, mix together dry yeast, 2 cups warm water, and 2 cups all purpose flour and cover loosely.
- Leave in a warm place to ferment, 4 to 8 days. Depending on temperature and humidity of kitchen, times may vary. Place on cookie sheet in case of overflow. Check on occasionally.
- When mixture is bubbly and has a pleasant sour smell, it is ready to use. If mixture has a pink, orange, or any other strange color tinge to it, THROW IT OUT! and start over. Keep it in the refrigerator, covered until ready to bake.
- When you use starter to bake, always replace with equal amounts of a flour and water mixture with a pinch of sugar. So, if you remove 1 cup starter, replace with 1 cup water and 1 cup flour. Mix well and leave out on the counter until bubbly again, then refrigerate. If a clear to light brown liquid has accumulated on top, don’t worry, this is an alcohol base liquid that occurs with fermentation. Just stir this back into the starter, the alcohol bakes off and that wonderful sourdough flavor remains! Sourdough starters improve with age, they used to be passed down generation to generation!
Authentic Sourdough Bread
Ingredients: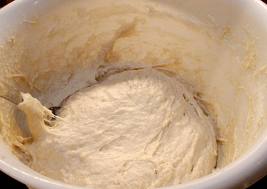
4 3/4 cups all-purpose flour
3 tablespoons white sugar
2 1/2 teaspoons kosher salt
1 (.25-oz) package active dry yeast
1 cup warm milk
2 tablespoons butter, softened
1 1/2 cups sourdough starter
1 large egg
1 tablespoon water
1/4 cup finely chopped onion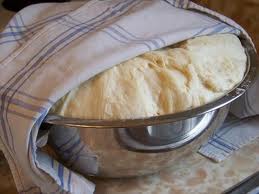
Preparation:
- In a large bowl, combine 1 cup flour, sugar, salt, and dry yeast. Add milk and softened butter or margarine. Stir in starter. Mix in up to 3 3/4 cups flour gradually, you may need more depending on your climate.
- Turn dough out onto a floured surface, and knead for 8 to 10 minutes. Place in a greased bowl, turn once to oil surface, and cover. Allow to rise for 1 hour, or until doubled in volume.
- Punch down, and let rest 15 minutes. Shape into loaves. Place on a greased baking pan. Allow to rise for 1 hour, or until doubled.
- Brush egg wash over tops of loaves, and sprinkle with chopped onion.
- Bake at 375 degrees F (190 degrees C) for 30 minutes, or till done.
Then refresh your starter by following direction number 4 above, using 1.5 cups water and all-purpose flour and a pinch of sugar.
