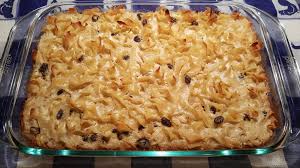
Epicure Market’s Famous Noodle Pudding
It’s a holiday classic!
The legend is that this was my grandmother’s signature recipe–the elusive Jennie Small-Thal-Robinson, mother of five and inspiration for everything that is/was the Epicure Market in Miami Beach, from the late 1940’s until its sad closing following the disastrous hurricane Irma, which ripped through South Beach in 2017. By that time the Epicure had passed into the hands of the LA deli kings Isaac Starkman and Jerry Seidman, the renowned Jerry’s Famous Deli, which had locations all over the LA metro.
The Epicure is gone, and now, and so, I believe are most, if not all, of the Jerry’s locations. But the Epicure had a long and loyal following, famous as one of the originators of cooked foods in grocery stores, which have become a staple of most stores now. I worked as a chef in one of the Miami Beach stores back in the 1970’s, and still use many of their most popular recipes, some of which have been published here, and are available through messaging–assuming I can remember any of them beyond the few I still regularly use.
This recipe for sweet noodle pudding was one of our most popular, and we made batches of 60 1-pound aluminum pans three days a week, and they never lasted in the display cases more than a day or two, so it was always fresh, as if you’d made it at home.
And now you can make it at home, exactly the same recipe we used back in the day, scaled down to family size. Because no one wants to make 60 pounds of noodle pudding at one time–except maybe some adventurous places that still cater to the deli crowd. But if you love a good sweet noodle kugel, this is the one to make. Here’s the plan…
Epicure’s Famous Noodle Pudding
Ingredients:
- 12-ounce bag wide egg noodles (I use No-Yolk)
- 1 tsp kosher salt
- 6 TBSP unsalted butter
- 4-ounces cream cheese, room temp
- 3/4 cup sugar
- 3 eggs
- 1 cup sour cream
- 1 lb. small-curd cottage cheese or ricotta
- 1 tsp pure vanilla extract
- ½ cup raisins, soaked in 1 cup hot water for ½ hour, then drained well
- 1 TBSP ground cinnamon
Preparation:
- Boil noodles in salted water for 7 minutes (no more!). Drain, return to pot and toss with 3 TBSP butter. Butter will melt.
- Preheat oven to 350℉.
- In a large bowl, combine cream cheese and 3 TBSP melted butter. Beat until smooth.
- Add eggs, sour cream, cottage cheese, vanilla, and raisins. Stir well until all the ingredients are well mixed. Add noodles and mix well.
- Generously butter a 9×13 glass baking dish (or 9×9 for a thicker kugel).
- Pour noodle mixture into the baking dish and jiggle the dish to smooth the top.
- Sprinkle cinnamon over the top.
- Bake in preheated oven for 50 to 60 minutes, until the kugel looks firm and the outer edges beginning to turn golden. Do not overbake. The kugel should jiggle a bit when first taken from the oven. It will tighten a bit as it cools, but should be moist and creamy in the center.
Garlic Season is Here!
I grow my own garlic.
Of course I do. I know, I know, obnoxious, right? Are you tired yet of reading about the stuff I do beyond the ordinary, the unusual stuff? I hope not.
I do it because I like trying different stuff, the things my cooking sensei, the extraordinary Martin Betonio, late of the Fountainbleau Hotel and the Epicure Market in Miami Beach, encouraged me to try—and occasionally fail—to make me a better and more rounded chef.
Martin was my spirit guide.
So…garlic…
First off, you should try it. Doesn’t take much space; my garlic patch is four feet by four feet, with about 50 fragrant hard-neck heads, due to harvest in mid to late June. With very little effort. And there’s plenty of sources of seed garlic, at your local garden center or on the Internet. And do a little bit of research. Just a little, and don’t be afraid.
Simply jam a bunch of seed cloves about six inches deep into composted soil about six to eight weeks before the ground freezes (I’m in central PA), cover with soil and lots of mulch; I use a straw bale, plentiful and cheap in late fall. The cloves will sprout leaves; leave ’em be. Then wait till spring. A couple of feedings with blood meal and lots of spring rain, and before you know it, it’s garlic season.
Can’t wait till late June? It’s still April here, and any day now the scapes will appear. Scapes, you say? What’s that? The scapes are the plant’s flower buds, like the flowers that shoot out of tulip bulbs. They’re attractive, but don’t let them grow. When the buds appear, cut them off at the base; the plant will turn its energy toward the bulbs, so that they grow fat. The bulbs are the gold, anyway—big heads of lovely, tasty garlic, ready when most of the green shoots turn yellow and brown. Then dig ‘em up (carefully, so you don’t damage them, clean most of the dirt off, and hang them by the greens to dry in a cool basement. They’ll keep a long time; mine last mostly through the winter, and the flavor and aroma are vastly superior to that grocery-store stuff—which probably comes from China on boats (imagine how much Chinese garlic will cost this fall (thanks, Donald).
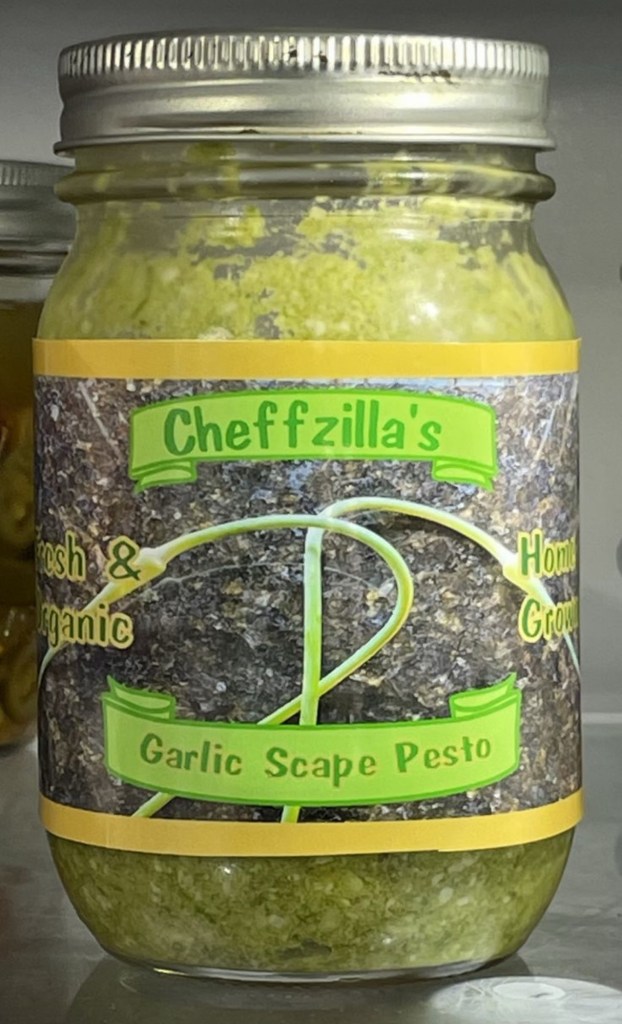
But wait…what to do with the scapes you just cut? Heavens, don’t throw them away. They make the most delicious pesto, with or without basil—I make mine without basil, and what a surprise. Just cut off the buds (toss them—not much you can do with them) and whizz them up with your usual pesto ingredients—Parmesan, lemon juice, salt, pepper, olive oil, and dip with chips or smother a bunch of pasta and enjoy.
Here’s the plan:
Ingredients:
- 1 pound garlic scapes, cut into 2-inch pieces
- 1 ¼ cups grated Parmesan cheese
- 1 cup olive oil
- 1 tablespoon lemon juice
- Kosher salt andground black pepper to taste
Preparation:
- Blend garlic scapes, Parmesan cheese, olive oil, lemon juice, and pepper together in a food processor until smooth.
Recipe tip:
Garlic scapes are abundant at farmers’ markets and CSAs (community-supported agriculture shares) in spring.
Prep Time: 10 mins
Total Time: 10 mins
Servings: 28
Yield: 3 1/2 cups
Yet Another Focaccia, Starring Sourdough Discard

I’ve mentioned before, and posted recipes for, sourdough bread, using my wonderful aged and active San Francisco-born starter. I keep my starter small, to reduce the amount of discard (having worked in a large commercial production kitchen, I hate discarding ANYTHING!). My starter regimen is this: from my daily starter feeding, I retain 5 grams of starter, add 20 grams whole-wheat flour, and 20 grams of spring water, and save the remaining starter in a 1-pint Mason jar. When I have about 200 grams of discard I make something with it, like lemon and olive oil quick bread, zucchini-and-carrot quick bread, banana bread, or my favorite, herb-and-garlic focaccia. Adding the discard to my focaccia recipe produces an incredible extra layer of flavor that sings, and it keeps me from wasting beautiful ingredients. In addition, making foccacia allows me to experiment with flavor combinations using other concoctions I make myself, such as garlic-infused olive oil, lemon-and-fennel coarse salt, tomato sauce, jalapeno relish, pickled red onions, and home-grown pepperoncini peppers.
But here’s the basic focaccia platform, based on a recipe from Grace in My Space, which has become one of my go-to sources of all things sourdough.
INGREDIENTS:
- 170 grams sourdough discard (preferably fed at some point in the last 72 hours)
- 284 grams lukewarm water (90-105 degrees F)
- 1 tsp instant yeast
- 225 grams high-protein bread flour
- 280 grams all-purpose unbleached flour
- 2 tsp fine pink Himalayan or sea salt
PREPARATION:
- Begin by dissolving 170 grams of sourdough discard in 284 grams of warm water in a mixing bowl. Mix in 1 tsp of instant yeast and let sit for 10-15 minutes to let the yeast bloom.
- Add 225 grams of bread flour (spooned) and 280 grams unbleached all-purpose flour. Turn your mixer onto level 1 and mix ingredients with a dough hook attachment. Once the water-and-flour mixture is combined, add 2 tsp (11 grams) fine salt and continue mixing on level 3-4 until the dough is smooth and pulling away from the sides of the mixing bowl (the amount of time you allow your dough to mix will depend on your mixer, starter hydration, and temperature. Start with 4-5 minutes and then check your dough. When it is ready, it will not be too sticky to the touch and will stretch easily.
- Cover your mixed dough with plastic wrap and let it rise for 1-2 hours until it has doubled in size. I do this in the oven with the light turned on.
- Once your dough has doubled in size, line a 9×13 pan with parchment paper. Drizzle 2 tbs. of high-quality extra-virgin olive oil in the bottom of the lined pan and spread with a basting brush.
- Dump your dough into the oiled pan, allow it to rest for 10 minutes, and use your fingers to spread it evenly to all four corners of the baking pan. Add 2-3 more tablespoons of olive oil to the top of the dough.
- Then, add your fresh herbs and lightly dimple the dough further with wet fingertips to push the herbs into the dough.
- Once the herbs are added, cover the pan with plastic wrap and let rise another 1 hour.
- When the dough has completed its second rise, top with flaky salt, red onion, and minced garlic. Preheat the oven to 500 degrees Fahrenheit and bake for 15 minutes.
- After 15 minutes, lower the temperature to 450 degrees and rotate the pan 180 degrees, to help it bake evenly. Bake at 450 for 7-12 more minutes, until the top of the dough is nicely browned.
- Remove the focaccia from the oven and allow to cool on a wire rack before slicing.
TOPPINGS:
- 5 tbs high-quality olive oil, divided
- Flaky sea salt (I use Maldon salt, sometimes the smoked variety)
- 1/8 of a red onion, sliced thin lengthwise
- 3 cloves minced garlic
- 3 sprigs chopped fresh thyme (1 tsp dried thyme alternative)
- 2 sprigs chopped fresh oregano (1 tsp dried oregano alternative)
- 1 sprig fresh rosemary, coarsely chopped (or not!)
NOTES: Some alternative foccacia toppings, or use your imagination for others.
- Freshly harvested home-grown rosemary and garlic, using garlic-infused olive oil
- Butter, cinnamon, brown sugar, and raisins (often soaked in rum or brandy), and glazed with a milk-and-10X sugar glaze
- Kalamata olives, cherry tomato halves, and rosemary
- Freshly made tomato sauce, mozzarella, oregano, and assorted pizza toppings of your choice
Turmeric Chicken Stew

There’s not much better than a big, warm bowl of stew on a cold and snowy February evening. The good news is, my sweet partner has conjured up such a treat, which I have just feasted on as I watch the snow sprinkle down on my driveway. It’s thick and hardy and filled with the goodness from the produce department–Sweet potatoes, carrots, onions, spinach, and maybe tomorrow, peas. Yum!
On a cold, gray day this one’s bright yellow and dotted with green and orange, steaming hot and as tasty as I could possibly hope for. And all warmed by a wonderful combination of herbs and spices that just sing together like the birds we hope will survive this cold snap and grace our feeders in the next few days, after the piles of snow have been cleared. Alas, the Punxatawney groundhog promised this weather, and more on the way. Who knew?
So I’ll get right to the recipe, so you can read and imagine this bowlful of sunshine on a cloudy day. Here’s the roadmap…
Ingredients:
2 Tablespoons olive oil
1 1/2 pounds boneless, skinless chicken thighs, cut to 1-inch pieces
1 medium onion, diced
2 carrots, diced
1 stalk celery, diced
4 cloves garlic, minced
1-inch piece fresh ginger, peeled and minced
2 teaspoons ground turmeric or 2-inch piece of turmeric root, peeled and minced
1/2 teaspoon ground cumin
1/2 teaspoon ground coriander
1 teaspoon kosher salt, plus more to taste
1/2 teaspoon coarsely ground black pepper, plus more to taste
2 Tablespoons all-purpose flour
2 medium sweet potatoes, peeled and cubed, 1/2-inch cube
2 1/2 cups chicken broth
1/2 cup unsweetened coconut milk
3 cups fresh spinach, roughly chopped
1-2 cups cooked brown rice or barley (optional)
fresh cilantro, chopped, to garnish
Preparation:
- Dice chicken thighs and season generously with salt and black pepper.
- In a large pot preheated to medium-high, warm the olive oil and add the chicken, stirring constantly to brown on all sides (work in batches if necessary). Remove to a bowl and set aside.
- In the same pot, reduce heat to medium and add the onion, carrots, and celery, and cook 3-4 minutes, until the vegetables are just tender.
- Add the garlic, ginger, turmeric, cumin, coriander, salt, and pepper and cook for an additional 1-2 minutes, until the pot is fragrant.
- Return the chicken to the pot, sprinkle with flour, and stir vigorously until all the flour coats the chicken. Add the sweet potatoes and broth, scraping up any bits that have stuck to the bottom of the pot, and stir to well combine all the ingredients.
- Bring the stew to a low boil, then reduce to a bare simmer and cool 30 minutes, stirring occasionally, until the chicken is tender and the potatoes can be easily pierced with a fork.
- Add the spinach and coconut milk, and grain, if using, stir to combine, and cook for 5 more minutes, until the spinach is wilted. Taste and season with additional salt and pepper to taste.
- Serve immediately with a delightful fresh bread or (as I did) a tasty focaccia (see a couple of my focaccia recipes below). Leftovers can be stored in an air-tight container for up to 5 days or frozen for up to 3 months.
Notes:
This recipe can be made in a slow cooker. Brown the chicken and mirepoix (onions, celery, carrots, and garlic) as directed. Place in the crock, add the remaining ingredients except the coconut milk and spinach, and cook 4 hours on high or 7 hours on low. Then add the coconut milk, grain (if using), and spinach, and stir into the hot stew until the spinach is wilted and the grain (if using) is hot, about 5 minutes. Taste and adjust the salt and pepper.
Cooked chicken can be used to replace the browned chicken. Use 4 cups of cooked, cubed chicken.
Ground ginger, garlic powder, and onion powder can be substituted for fresh (1 teaspoon each), but fresh will always be better.
Recipe courtesy of Stephanie Kay, www.kaynutrition.com
Crusty Cranberry-Nut No-Knead Artisan Bread
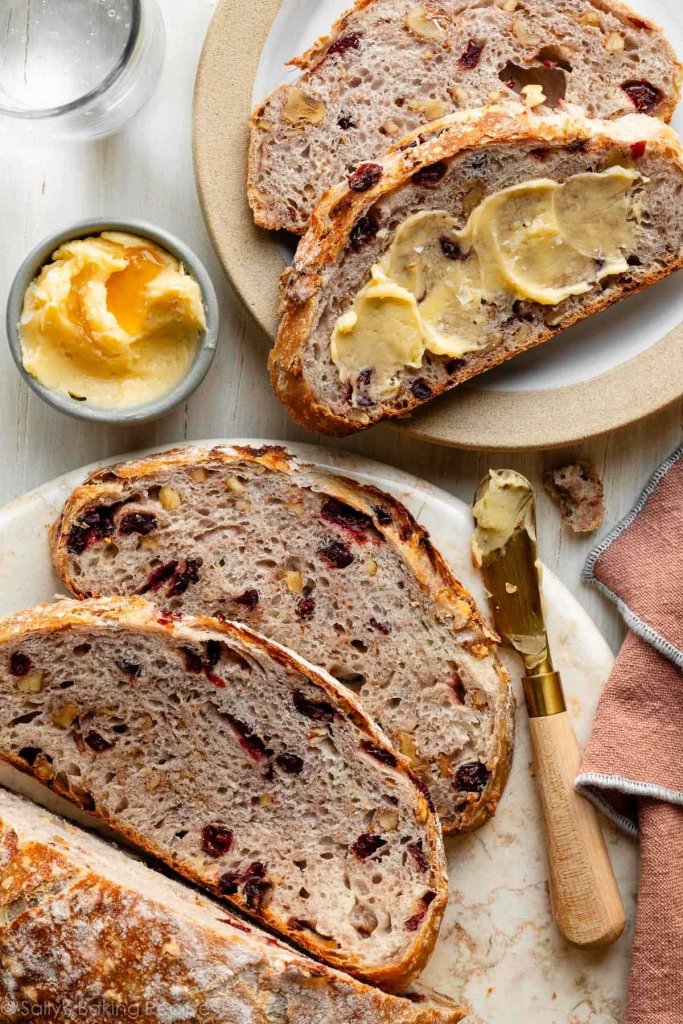
I’m making this bread for our Christmas Eve Swedish Smorgasbord feast. It is a variation on Jim Lahey’s famous no-knead crusty artisan bread, which has been featured, amended, and rebranded as the New York Times “Almost” no-knead bread loaf, which we’ve made on numerous occasions over the years. It is also the recipe on which most of my recent sourdough adventures have been based. It is a genuine holiday treat, and worthy of your time and attention. Try it sometime. You’ll like how easy it is and how wonderful it tastes. I also have a standard recipe for the bread without the fruit and nuts, which you can find by searching on “Jim Lahey bread” or “New York Times No-Knead bread.”
Crusty Cranberry-Nut No-Knead Artisan Bread
Ingredients:
3 cups + 2 Tablespoons (390 g) all-purpose flour, plus more for hands and bench
2 teaspoons coarse sea salt (10 g)
1/2 teaspoon instant yeast
3/4 cup (95 g) chopped nuts (walnuts or pecans)
3/4 cup (105 g) dried cranberries
1 Tablespoon honey
1 1/2 cups (360 g) warm water (95-100 degrees)
Preparation:
- Stir the first six ingredients (flour through honey) together in a large bowl. Stir in the water and mix well to incorporate and hydrate all the flour. Gather into a homogenous ball. Cover tightly and rest on the counter 12-18 hours.
- Turn the dough out onto a floured surface and shape into a ball. transfer to a 12×12 piece of lightly oiled parchment paper. Score the dough as desired with a lame or sharp knife 1/2″ deep. Cover lightly with plastic wrap and allow to rest for 30 minutes.
- While the dough is resting, place a covered Dutch oven in the oven and preheat to 475 degrees. After 30 minutes, remove the Dutch oven and carefully place the bread (on the parchment paper) into the pot. Cover and place in the oven and bake for 30 minutes covered. Remove the lid and continue to bake 8-10 minutes, until nicely browned. Remove from the oven, lift the bread from the pot and place on a cooling rack. Allow to cool at least 30 minutes before slicing/serving.
- The bread can be stored in a zip-close plastic bag for one week or frozen for up to 3 months.
Notes: The dough can be premade and frozen for up to 3 months, wrapped in plastic and placed in a freezer container after Step 2. To bake, allow the dough to thaw overnight in the fridge or 2-3 hours at room temperature, then resume at Step 3.
You can replace up to 1/2 the flour with whole-wheat flour for a chewier crumb and a slightly nutty taste.
Raisins can be substituted for cranberries, and
This recipe is published courtesy of Sally’s Baking Addiction, at www.sallysbakingaddiction.com
Gael’s Saturday Focaccia
So I made another focaccia!

I got this one from the website of King Arthur’s baking products (www.kingarthurbaking.com), the recipe of Gael Clauson, who bakes regularly in the Baker’s store in White River Junction, Vermont. According to the website, Gael bakes fresh, hot focaccia for customers on Saturday mornings. I can’t think of anything better on a chilly New England Saturday morning than a slice of fresh hot and spicy bread slathered with cream cheese or marmalade with a steaming cup of coffee. Makes me long for my wonderful years in the Berkshires of western Massachusetts (which is not too far away).
So I played a bit with Gael’s recipe, which called for semolina flour. I substituted whole wheat flour because that’s what I had on hand. The recipe calls for olive oil, but on a whim, I substituted my homemade garlic-infused olive oil, a rich and flavorful condiment I’ve been making for several years now (I’ll tag that recipe at the bottom of this post, just in case you want to try it; it goes wonderfully with most green veggies in an air fryer). As a nod to King Arthur’s flour products–which I use exclusively–I listed them by brand in the ingredients [editor’s note: I get no support from King Arthur].
The recipe calls for round cake pans, but I love using my 8×8 square baking pans, so I used them instead. This was about the easiest bread I’ve made, three and a half hours start to finish with two rises.
Ingredients:
2 cups (454g) lukewarm water
1 tablespoon (14g) granulated sugar
1 tablespoon instant yeast
1 tablespoon (18g) table salt
2 tablespoons (25g) olive oil
1/2 cup (82g) King Arthur semolina or whole-wheat flour
4 1/2 to 5 cups (540g to 600g) King Arthur unbleached all-purpose flour
2 to 3 tablespoons Herbes de Provence
1/2 teaspoon black pepper
2 tablespoons (25g) olive oil for the pan
herbes de Provence
freshly snipped chives
coarse salt
coarsely ground black pepper, optional
extra-virgin olive oil
Preparation:
- Measure all the ingredients in grams–you’re baking here. Spend the twenty bucks on a digital scale. If you plan to do much baking, you’ve GOT to measure in grams for everything!
- Combine the water, sugar, yeast, salt, and olive oil, stirring to dissolve the sugar and yeast.
- Stir in the semolina or whole-wheat flour, then 4 1/2 cups of the all-purpose flour, the herbs, and the black pepper. Knead the dough — by hand, mixer, or in a bread machine set on the dough cycle — until it’s smooth. It’ll be quite soft. Gael says, “Your finished dough should be like a marshmallow, very easy to knead. It should clean the sides of the bowl, if you’re using a mixer. If the dough seems too slack, add more flour a tablespoon at a time until it comes together. It should feel moist and soft; tacky like a sticky note, but not sticky.” I started with 540 grams of AP flour, and measured 60 more in a separate bowl, and added a little more, two tablespoons at a time until the dough came together and cleaned the sides of the bowl. Trust the process. It WILL come together, but you’ll likely need most of the last 60 grams of flour–I did.
- Place the dough in a lightly oiled bowl and turn the dough on all sides to coat with oil. Cover it loosely with plastic wrap, and let it rise for 90 minutes in a warm place–like your oven with only the light turned on–or until doubled in size.
- Gently deflate/de-gas the dough by pressing lightly. Turn it out onto a lightly floured counter; it should feel like a big marshmallow, very pliable.
- Lightly grease two 8″ or 9″ cake pans, and drizzle 1 tablespoon garlic oil or olive oil into each pan, brushing it across the bottom. “The oil will ensure that the bottom of the focaccia will be crispy and tasty,” says Gael.
- Divide the dough in half and gently shape it into rounds to fit whichever pans you’ve chosen. Place the rounds into the prepared pans, cover the pans, and let the dough rise for 45 minutes in a warm place (not the oven this time, you’ll need it) until puffy.
- While the dough is rising, preheat your oven to 425°F.
- Use your fingers to gently but firmly dimple the dough, making focaccia’s signature little hills and valleys. Sprinkle the top with herbes de Provence and some freshly snipped chives, a bit of coarse sea salt for crunch and flavor, and coarsely ground black pepper. Drizzle with garlic oil or olive oil.
- Bake the focaccia in the middle of the oven for about 30 minutes, or until it’s lightly browned and baked through. It should be brown and crispy on the bottom.
- Remove the focaccia from the oven, and turn it out of the pans onto a rack to cool just slightly before serving. Serve with warmed marinara sauce as a dip, or just as is with soup or salad.
Tips from a professional baker:
- Substitute an overnight rest in the refrigerator for the dough’s first rise, if desired. Let the dough come to room temperature before proceeding with the rest of the recipe.
- For heartier bread, choose any of the following toppings (or whatever strikes your fancy): chopped fresh rosemary, grated Parmesan cheese, chopped Kalamata olives, halved grape tomatoes, shredded Asiago cheese, crumbled feta cheese, mozzarella cheese, anchovies, oil-packed sun-dried tomatoes, caramelized onions, sautéed mushrooms, diced red peppers.
Recipe from Gael Clauson, courtesy of kingarthurbaking.com
Pain-Free Cast-iron Skillet Foccacia
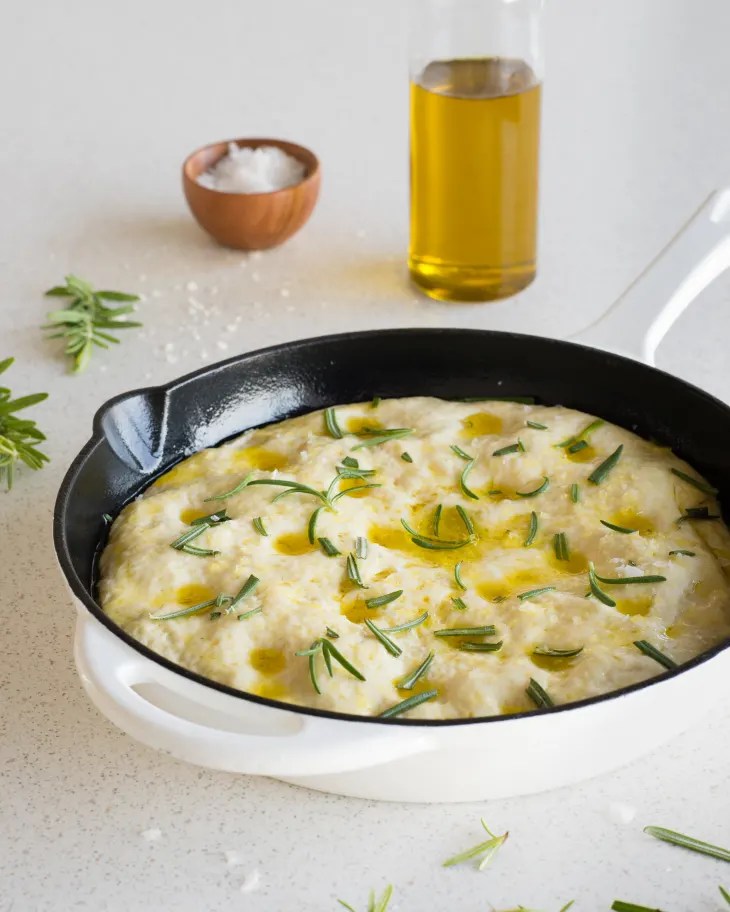
I am forever in search of the perfect recipe for an amazing foccacia, one that doesn’t take two days to make, and which makes just enough for the family. I think I’ve found it, and it happens quickly with ingredients that I always have on hand. And it happens in my favorite pan, my 10-inch cast-iron skillet. It doesn’t take a lot of work, and it comes out perfect every time.
The only caveat I give you is that you must use fresh and high-quality ingredients to get a high-quality product. Trust me on this. If I have one mantra in Jeff’s Kitchen, it is to use only the finest–and freshest–ingredients. It’s why I grow my own tomatoes and herbs. I’ve waxed poetic in the past about both of these–you can find my rants on tomatoes here, and on my herb garden here. You should trust me on these.
The best ingredients make the best-finished recipes. It only makes sense. Right?
So assemble your ingredients with care, and you’ll have a dish of which you can be proud. That’s a promise.
So here, forthwith, is the easiest, best-tasting foccacia you can make, and you surely CAN make it.
INGREDIENTS:
- 2 cups all-purpose flour — I use King Arthur AP.
- 1/2 teaspoon salt — Diamond Crystal kosher salt is what you ought to have
- 1 teaspoon dry instant yeast — For this recipe instant is best
- 3/4 cup lukewarm water — not too hot, please. You’ll kill the yeast. 100 – 110 is best
- 3 tablespoons plus 3 teaspoons extra-virgin olive oil, divided — Don’t skimp here!
- 2 teaspoons coarsely chopped fresh rosemary leaves — Fresh only! Grow it on a windowsill
- 1/4 teaspoon flaky sea salt — Should be a pantry staple in your kitchen.
PREPARATION:
- Place the flour, salt, and yeast in a food processor fitted with the blade attachment and pulse to combine. Add the water and 2 tablespoons of the olive oil. Pulse until a rough ball of dough forms, about 15 (2-second) pulses.
- Drizzle 2 teaspoons of the olive oil in a large bowl. Flour your hands, scoop the dough out of the food processor, and form into a smooth ball. Place the ball of dough in the oiled bowl and turn it so it’s coated on all sides. Cover with plastic wrap or a kitchen towel and let it sit at warm room temperature until doubled in size, 2 to 3 hours.
- Drizzle 1 teaspoon of the olive oil in a 10-inch cast iron or other ovenproof skillet and rub it over the bottom and sides. Punch down the dough and place the dough in the skillet. Using your fingertips, coax and stretch the dough to cover the bottom of the skillet and reach all the way to the edges. Cover with plastic wrap or a kitchen towel and let rest at warm room temperature until puffed and slightly risen, 30 to 40 minutes. Meanwhile, arrange a rack in the middle of the oven and heat to 450°F.
- Use you fingertips to gently dimple the surface of the dough. Drizzle the remaining 1 tablespoon of olive oil over the dough so that it pools in some of the indentations. Sprinkle with the rosemary and flaky salt.
- Place in the oven and immediately turn the heat down to 400°F. Bake until lightly golden-brown, 20 to 25 minutes.
- Remove from the oven and cool for at least 15 minutes before slicing and serving. Focaccia is best eaten when warm, but is also good at room temperature. If the crust gets too soft, reheat in a 350°F oven to crisp it up.
NOTES:
Make ahead: The dough can also be left in the covered bowl to rise overnight in the refrigerator — the slower rise actually provides extra flavor. In the morning, transfer the cold dough to the skillet and allow it to warm up a little, about 20 minutes, before stretching it and proceeding with the recipe.
Storage: The focaccia is best the day it is made but can be stored, well-wrapped, at room temperature for up to 1 day. The crust will soften, but it can be warmed and crisped in a 350°F oven for a few minutes. Leftover focaccia also freezes exceptionally well. Let it defrost at room temperature and then reheat in a 350°F oven for a few minutes.
Topping options: There is tons of experimentation to be had when it comes to focaccia toppings. Aside from rosemary, other herbs like thyme and oregano, thinly sliced lemons, pitted chopped olives, thick slices of fresh garlic or shallots, a sprinkling of Parmesan cheese, and even everything bagel seasoning are great topping options.
Recipe Credit: Sheela Prakash, on The Kitchn: https://www.thekitchn.com/skillet-focaccia-bread-recipe-261454
Ted Lasso’s Incredible Biscuits

Okay, folks, here’s one you’ve all been waiting for: Ted’s shortbread cookies (“biscuits” in the UK). I’ve tried several different recipes for these, including the one that alleges to be the original one from the TV show. This one is the easiest to pull together, and also the one I find to be the tastiest of the bunch. I’ll be making these for my Valentine this year, and likely all the years to come. Oh, and a link to instructions to craft the lovely pink gift box in included at the bottom as well. All it takes is a simple printer, one sheet of heavy card stock, a glue gun, and a pair of scissors. And it’s worth the effort. Trust me.
INGREDIENTS
- 2 cups all purpose flour
- 2/3 cup granulated sugar
- 1/2 teaspoon salt
- 1 teaspoon vanilla extract
- 1/4 teaspoon almond extract
- 1 cup unsalted butter, cold and cut into cubes
- coarse sugar, for topping (optional)
INSTRUCTIONS
- Preheat the oven to 350°F and line an 8 x 8-inch pan with parchment on all sides. Set aside.
- In a food processor combine the flour, sugar, salt, vanilla, almond, and butter. Pulse until just combined and the mixture starts to form a dough around the blades of the food processor.
- Press the dough into the prepared pan, using your hands to spread the dough into an even layer.
- Sprinkle the tops of the bars generously with coarse sugar.
- Bake at 350°F for 35 to 40 minutes or until just light golden brown. Take out of the oven and allow the bars to cool completely before slicing the bars into your desired size! Enjoy!
- Prep Time: 15 MINUTES
- Cook Time: 40 MINUTES
- Total Time: 55 MINUTES
- Yield: 18 bars
- Courtesy of BromaBakery.com
Ted’s cute little pink box–perfect size for six bars, so you can give the gift to your favorite Valentine and keep the rest for yourself. Simply print both pages on one sheet (both sides) of a piece of heavy card stock, cut carefully along the lines, and fold and glue the box. Nice!
Swedish Meatballs With a Major Twist—Turkey Meatballs!

It’s our Christmas Eve Swedish feast. It’s a special night around here—why should we be any different from anyone else? We do Christmas Eve Swedish style, a nod to E’s maternal-side heritage. It’s a traditional Swedish smorgasbord, complete with sliced cheeses, lingonberry jam, pickled herring, and of course, Swedish meatballs, that creamy, meaty, saucy confection the younger ones look forward to all year. But because we don’t eat red meat, turkey is the order of the day. Ground turkey, that is.
Because turkey can be a bit more bland than beef, I take an additional step to up the robustness quotient—I use reduced vegetable broth instead of beef broth (See note below). And I add a surprise ingredient, fennel, for another subtle layer of flavor. Toasted fennel seeds, which are ground fine with a mortar and pestle.
It’s a family favorite. You owe it to yourself to try this one.
SWEDISH MEATBALLS
Ingredients:
- 20 ounces ground turkey, 93/7
- 1/4 cup panko bread crumbs
- 1 tablespoon parsley chopped
- 1/4 teaspoon ground allspice
- 1/4 teaspoon ground nutmeg
- 1/4 teaspoon toasted fennel seeds, ground
- ¼ cup onion finely chopped
- ½ teaspoon granulated garlic
- ½ teaspoon kosher salt
- ¼ teaspoon coarsely ground black pepper
- ⅛ teaspoon fine-ground white pepper
- 1 egg
- 1 tbsp. olive oil
- 5 tbsp. butter
- 3 tbsp. flour
- 4 cups vegetable broth, reduced by half (2 cups needed for the recipe)
- 1 cup heavy cream
- 2 Tablespoons Worcestershire sauce
- 1 tsp. Dijon mustard
- additional salt and black pepper, to taste
Preparation:
- In a small saucepan, bring the vegetable broth to a boil, turn the heat down to medium-low, and simmer until reduced by half.
- In a medium-sized bowl combine ground turkey, panko, parsley, allspice, nutmeg, fennel, onion, garlic powder, pepper, salt, and egg. Mix until combined.
- Roll into 20 small meatballs. In a large skillet heat olive oil and 1 Tablespoon butter. Add the meatballs and cook, turning continuously until brown on each side and cooked throughout. Transfer to a plate and cover with foil.
- Add 4 Tablespoons butter and flour to the skillet and whisk until it turns brown. Slowly stir in broth and heavy cream. Add Worcestershire sauce and Dijon mustard and bring to a simmer until sauce starts to thicken. Salt and pepper to taste.
- Add the meatballs back to the skillet and simmer for another 1-2 minutes. Serve over egg noodles or rice.

- NOTE: if you’re a fan of the “Better Than…” products, make your vegetable stock from 4 cups water and two tablespoons of their roasted vegetable base, then reduce by half
Garden-Fresh Ratatouille with Chicken

Got a bunch of fresh vegetables in your garden you’d like to turn into a magic dish? I sure do. Squash, eggplant, peppers, tomatoes, and lots of fresh herbs. To me, that spells ratatouille, a garden-fresh vegetable stew. Add some chicken, and you’ve got a wonderful, protein-rich, vegetable-rich dinner to dazzle your family. It’s one of my favorites; we make it all the time in the summer, to use the delicious fresh veggies we grow in the back yard.
I’ve been making the ratatouille for years, and last year we decided to add the chicken for a protein-jolt, and to make it a complete meal. We love it. You will too.
Here’s the recipe:
Chicken Ratatouille
Ingredients:
2 Tablespoons extra-virgin olive oil
8 bone in chicken thighs, skin removed
Kosher salt and freshly ground black pepper
1 medium onion, diced
5 garlic cloves, minced
1 medium eggplant, 1-inch dice
1 tablespoon tomato paste
1 tablespoon finely chopped fresh thyme
2 medium zucchini, 1/2-inch chop
1 yellow pepper, 1/2-inch dice
5 ripe cooking tomatoes, 1/2-inch dice
1 cup fresh basil leaves, chopped
Preparation:
- Preheat oven to 400 degrees F.
- Set a large Dutch oven over medium-high heat. Add ½ tablespoon EEVO, heat to shimmering
- Pat the chicken dry with paper towels, season well on both sides with salt and pepper. Place the chicken in the Dutch oven and brown, unmoved, for 5 minutes. Flip and brown the other side until the chicken releases from the pan, about 4 minutes more. Remove from pan and set aside.
- Reduce the heat to medium and add the remaining EVOO. Add the onion and garlic and a pinch of salt. Cook, stirring occasionally, until the onions begin to soften, about 5 minutes. Add the tomato paste and thyme, and continue to cook until the tomato paste begins to brown.
- Add the eggplant and another pinch of salt, and cook, stirring occasionally, until the eggplant just begins to soften, about 5 minutes.
- Add the zucchini, peppers, tomatoes, and another pinch of salt and cook, stirring occasionally, until the vegetables are tender, about 10 minutes.
- Remove the pan from the heat and partially submerge the chicken into the vegetables. Place the pan in the preheated oven, uncovered, until the thickest part of the chicken registers an internal temperature of 160 degrees F., about 20 minutes.
- Remove from the oven, cover, and allow to rest 10-15 minutes.
- Stir in the basil and serve.
