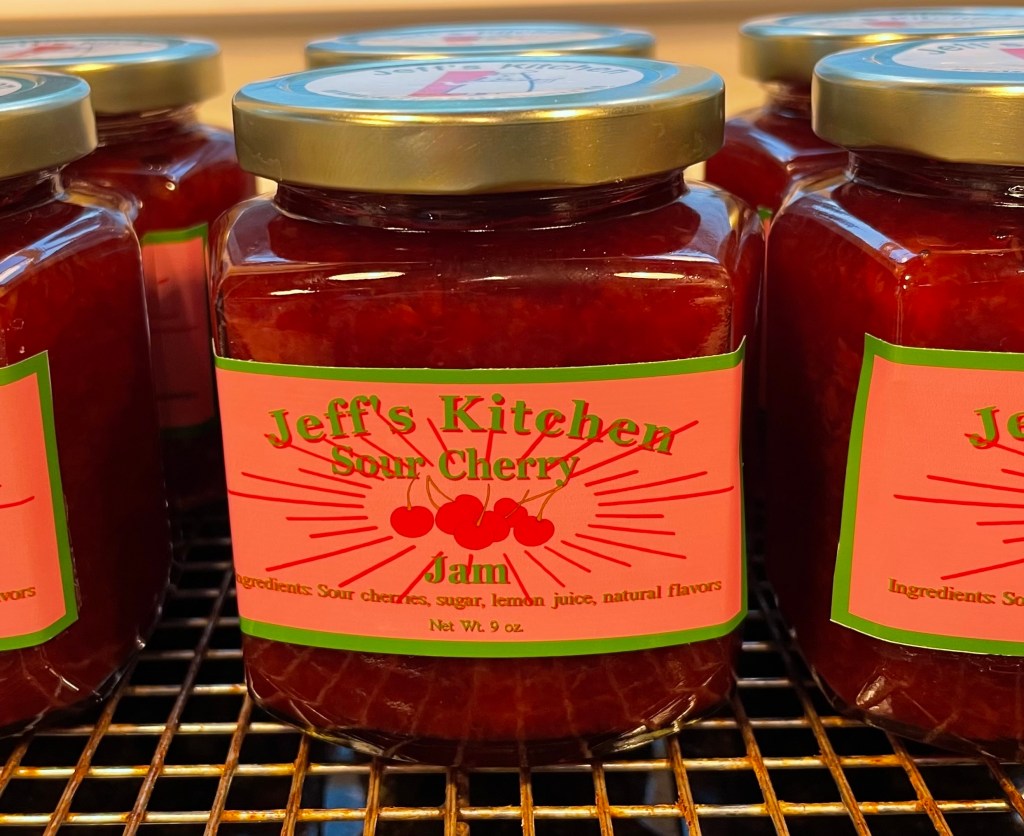
Sour Cherry Jam — A Labor of Love
I make a lot of stuff.
Regular (or even occasional) visitors to my Facebook or Instagram pages are aware of my frequent posts chronicling my various attempts at food production, both meal ideas and my current passion for preserving and canning. Some are wonderful and some not so. I keep practicing and will continue to do so until I get it right.
Among my better–and most often produced things–is my applesauce, which I make in collaboration with my lovely wife, Ellen. She picks and chooses the apples, after which I peel, core, chop, cook, and can the apples every Sunday in October while watching football. This year we produced 60 quarts and 12 pints of applesauce, to be enjoyed until next year’s apple season.
My other favorite product, and certainly Ellen’s favorite, is sour cherry jam, again the labor of picking, pitting, cooking, and canning. We pick together, and then I pit, cook, and can. This perfect product began as an outing to a local orchard with the kids and Ben and Cristina, visiting from California and wanted a fun local Lancaster experience. So, off to Cherry Hill Orchard we ran and spent about an hour picking sour cherries, after which we enjoyed marvelous ice cream from Pine View Dairy.
The resulting sour cherry jam was so delicious that the exercise has become another annual event (this year Ellen and I picked 30 pounds of cherries). Again, we picked together, and then I spent a day washing, picking over, and pitting all those cherries and stuffing them into 4-cup freezer bags, to be cooked and canned over the course of the fall.
I made my fourth batch from this year’s harvest yesterday. It was perfect.
And so, having perfected my own personal jam recipe, I now share it with you all, so that you can either try it yourself or wish you had. For the record, eight cups of frozen cherries yield seven nine-ounce jars, plus a little more for your immediate enjoyment on a freshly toasted English muffin (as I did moments before I began writing this post).
You can work out the logistics of obtaining the sour cherries for yourself (we now pick them at the Kissel Hill Fruit Farm behind the Lancaster airport–they have both sour and sweet cherries). But here’s the recipe for the jam…
SOUR CHERRY JAM
Ingredients:
8 cups sour cherries, washed and pitted
Zest AND juice from 3 lemons
1/2 teaspoon almond extract
6 cups cane sugar
Preparation:
- Add cherries, lemon zest and juice, and almond extract to a large non-reactive pot. Bring to a gentle boil, reduce the heat and simmer, just barely bubbling, for 45 minutes. Chop them up with an immersion blender, leaving about 1/4 of the cherries mostly whole, or just slightly mashed (don’t want too many whole cherries rolling off the toast now, do we?)
- While the cherries are simmering, prepare jars and lids for canning: wash them thoroughly with warm soap and water, rinse completely, and then place the jars in a 215-degree oven for 30 minutes, and bring your canning pot to a boil, then turn the heat under the pot to low and place the lids or disks in the hot water for at least five minutes. Alternatively, you can boil place the jars in the canning pot and boil them for five minutes. But either way, keep them hot until ready to can the jam.
- Add sugar and bring slowly to a gentle boil, stirring constantly until all the sugar is dissolved. Allow to simmer gently for 30 minutes, then gradually turn up the heat until the cherry jam is just boiling, stirring occasionally to prevent the sugar from caramelizing. Continue slowly increasing the heat, stirring every few minutes, while monitoring the temperature with a candy thermometer, until the temperature approaches 220 degrees F. At that point I check the temperature with a digital thermometer, allowing the brew to maintain 220 degrees for at least three minutes. If the temperature reaches 222, STOP BOILING and turn the burner down to low. To check for the proper set, you can do the “freeze the plate and drop a spoonful of jam on the cold plate” test if you wish, but I’ve not had much luck with that method–I trust the science.
- Scoop the jam into the hot jars, leaving 1/4″ head space, wipe the rims carefully, and affix the lids, closing only finger tight. Allow the jars to rest for five minutes, then place them in the canning pot, return the canning pot to a rolling boil, and process for 10 minutes, covered. Turn the heat off under the canning pot and allow the jars to sit undisturbed for five minutes, then remove them to a cooling rack or a folded towel. Allow to sit, undisturbed for 24 hours before you move them to storage.
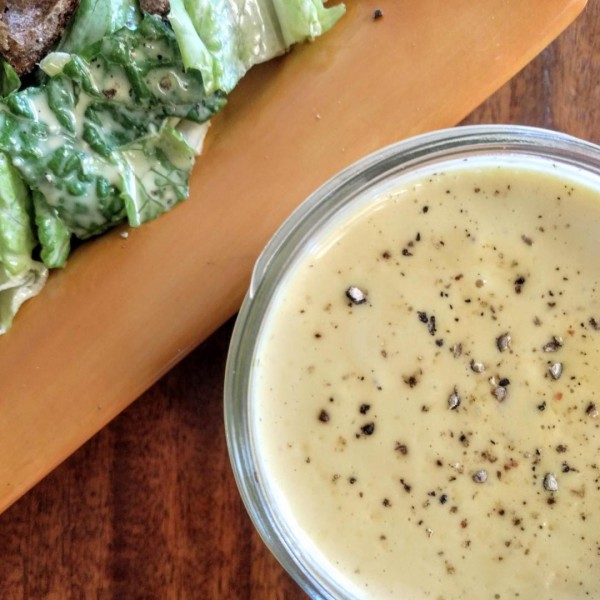
Tasty—And Healthy—Caesar Salad Dressing
It’s a summer classic!
Who doesn’t love a good Caesar salad when the romaine is garden fresh, the croutons are toasty crisp, the Parmesan is salty and plentiful, and the dressing is tangy, lemony, and nicely briny? Just add some grilled chicken on a steamy summer evening, pour yourself a frosty beer or wine cooler, and dig in to this perfect hot summer treat.
Or, as we do here, pile up a batch of luscious grilled shrimp with some shredded romaine, some pickled onions, and your homemade Caesar dressing on warm tortillas and treat the family to the best fish tacos EVER!
That’s how we do it.
The Caesar palette is something with which we’re all familiar; fresh, crisp romaine, shaved Parmesan, garlicky croutons—you do make your own, right?—and that classic salty dressing. It just cries out for a cold beer in a frosty mug, doesn’t it?
But ah, you say, the dressing! Mayo, egg yolk, oil? Healthy?
Here’s a different take; it’s creamy and delicious, and I guarantee your guests will never know the difference.
We’ve eliminated the mayo and egg, reduced the amount of oil, and come up with a perfect Caesar dressing for the 21st century, when getting healthy is something that will serve all of us well.
But can’t that dressing be fussy? I say, NOPE! Just grab a food processor, dump, and Voilà! Tangy heaven. Here’s the scoop…
Ingredients:
1/3 cup freshly grated Parmesan cheese
Juice from 1 lemon
1 garlic clove, sliced thin (do not smash it)
½ tablespoon Dijon mustard (we use stone-ground Dijon)
2 anchovy filets (don’t skip the anchovies—anchovy paste from a tube works well here—about a 2-inch ribbon)
1 tablespoon GOOD extra-virgin olive oil
5 tablespoons 0% fat Greek yogurt
1/8 teaspoon kosher salt
Freshly ground black pepper (more than you think you need)
Preparation:
Simply dump all the ingredients into a food processor–it’s just the right amount for a mini-chopper–and whiz until it’s smooth. That’s it!
It works out really well to make the dressing in the morning and allow the flavors to marry, but it’s not necessary.
Shrimp Tacos

And if you want it, here’s the fast scoop on the tacos: Season the shrimp with salt and pepper; melt butter and oil in a large skillet, saute one pound of shrimp, two minutes on each side, in butter and olive oil; add some lemon juice, garlic, red pepper flakes, and freshly chopped parsley, and toss to combine. Turn off the heat. Then pile the shrimp, salad, and some pickled red onions on warm tortillas (flour tortillas are better for this recipe), and serve immediately.
Mmmmm Mmmmm Good!
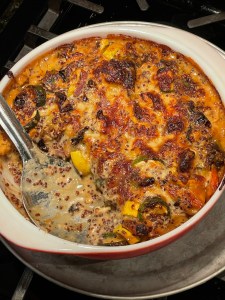
Red Quinoa and Roasted Vegetable Gruyere Bake
Ellie Krieger’s recipes are some of the best things on the planet. We love her creations, and use them whenever we see them. We found this one thanks to the Washington Post.
There’s a lot going on here, but I promise, it’s well worth the effort. It’s actually not all that much effort, just a lot of prep involved—mostly prepping vegetables and cooking the quinoa ahead of time.
Considering how cheesy and delicious this casserole dish is, it’s remarkably healthy—low-fat milk, only a bit of AP flour, a little Gruyere cheese, and lots of grains and veggies. The flavor comes from a wonderful seasoning combination and a little bit of creativity. She recommends red quinoa (available at Wegman’s) for its deep flavor, but any quinoa (and, I suspect, just about any grain) will do. But try the red quinoa. And when you prepare it, do it in stock, not just water (you’ll thank me later). I used Better-Than-Bouillon seasoned vegetable base to make the quinoa, and I used twice the recommended amount. It really rounds the flavor up. I guarantee you’ll be happy if you make it this way.
This is not just another veggie casserole. It is just bursting with flavor. And if a nice meaty bite is something you crave, include some cremini and shiitake mushrooms to the veggies. They will add a nice earthy and “meaty” note to this wonderful dish.
It’s a keeper!
INGREDIENTS
- Olive oil, for greasing the baking dish
- 2 1/2 cups low-fat milk
- 2 1/2 tablespoons all-purpose flour
- 2 cloves garlic, minced or finely grated
- 1 teaspoon mustard powder
- 3/4 teaspoon sweet paprika
- 1 1/4 cups (4 ounces) shredded Gruyère cheese, divided
- 1 teaspoon kosher salt
- 1/2 teaspoon freshly ground black pepper
- 3 cups cooked quinoa, preferably red (from about 3/4 cup/4 1/2 ounces uncooked)
- 4 cups roasted mixed vegetables (such as Brussels sprouts, carrots, cauliflower, squash, assorted mushrooms…), coarsely chopped
DIRECTIONS
Roast the vegetables—whichever ones you choose—according to your favorite recipe, until lightly golden brown and beginning to soften.
Prepare the quinoa per package instructions, adding vegetable cubes or stock base to the water. We use “Better-Than-Bouillon” seasoned vegetable base—the best product available (IMHO) for quick stocks.
Position a baking rack in the middle of the oven and preheat to 400 degrees. Brush a 1 1/2- to 2-quart shallow baking dish with oil.
In a medium saucepan over medium heat, whisk together the milk and flour until the flour is dissolved. Add the garlic, mustard and paprika and, whisking constantly, bring the mixture to a gentle boil. Reduce the heat to medium-low and simmer, stirring a few times, until the mixture has thickened to the thickness of cream, about 2 minutes.
Add half of the cheese, the salt and pepper, and stir until the cheese is melted and the mixture is smooth, then remove from the heat. Add the quinoa and vegetables to the pot and stir until combined.
Transfer the mixture to the baking dish. Top with the remaining cheese and bake for 25 to 30 minutes, or until the mixture is bubbly and the cheese on top is nicely browned. Let cool for 5 minutes before serving.
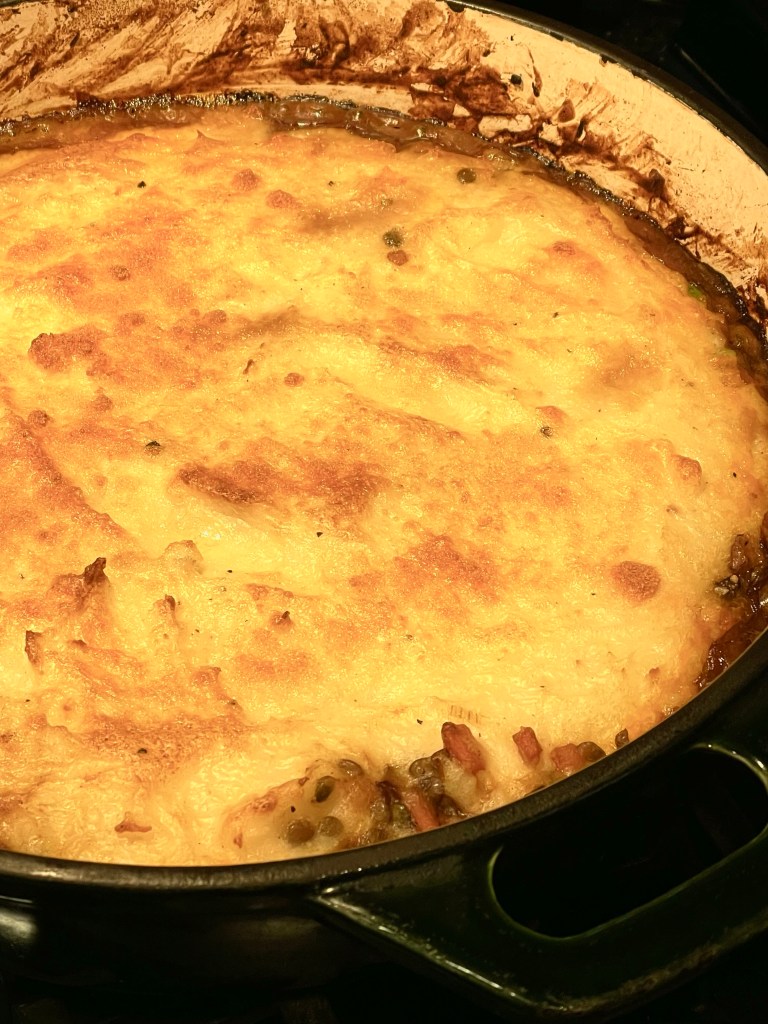
Vegetarian “Shepherd’s” Pie
It’s an oxymoron.
How can a dish be both “shepherd’s” and vegetarian? Doesn’t “shepherds” imply that some herd has or is being shepherded? Perhaps. No animals were harmed in the making of this dish. Maybe what I’m doing is shepherding lentils. Is that a thing?
It is now.
A while back, Ellen and I decided to become vegetarian (vegetarians?). Why? The idea that we would become vegetarians (not vegan–not yet, at least…) was born with our becoming acquainted with a local organization called the Lancaster Farm Sanctuary. These are great folks. They do the incomparable goodness of rescuing farm animals (of which there are many, many here in Lancaster County–more than there are people, actually) that are abused, misused, ignored, forgotten…you get the idea. The owners/angels of the farm sanctuary, one of many across the nation, but the one closest to us, are brilliant at social media, and their frequent posts of the wonderful things they do just captured our hearts. The animals they husband seem to have personalities, likes and dislikes, friends among the herds–including friends of other species at the sanctuary. We were particularly taken by a friendship struck up between a dairy cow with a cleft palate and a chicken that followed him everywhere about the farm like a remora. They just seemed to get along perfectly.
These animals are sentient beings; they have souls. You simply can’t look into the eyes of these animals and not get the feeling that they are looking back at you and trying to communicate their gratitude.
And then there was the lamb.
We were driving someplace together (Ellen and I). We were stopped at a traffic light, and a large animal carrier cruised by us filled with animals, and likely on their way to a slaughterhouse. As we watched the truck pass by, one solitary lamb had extended its head out of one of the vent openings in the side of the trailer, and it seemed like it was smiling, enjoying the wind of a beautiful fall afternoon in its face. Unaware, most likely, of its destination.
Seeing that lamb enjoying its last moments alive crystallized something in both of us, and we haven’t eaten meat since. We haven’t yet forsaken seafood, but I can imagine us doing that sometime in the future. Having recently read David Foster Wallace’s essay, “Consider the Lobster,” I’m not sure that won’t happen sooner rather than later.
[END OF RANT]
And so, in search of alternatives, we have turned to other sources of protein, and recipes that are suitable substitutes for the dishes I have long prepared and enjoyed. Which brings me to Vegetarian Shepherd’s Pie. It’s a mashup of lentils and mushrooms and aromatics and potatoes and herbs and spices that caught me entirely by surprise.
It’s one of the best dishes I’ve ever tasted. It has the bite and texture of a ground-meat casserole, and flavors that just burst on my palate.
So I decided to share it. It comes from the New York Times food section, originally written about by Samantha Seneviratne, and I’m telling you, it’s a winner. Somewhat labor intensive, but this recipe will satisfy eight hungry vegetarians (or even those who aren’t necessarily on board but are open to a new experience). Like I always do, I’ve changed up the recipe a bit, to suit my–our–palate, but it is, to my mind, better than the original.
Try it.
Vegetarian Shepherd’s Pie
Ingredients:
FOR THE TOPPING:
- 2 tablespoons kosher salt, plus more for seasoning
- 2 pounds Yukon Gold potatoes, peeled and quartered
- 6 tablespoons butter or Earth Balance butter substitute
- ½ cup half and half or almond milk
- ½ cup sour cream or plain yogurt
- ½ cup packed grated Parmesan-style cheese
- Freshly ground black pepper
FOR THE FILLING
- ¾ cup French lentils
- 4 sprigs fresh thyme
- 3 ½ cups vegetable broth
- 1 teaspoon kosher salt, plus more for seasoning
- 4 tablespoons butter or Earth Balance butter substitute
- 12 ounces sliced mixed mushrooms, such as cremini, and shiitake (remove shiitake stems)
- 1 large leek, white part only, thinly sliced (about 1 1/2 cups)
- 2 medium carrots, peeled and diced (about 1 cup)
- 4 cloves garlic, minced
- Freshly ground black pepper
- 2 tablespoons tomato paste
- 3 tablespoons AP flour
- 1 cup frozen peas, thawed
- 1 to 2 teaspoons fresh lemon juice
Preparation:
- In a large pot, bring a gallon of water and 2 tablespoons salt to a boil over high heat. Add potatoes to boiling water and boil for about 15 to 20 minutes, until soft; a knife should go in with almost no resistance.
- Meanwhile, prepare the filling: In a 10-inch oven-safe skillet with high sides or an enameled cast-iron braiser over medium-high heat, bring the lentils, thyme and 2 cups of the broth to a simmer with 1 teaspoon salt. Reduce the heat and continue to cook the lentils, partly covered, until they are tender and most of the liquid is absorbed, about 20 minutes. Transfer the lentils to a bowl.
- Finish the topping: In a small saucepan or a microwave oven, heat 6 tablespoons of the butter and milk together until butter melts. Drain potatoes well and return to pot. Using a masher or a ricer, mash hot potatoes until smooth. Mix in the hot butter mixture and sour cream just until blended. Stir in 1/2 of the Parmigiano. Season to taste with salt and pepper. Cover and set aside.
- Finish the filling: Heat the oven to 375 degrees. Melt the butter in the 10-inch skillet over medium-high heat. Add the mushrooms and cook, stirring often with a wooden spoon, until they are deep golden brown, about 8 to 10 minutes. Reduce the heat to medium and add leeks, carrots and garlic, and continue to cook until tender, another 10 minutes. Season to taste with salt and pepper. Add the tomato paste and stir, cooking until it is well combined, another 2 to 3 minutes. Sprinkle flour over the mixture, stir and cook for 1 minute. Add remaining 1 1/2 cups broth, cooked lentils and peas, and cook until thickened. Remove thyme stems and stir in lemon juice to taste.
- Top the mixture with dollops of the mashed potatoes, then spread them out over the top. (Or transfer the lentil mixture to a 3-quart casserole dish and spread into an even layer, and top with potatoes.) Sprinkle with the remaining Parmigiano. Transfer to the oven and, if the mixture is at the top edges of your pan, set a foil-lined baking sheet underneath the pan to catch any drips. Bake the pie until the potatoes have begun to brown and the edges are bubbling, about 30 minutes, then 3-5 minutes under a low broiler, until the potatoes begin to brown. Let stand at room temperature for 15 minutes before serving.
Hearty Country Vegetable Soup with Ravioli
It’s a working vegetarian’s dream!
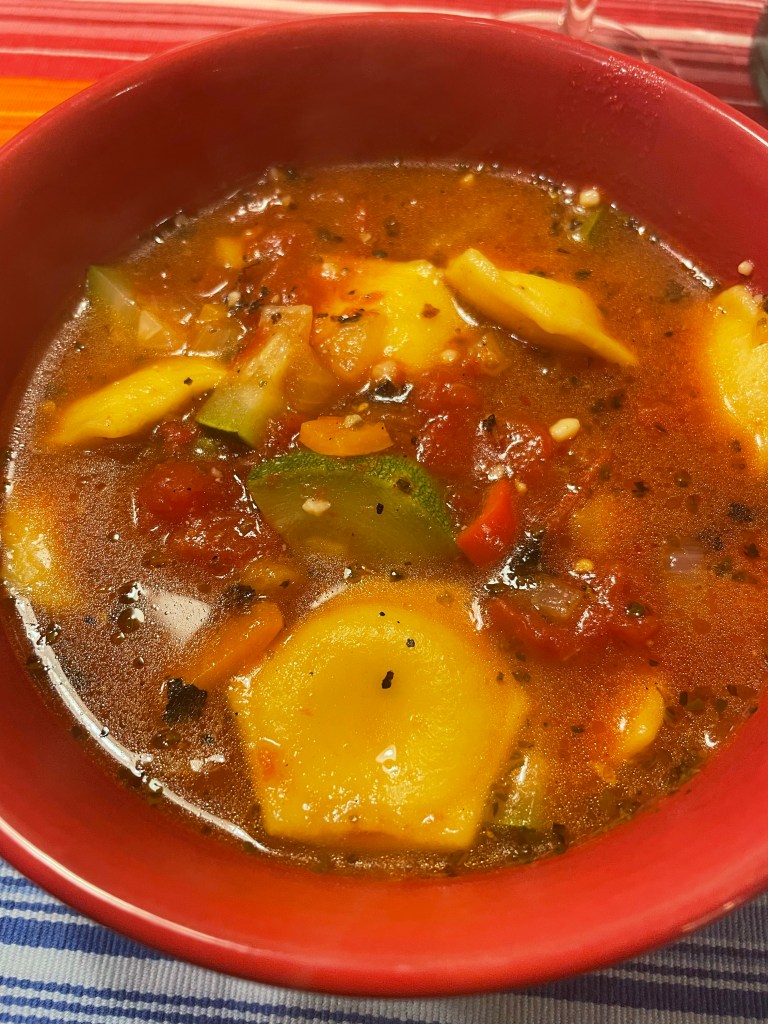
Oh, and it’s just about the easiest soup you could make; I made it the other night, start to finish, in just about 15 minutes, with minimal prep, little more than just stirring the pot, and a little seasoning.
This soup–I hesitate to call it a soup, because with just a few minor alterations it could be a wonderful vegetarian or seafood stew. It’s hearty, flavorful and, made with fresh vegetables, just about perfect.
If you’ve followed this space at all, you know that what I am all about is simple; both of us work, and often supper comes down to what is easiest. Well let me tell you, this is easier than defrosting something you made last Sunday while watching the football games.
The recipe I post here is for a vegetarian version, but let me suggest to you that a simple addition of about three quarters of a pound of shrimp or a nice white fish like cod or haddock–or both–would make this a dream come true.
Guaranteed!
A couple of preparation notes: this would work really well with a bag of chopped onions and peppers from the freezer aisle of the grocery store–in fact the original recipe called for just that–but don’t. Use a fresh onion and a bell pepper or two (I used mini peppers–red, orange, and yellow), and fresh garlic cloves. The recipe calls for two 15-oz. cans of diced tomatoes. I suggest Muir Glen Fire-Roasted tomatoes–find them at a store near you–we found them at Target–they’re worth the difference. It might be even better if you have tomatoes from your garden that you put up over the summer–I do, and I fire-roasted them, but these canned tomatoes are fabulous. Try them. You’ll be glad you did.
So here’s the roadmap:
Vegetable Soup with Ravioli
Ingredients:
1 TBSP extra-virgin olive oil
2 cups chopped onions and bell peppers–about half of each
2 cloves garlic, minced
1/4 tsp. red pepper flakes (don’t skip this!)
2 15-oz. cans diced tomatoes (fire-roasted is best)
3 cups vegetable stock
1 cup water
1 tsp. dried marjoram (or basil if you prefer)
9 oz. fresh or frozen cheese (or meat, if you must) ravioli
2 cups zucchini, small dice
Salt and freshly ground pepper, to taste
Preparation:
- Over medium heat add the oil in a heavy enamel or stainless-steel soup pot (not aluminum–tomatoes and aluminum don’t play well together). Add onions, peppers, garlic, and pepper flakes and saute. stirring constantly, for 2 minutes. Don’t overcook here–you want the veggies to feel like they’re still fresh.
- Add the tomatoes, stock, water, and dried herbs, plus 1/2 tsp. kosher salt and 1/4 tsp. freshly ground pepper; stir well and bring to a rolling boil.
- Add the ravioli, give it a stir, bring the soup back to a boil and cook, stirring, just until the ravioli begin to float, about 2 minutes. Add the zucchini, stir, and return to a boil. Continue cooking, stirring occasionally, until the zucchini are just getting tender–3 to 4 minutes. NO MORE!
- Adjust the flavor with salt and pepper to taste and serve with a pinch of grated Parmesan cheese, if desired.
NOTE: You can turn this into a bangin’ seafood soup by adding about 3/4 pound of 26-31 shrimp and/or white cod or haddock at the same time as the zucchini and cook just until the fish is turning from translucent to opaque. Want a stew: After cooking the onions and peppers for a minute, add 2 TBSP olive oil and 2 TBSP all-purpose flour, and stir well to combine, until there is no more white flour showing. Stir another minute, until the mixture begins to brown and the oil and butter are well incorporated. Then proceed to step 2, adding the tomatoes and the stock, but don’t add the extra cup of water. For an extra jolt of goodness, add a teaspoon or two of Cajun seasoning.
TIP: You can make this ahead and keep it in the fridge for 2-3 days–it gets better. but if you do and want the seafood variety, don’t add the fish until you’re ready to heat and serve.
Original Source: Nancy Baggett for EatingWell
The Best Tomatoes NOT Grown in the Shadow of Mount Vesuvius
A Cheffzilla story…

Before the turn of the (21st) century–truth be told–just about the only people who know about San Marzano tomatoes lived in the region in Italy, or were European-trained chefs, were one of handful of American chefs who had been to the region, or worked in the kitchen at my beloved Epicure Market on South Beach. Let’s face it, the “legendary” San Marzano tomato was a virtual unknown here in the US. Then, about 15 years ago, its fame and story became one of the “newest” trends in American cooking. People discovered this amazing tomato variety. The major tomato growers in the US began importing seeds or the tomatoes themselves and harvesting the seeds, and started selling the product as authentic, even though anyone who actually knew of the tomatoes knew better. The growers in this tiny region of southern Italy filed all sorts of lawsuits and attempted to patent and copyright the name, only to be hoo-hahed by the agro-industrial complex.
Because of my experience in South Florida, I knew of this amazing fruit, because the owners of the gourmet store imported these beauties any way they could–fresh, frozen, or canned. Now because I have known about San Marzanos almost forever, I decided that I would try to grow them myself in my garden here in the fertile soil of Lancaster County. I’ve been growing them for seven or eight years now.
Now, anyone who knows the origin story of these amazing tomatoes know that their special magic–the thing that makes them the most delicious and sought-after tomatoes in the world–knows that what sets these tomatoes apart has to do with the volcanic-ashen soil in the shadow of Mount Vesuvius, near Naples, Italy. Those grown in the US may come from the same (or harvested) seeds, but they don’t have the same incredible flavor of the originals.
I won’t pretend that my San Marzanos are anywhere near as tasty as the Italian-grown variety, but I do know that they are a darn sight better tasting than any other tomatoes I’ve ever used.
And so I grow my own.
This year I tried something a little different, just as an experiment. In addition to the normal care and feeding of my tomato garden, into the soil where the San Marzano plant (only one) was to grow, I sowed a bucket full of wood ash from our back-patio fire pit.
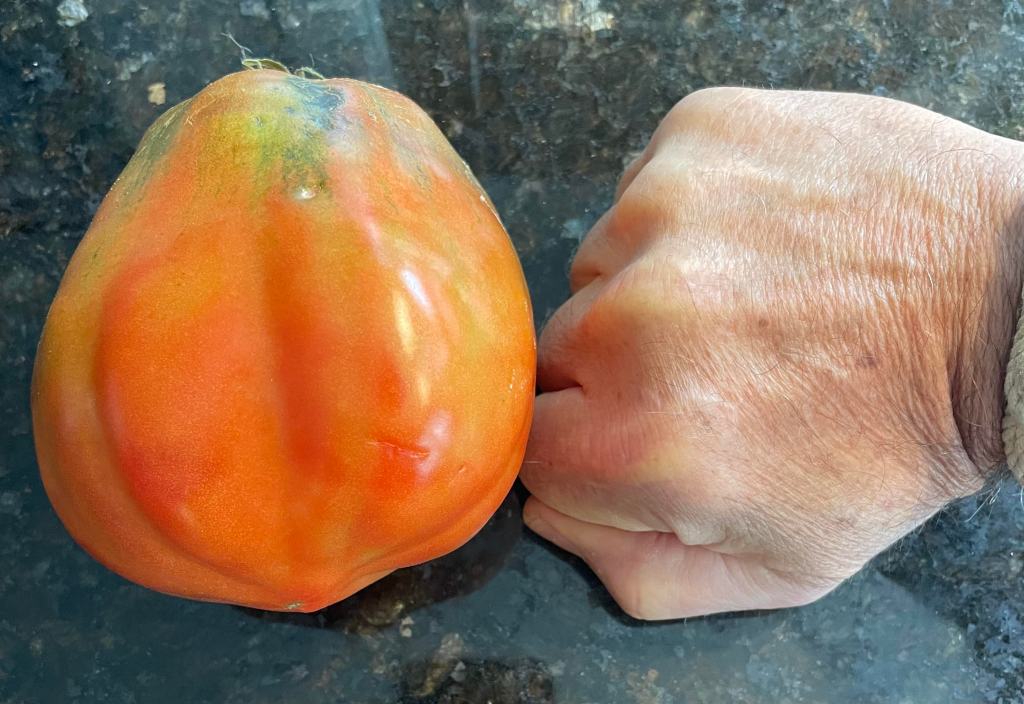
Guess what…
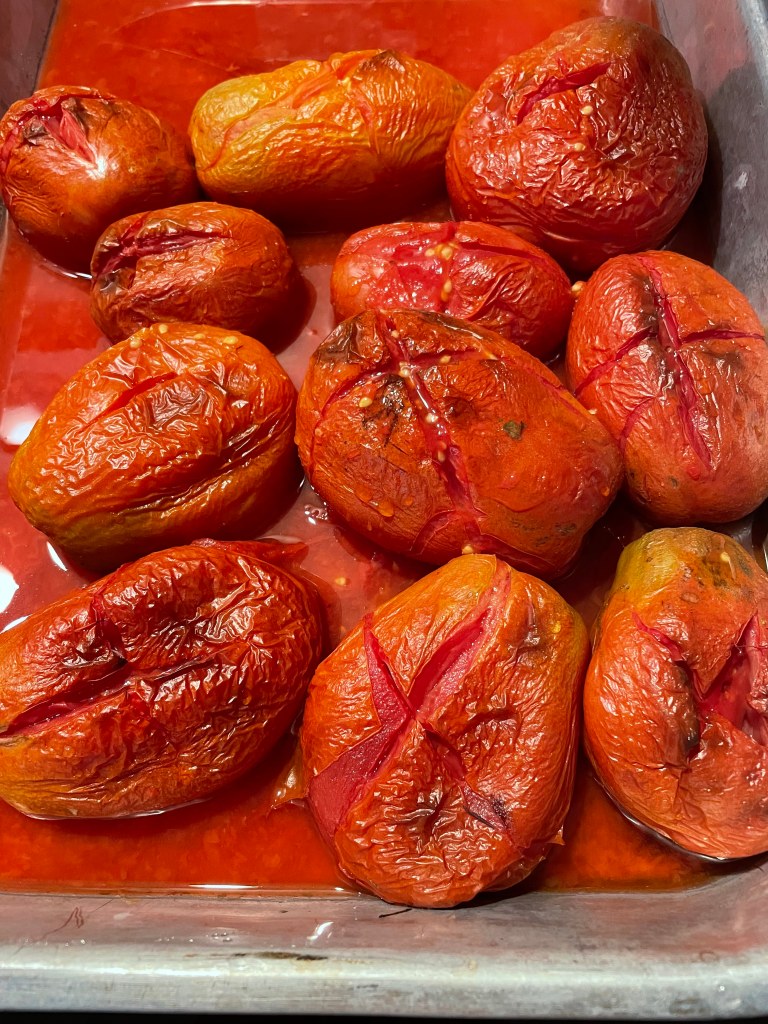
In my admittedly unscientific experiment, my San Marzano plant gave me a surprise: nearly four times the number of tomatoes, and of such amazing size that some of them were as large as my fist. So far, as of October 1 I have harvested and roasted more than 30 pounds of these wonderful tomatoes–twice what any of my other plants produced. And that is cooked weight–I roast, peel, and freeze my tomatoes, so that I have them to use all winter–tomatoes from my garden in February is a special treat, especially when they are these amazing San Marzano-variety tomatoes. Just today I roasted up four pounds (cooked weight) and I’ve been doing this every weekend since they first started to ripen more than a month ago.
If only I could travel ot Sicily to get some seeds, so that I could say the tomatoes came from San Marzano.
If only…
Muesli — The healthiest stuff I’ve ever eaten
Truth time here.

If you follow me on Twitter or Instagram you know that I’ve lost more than 50 pounds during the pandemic—don’t hate me, please. But I could never have done it alone. I had an enormous boost from my beloved, who poked, prodded, encouraged, excoriated, and refused to buy me the ice cream I so desperately craved—still crave. But she also fed me well.
Somewhere about 20 pounds in she decided that she had to come along for the ride, but in her ever-Ellen fashion, she came at it both 745%, and with more research than a barrel of dieticians. She got herself a personal trainer/slavemaster who also, serendipitously, is a nutritionist/body-builder/…I hate her (and I love her)—let’s call her…Sally (that’s her real name, and if I call her anything else she’ll likely make me eat healthy or something).
So, Sally got us into this “clean-eating” thing. Eliminate white foods—breads of all kinds, sugar, high-fat dairy; you know; the stuff we all know and love.
And, real food—fresh vegetables, skinless chicken—broccoli, for God’s sake! And lots of it. Lots of protein. All the time—we have to eat some protein every time we put something in our mouths. And smaller meals more often. Actually, the plan is breakfast, lunch, dinner, and small protein snacks at 10:00 am, 3:00 pm, and just before bedtime. And by golly, it worked!
She made me reduce my intake of breakfast cereals—I should have just offed her right there. I just take some bran flakes with protein powder a couple of days a week and my new favorite breakfast food, which I make myself.
Muesli. That’s right, the legendary “nuts and twigs” plan.
But I’ve learned that that stuff—normally found in the “nuts and twigs” (read: health-food) store—can be really expensive. I think gasoline is cheaper—it certainly is, by the gallon (go ahead, do the math). So I decided to make my own. Hello Pinterest!
There are five-hundred twenty-five thousand, six hundred minutes in a year (thanks, Rent), and just as many muesli recipes on Pinterest. And I think I may have read them all. No, really!
And then, armed with more knowledge about muesli than that which a human being ought to be armed, I ventured forward and tried several, and tried abstracting several of them into a reasonably good product, one that I could make quickly, easily, and with readily available (already in my pantry) ingredients.
I finally settled on one recipe—the proof of the recipe is in the fact. That my beloved will actually take a handful from the jar and eat it like a small snack—it even has a pretty healthy dose of protein.
So, the moral of the story is…there really isn’t any moral of this story, I’m just rambling and free associating, and filling space—because that is what all the Internet recipe writers seem to do—and aren’t you sick of that? I promise that from here on in I’ll keep my blab down to about 600 words—that’s what the LNP people I used to write for made me do, and I guess that after this finely crafted example of bloated writing, it was probably a good idea.
So…Cheffzilla’s muesli… (Makes about 2 1/2 quarts)
Ingredients:
3 cups rolled oats (regular oats—steel-cut oats won’t work here)
1/2 cup sliced (or slivered) almonds
1/2 cup walnuts, medium chop—somewhere between course and fine, you figure it out.
1/2 cup pumpkin seeds (or sunflower seeds, your choice—I like the pumpkin seeds better)
1/4 cup flax seeds or chia seeds—again, your choice
1/4 cup dried cranberries
1/4 cup dried apricots, chopped to the same size as the cranberries
1-3 teaspoons fine ground cinnamon
Preparation:
1. Preheat the oven to 325 degrees F.
2. Spread the oats on a sheet pan and shake the pan until they are evenly spread over the whole pan. Repeat with the almonds, walnuts, and pumpkin seeds, using a second sheet pan. Place the pans on two racks in the preheated oven (NOT ON THE BOTTOM RUNG OF THE OVEN—it gets too hot down there. Set a kitchen timer for 7 minutes.
3. After seven minutes, take the pans out of the oven, stir the product around on the pans (I toss them in a large bowl to mix them up) and return them to the pans, switching the pans top and bottom shelfs. Check after six minutes to ensure they are not burning. If they haven’t begun to brown slightly, give them another minute or two, rotating up and down again. They are done when they just begin to brown, especially. The oats. They’re not done until the oats begin to brown. If the nuts are done before the oats begin to toast, remove them from the oven and let them cool. When finished toasting, allow both the nuts and the oats to cool completely to room temperature.
4. While the oats and nuts are toasting, place the cranberries and chopped apricots in a bowl, add a teaspoon of cinnamon, and toss to coat the fruit. If they still stick together, add another teaspoon and toss some more. Ultimately, you want to add just enough cinnamon to keep all the fruit pieces separate, but no more—well maybe just a little bit more–but not very much.
5. Dump the cinnamon-dusted fruit into a very large bowl, add the flax or chia seeds, the nuts, and the oats, and mix thoroughly. Then mix again. And again, to make sure all the ingredients are fully mixed up. Funnel the muesli into quart-sized mason jars right to the lip, tap the jars on the counter and add more if necessary, to the top of the jar—the less air in the jar the longer the muesli will last.
And then, well, #NutsAndTwigs!
Seattle-Style Teriyaki Chicken
I’m obsessed with Seattle-style chicken teriyaki.
To begin with, let me state for the record that I have only been to Seattle once, and it was way back in the early seventies, when I lived in San Francisco for a short while, and took a motorcycle trip to Alaska up the AlCan highway, and the itinerary from SF took us through Seattle in the middle of the day. We managed to stop only for a rest-room break and lunch, then back on the bikes and northward we went.
But oh, that lunch!
Our itinerary took us through the Japanese section of Seattle’s downtown, where hole-in-the-wall restaurants were serving up dishes that were part of their culture. This was a couple of years before the first—and soon to become world-famous—Toshi’s opened and changed the face of fast food in Seattle forever.
Small places, few tables, limited decor—the phenomenon that was to become Seattle-style chicken teriyaki hadn’t happened yet, but places were already serving up the amazing dish as an undiscovered gem. A friend who was a Seattle native had recommended a small dive—I can’t for the life of me remember the name of the place—that served up this most amazing dish, and for just a couple of dollars I would get a lunch I’d never forget.
Guess what?
I never forgot it. A few years later Toshi’s opened up, copycats followed, and voila! A phenomenon was born. Today chicken teriyaki is to Seattle what the cheesesteak is to Philly, what BBQ is to Texas (or North Carolina, or Kansas City, or…or…or…), what key lime pie is to south Florida, what Sabrett’s is to New York, what deep-dish pizza is to Chicago—you get the idea.
Just Google ”Seattle chicken teriyaki” and then surf your way to paradise. You’ll find jillion’s of recipes, recommendations for “THE place.” Just like with cheesesteaks and Philly, everyone has their own opinion of which is the best, the most, the source.
But suffice it to say, it’s just about the best fast food on the planet—Seattlites will tell you that the sound of squeaking styrofoam boxes is just part of the teriyaki experience (even though styrofoam in Seattle is becoming extinct). It’s kind of like, ”…cheesesteak wit…”.
But whether you’re from Seattle, or have been there and tasted the real thing, or have never been there but heard of it, or have no idea what I’m writing about here, you can experience this treasure right in your own kitchen. And it’s really quite simple. Just marinate, grill, broil to finish, and enjoy—especially with an ice-cold Asahi Super Dry (or two or three). Charcoal or wood-fired grill is best, but a gas grill or a grill pan will do in a pinch. At the very least, use a super-hot cast-iron pan.
Try it for yourself.
You’ll thank me later.
SEATTLE-STYLE CHICKEN TERIYAKI
INGREDIENTS:
1/4 cup rice wine vinegar
1/2 cup water
8 boneless, skinless chicken thighs
4-5 large cloves garlic finely minced
2 tablespoons cornstarch
3 tsp freshly grated ginger
Lightly toasted sesame seeds
1 cup brown sugar
3 green onions
1 cup soy sauce
PREPARATION:
- In a small bowl whisk together soy sauce, brown sugar, rice vinegar, water, garlic and ginger. Pour half of the mixture over chicken in a large bowl (or in a zip-close plastic bag) and let marinate for at least 2 hours, or preferable over night (I like to do the prep first thing in the morning for a dinner-time cook). Reserve the other half of the marinade to finish at cooking time.
- When ready to cook the chicken, place the remaining marinade in a small pot over medium heat. Add the cornstarch and whisk until dissolved. Bring to a boil, reduce heat and simmer 3-4 minutes, until it just begins to thicken. Remove from heat and set aside.
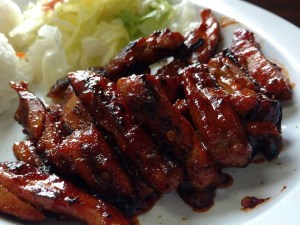
- Heat a grill or cast-iron pan over high heat and cook 6-7 minutes on each side to get a nice sear. Brush the teriyaki sauce on. Place the chicken under a hot broiler for another 3-4 minutes on each side or until juices run clear. The sauce will get sticky and caramelize—don’t let it burn.
- Let chicken rest 10 minutes, slice into 3/4-inch pieces across the grain, and serve with cabbage salad (Google it), sticky rice, and pickles, and top with green onions and sesame seeds
Thai Noodle Bowls


I’ve got an abundance in in of Thai basil and Thai chilies growing in my garden, and they’re begging to be harvested. Ok, so what to do with them?
A while back, at the Manheim Township public library, I did a cooking class in making Thai noodle bowls, and it was one of my most successful classes ever. So hankering for something different, tasty, and filling, I think I’ll make a batch for supper.
Like noodle bowls? Try these:
Ingredients:
1 lb. boneless, skinless chicken breast
4 cloves garlic
1 tablespoon fresh ginger, minced, thinly sliced
1 bunch scallions or lemon grass, white and light-green parts, cut to 1-inch pieces
4 sprigs fresh Thai basil
5 cups chicken stock
1 tablespoon red curry paste
½ teaspoon fish sauce
1 tablespoon soy sauce
1 tablespoon brown sugar
8 ounces rice noodles
Toasted sesame oil
Fresh bean sprouts
2 ounces thinly sliced mushrooms
1 red chili pepper, thinly sliced
Fresh limes, cut into wedges
Preparation:
Make the broth:
1. Heat a pan to medium high with coconut oil (or peanut or vegetable or canola oil).
2. Season the chicken with salt and pepper; brown the chicken on both sides, set aside on a plate and allow to cool to room temperature.
3. Add the ginger, garlic, and scallions or lemon grass, and sauté until softened. Add the curry paste, stir, and simmer 1 more minute.
4. Add the stock, scrape the bottom of the pot, bring to a boil, reduce the heat and simmer for 30 minutes.
5. Prepare the rice noodles per the package directions, drain and toss with a bit of toasted sesame oil.
6. When the stock is ready add the fish sauce, brown sugar, and soy sauce.
7. Shred the chicken with 2 forks.
Prepare the bowls:
The Last Word on Roasted Whole Chicken
I want to tell you about my latest adventure in roasting a whole chicken. I think I’ve finally mastered the beast, and I’m not changing a thing.
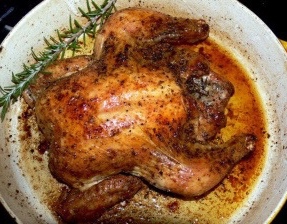
First of all, a few years ago on this site I posted what I think is the perfect approach to roasting a chicken. It’s mostly hands off, takes only a few minutes of preparation, and an accurate kitchen timer—30-40 minutes in a hot oven (450 hot) and the same time with the oven turned off. Perfect every time. The timing, of course, depends on the size of the chicken. ATK says 30/30, for a 3 1/2 pound chicken. Good luck finding one of them in the grocery store. Everything now os 5-6 pounds, loaded with growth hormones and water. But I do get them at the farmers’ market, and they tend to run about 4 pounds. At that size, use 35/35.
But now, I’ve discovered a new seasoning profile, and it’s so good that I’m loathe to try anything else. Because let’s face it—roasting a chicken is, while an essential skill, pretty boring.
Until now.
You’ve got to try this. Because it’s all about flavor. This recipe turns an ordinary every-day roast chicken into a feature dish to which to be looked forward (um…grammar rules, you understand, but still…)
So here’s the blueprint:
SPICE BLEND:
2 Tbsp extra-virgin olive oil
1 Tbsp Harissa (mild or hot—you decide)
1 Tbsp dried sage
1 Tbsp kosher salt
1 Tbsp granulated garlic
1 tsp finely ground white pepper
1 tsp sweet paprika
1/2 tsp ground thyme
1/2 tsp Cayenne pepper
Start by mixing up the dry ingredients—standard stuff, mind you). Mix in some good olive oil and harissa until you have a thick paste. :
PREPARATION:
Run your fingers and/or thumbs under the skin of the breasts AND legs and thighs, to separate the skin from the meat.
Then, rub the seasoning glop all over the entire chicken—top, bottom, sides, into the crevices of the legs and wings. Then slather more under the skin, covering as much of the breast, leg, and thigh meat as possible. And don’t forget to dump a bit inside the front and rear cavities.
Tuck the wing tips under the bird.
Then follow the directions as in the earlier post—which I’ll repeat here because it takes only a few words. Preheat the oven AND A HEAVY 12-INCH OVEN-SAFE FRY PAN—an enamel pan is best, but a cast-iron pan works too—to 450 degrees. Carefully take the pan out of the oven, place the whole bird in the pan, and return the pan to the oven. Set the timer for 30-45 minutes (depending on the size of the bird). When the timer goes off, turn the oven off and set the timer for the same amount of time again. DO NOT OPEN THE OVEN DOOR!!! When the timer goes of this time, take the pan out of the oven, set it on the counter, cover the bird with foil, and set the timer for 15 minutes. Then carve and enjoy.
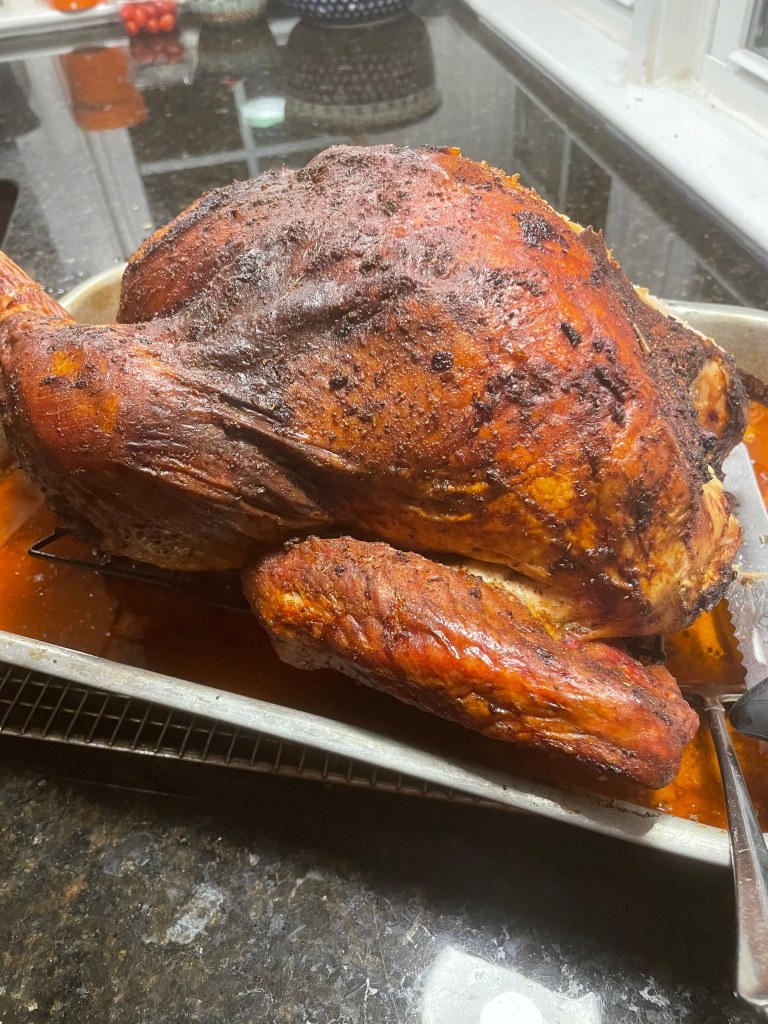
Perfect every time. And if you have a convection setting on your oven, even better. The skin will be crisp and tasty, the chicken will be perfectly done and as moist as can be.
You’re welcome.
And by the way, this goes double for a turkey (or triple, depending on the size of the bird (which I did, just before writing this entry). Just use a larger vessel for a turkey.
