Category Archives: Desserts
Meyer Lemon Marmalade
E posted a photo on her Pinterest page suggesting that Meyer lemon marmalade  is one of her favorite things, even as she spread a wonderful Trader Joe’s rendition of orange marmalade on her rosemary-olive-oil bread from Thom’s. Given that whatever E thinks is a “favorite thing” ought to be made a reality, I decided to make a batch of the jelled gold for her. Not a marmalade fan myself, I needed to learn how marmalade is made, and I discovered how simple it is.
So off to market I go, ISO ripe Meyer lemons. The good news is that I knew just where to find them–at John and Ethel Stoner’s little stand in the middle of our local jewel, the Lancaster Central Market.
The Meyer lemon, in case you’re not familiar with it, is rounder than a true lemon. The skin is fragrant and thin, colored a deep yellow with a slight orange tint when ripe. Meyer lemons have a sweeter, less acidic flavor than the more common supermarket lemon varieties. The Meyer lemon is commonly grown in China in garden pots as an ornamental tree. It became popular as a food item in the United States after being rediscovered by chefs such as Alice Waters at Chez Panisse in San Francisco at the end of the 1990s, and even more so when Martha Stewart began featuring them in her recipes.
Citrus marmalades are basically reductions of the fruit, water, and sugar, cooked slowly until the sugars begin to caramelize. Orange marmalade has been a staple of British and American breakfasts for generations, certainly around here. So the idea of Meyer lemon marmalade seemed like such a natural for us, given E’s sudden “pinterest” in the stuff and my constant desire to please her with surprising cooking choices.
Ergo Meyer lemon marmalade. Sweet, tart, and tasty, it’s wonderful on English muffins and any good artisan bread you can imagine.
Here’s my take:
Meyer Lemon Marmalade
Ingredients:
6 Meyer lemons (about 1 1/2 pounds)
4 cups water
4 cups sugar
Preparation:
Quarter the lemons and separate the seeds (save the seeds!). Remove the ends and slice the lemons as thinly as possible, and reslice any larger bits of lemon rind to small pieces. Place all the lemon seeds in a cheesecloth bag and tie off the ends. Combine the lemon slices, the seed bag, and water in a large non-reactive pot, stir to mix well, cover and allow to stand at room temperature for 24 hours. (I used an enamel-coated cast-iron pot–Le Creuset–but you could also use a stainless-steel pot. I actually have a favorite stainless-steel pot I will use in the future,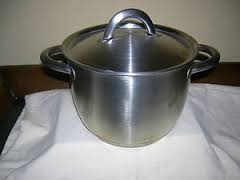 a $15.00 gem from Ikea. It holds five quarts, and has quart- and liter- markings etched ON THE INSIDE OF THE POT: BRILLIANT! This feature will work you your amazing advantage for this recipe, as you will see).
After the lemons have rested in the water for 24 hours, remove the seed bag and bring the mixture to a boil, reduce the heat and simmer slowly until the mixture is reduced to 4 cups (or 1 quart! See why the inside-the-pot etchings on the Ikea pot are so terrific for this recipe?). Add the sugar to the lemons, stir well to dissolve the sugar, and boil over moderate heat, stirring occasionally and skimming off any foam that develops, for 15-20 minutes, until a teaspoonful of the marmalade dropped on a cold plate gels (you can skip this test if you wish, it really works).
In the meantime, prepare six 1/2-pint jars for canning: wash and rinse the jars, lids, and rings, set them in a large pot of water and bring to a boil; allow the jars to simmer at a slow boil for 30 minutes, then turn the fire off under the pot.
When the marmalade is ready, ladle hot marmalade into the hot jars to within 1/4 inch of the rim, wipe the rim of the jar with a damp towel, and seal the jars with the hot lids and rings. Set the jars back into the hot water, bring to a boil, cover the pot and boil the jars for ten minutes, then turn off the heat, remove the cover, and allow to rest in the hot water five minutes more. Using jar tongs, transfer the jars to a wire rack and allow the marmalade to cool completely, then rest unmoved for twenty-four hours. Check to ensure that the lids have popped inward and the jars have sealed. If any jars haven’t popped, refrigerate them and use immediately. The sealed jars will keep in a cool, dark place for 1 year.
Next batch I’ll make will include 1 teaspoon of finely chopped fresh rosemary.
Just sayin’.
Mexican Chocolate Slice-and-Bake Cookies Recipe
Ellen found this recipe online. We made the cookies to pack in kids’ lunches. The recipe is extraordinary, and simple, too. Follow the instructions to the letter; they’re perfect. And so are the cookies!
What sets Mexican chocolate apart is the addition of cinnamon and sometimes other spices. It can be difficult to find, though, so we made our own custom blend of cocoa powder, cinnamon, and a touch of cayenne to add to this cookie dough. Form the dough into logs, refrigerate, and then slice-and-bake whenever you’re in the mood for a cookie with a deep, chocolaty flavor and a little kick of spiciness at the end.
Game plan: The dough logs can be frozen for up to a month—just wrap the plastic-covered logs tightly in aluminum foil before freezing. Thaw in the refrigerator overnight before slicing and baking.

- 1 1/2 cups all-purpose flour
- 1/2 cup Dutch-process cocoa powder
- 1 teaspoon baking powder
- 1/2 teaspoon ground cinnamon
- 1/4 teaspoon cayenne pepper
- 1/4 teaspoon fine salt
- 8 tablespoons unsalted butter (1 stick), at room temperature
- 1/2 cup packed light brown sugar
- 1/2 cup granulated sugar
- 1 large egg, at room temperature
- 1/2 teaspoon vanilla extract
- Whisk together the flour, cocoa powder, baking powder, cinnamon, cayenne, and salt in a medium bowl to break up any lumps; set aside.
- Place the butter and sugars in the bowl of a stand mixer fitted with a paddle attachment and beat on medium speed until lightened in color and fluffy, about 3 minutes. Stop the mixer and scrape down the sides of the bowl and the paddle with a rubber spatula.
- Return the mixer to medium speed, add the egg and vanilla, and beat until just incorporated. Stop the mixer and scrape down the sides of the bowl and the paddle with the rubber spatula.
- Turn the mixer to low speed and slowly add the reserved flour mixture. Mix until just incorporated.
- Turn the dough out onto a clean work surface and divide it in half. Roll each portion into a log about 1 1/2 inches in diameter. Wrap each log tightly in plastic wrap and refrigerate until firm, at least 2 hours and up to 3 days.
- When ready to bake the cookies, heat the oven to 350°F and arrange the racks to divide the oven into thirds.
- Remove the dough logs from the refrigerator, remove the plastic wrap, and slice the dough into 1/4-inch-thick rounds. Place the rounds about 1/2 inch apart on 2 baking sheets (about 20 cookies per sheet).
- Bake both sheets for 6 minutes. Rotate the baking sheets front to back and top to bottom and bake until the edges of the cookies are firm but the tops are still soft, about 6 to 7 minutes more.
- Place the baking sheets on wire racks and let cool for 5 minutes. Using a flat spatula, transfer the cookies to the wire racks to cool completely. Store in an airtight container at room temperature for up to 3 days.
SOURCE: http://www.chow.com/recipes/30524-mexican-chocolate-slice-and-bake-cookies
Caitlin’s Chocolate Beet Cake from the Blue Rock Farm
In my last post I waxed poetic about the Blue Rock Farm in Willow Street. Now, Caitlin Brady sends me this recipe for a sweet and tasty chocolate cake made with chocolate and beets. It’s incredibly rich, and you may never go back to “normal” chocolate cake again.
Caitlin’s Chocolate Beet Cake with Beet Cream Cheese Frosting
Makes one 8 or 9-inch 2 layer cake
Ingredients: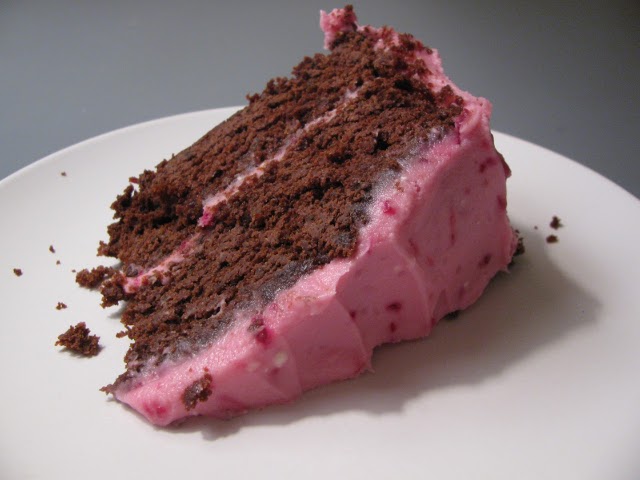
For the Cake:
2 medium beets, unpeeled and trimmed of their greens
1 teaspoon vegetable oil
6 ounces (3/4 cup) unsalted butter, softened, plus more for the pans
1 cup packed brown sugar
3/4 cup granulated sugar
2 large eggs
1 teaspoon pure vanilla extract
2 cups all-purpose flour, plus more for dusting the pans
2/3 cup unsweetened cocoa powder
1 teaspoon baking soda
1/2 teaspoon baking powder
1 teaspoon salt
1 1/4 cups buttermilk
For the Frosting:
1 cup (2 sticks) unsalted butter, softened
8 ounces (1 brick) cream cheese, softened
4 to 5 cups powdered sugar, sifted
2 tablespoons finely grated beets, mashed with a fork
1 teaspoon pure vanilla extract
1-2 teaspoons milk, depending on desired consistency
1/2 teaspoon fresh lemon juice
pinch of salt
Preparation:
Place a rack in the center of the oven. Preheat oven to 350 degrees F. Wash beets under running water, and trim their leaves. Place clean beets in a piece of foil and drizzle with just a bit of vegetable oil. Seal foil and place on a baking sheet in the oven. Roast until beets are tender when pierced with a knife, about 1 hour. Remove the beets from the oven and allow to cool completely.
Using a box grater, grate the peeled beets on the finest grating plane. Measure 3/4 cup of grated beets for the cake and 2 tablespoons for the frosting. Set aside. Use butter to grease two 8 or 9-inch round baking pans. Add a dusting of flour to coat the pan. Set pans aside while you prepare the cake.
In the bowl of an electric stand mixer, cream together butter and sugars. Beat on medium speed until pale and fluffy, about 3 to 5 minutes. Beat in eggs, one at a time, for one minute after each addition. Stop the mixer and scrape down the sides of the bowl as necessary. Once eggs are incorporated, beat in beets and vanilla extract until thoroughly combined. In a medium bowl, whisk together flour, cocoa powder, baking soda, baking powder, and salt.
Add half of the dry ingredients to the butter and egg mixture. Beating on low speed , slowly add the buttermilk. Once just incorporated, add the other half of the dry ingredients. Beat on medium speed until milk and dry ingredients are just incorporated. Try not to overmix the batter. Bowl can be removed from the mixer. and mixture folded with a spatula to finish incorporating ingredients. Cake batter will be on the thick side… not pourable.
Divide the batter between the two prepared cake pans. Bake for 23 to 25 minutes (for a 9-inch pan) or 30-32 minutes (for an 8-inch pan). Cake is done when a skewer inserted in the center comes out clean. Remove cakes from the oven and allow to rest for 10 minutes. Invert cakes onto a cooling rack to cool completely before frosting and assembling the cake.
To make the frosting:
In the bowl of an electric stand mixer, beat cream cheese for 30 seconds, until smooth. Add the butter and beat for another 30 seconds, until well combined. Beat in the beets. Add the powdered sugar, vanilla extract, milk, lemon juice, and salt. Beat on medium speed until smooth. Refrigerate the frosting for 30 minutes before frosting the cooled cakes.
To assemble the cake, place one layer of cake on a cake stand or cake plate. Top with a generous amount of pink frosting. Spread evenly. Place the other cake on top of the frosting. Top with frosting. Work frosting onto the sides of the cake. Refrigerate for an hour before serving.
Baked Arborio Rice Pudding
In response to another comment, I have taken the principle of baked rice one step further, and produced, via one of my favorite recipe sources, a perfect dessert: baked rice pudding. Comfort food as good as good can be. The key to this recipe is Arborio rice, the same stuff that you use to make risotto. Good with long-grain white rice. With Arborio? Orgasmic. You owe it to yourself to do this one for a loved one. I promise results.
Ingredients:
4 cups whole or 2-percent milk (come on, folks. Use high test!)
1/3 cup Arborio rice
¼ cup brown sugar
½ cup golden raisins, soaked in Amaretto for ½ hour, then drained (optional, but incredible—if you don’t have Amaretto, replace with ½ teaspoon almond extract mixed into ½ cup warm water)
2 tablespoons butter, divided
2 tablespoons Demerara sugar (Google it! Then find it!)
Preparation:
- Preheat the oven to 350 degrees F.
- Lightly coat an 8×8 square or 9-inch round baking dish with 1 tablespoon butter
- Pour milk into baking dish. Add rice, brown sugar, and butter; stir gently.
- Place on the center rack of preheated oven. Bake 2 hours, stirring gently every 10 – 15 minutes (this is important—if you don’t, the dish will form a skin and the skin will burn.
- Remove from oven and sprinkle Demrerara sugar over the baked rice.
Serve immediately with soft vanilla gelato or (yawn!) ice cream.
Wow!
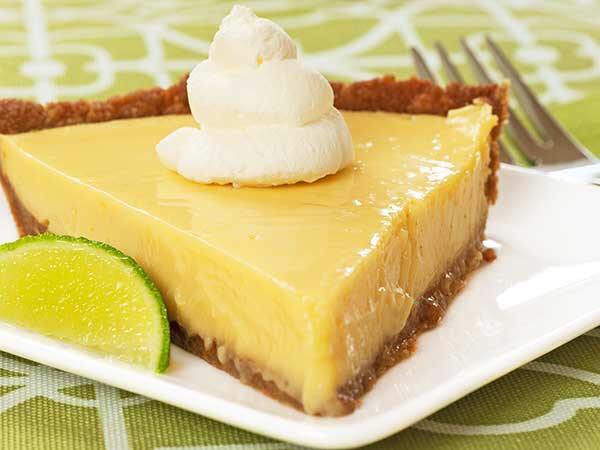
Key Lime Pie with Gluten-Free Crust
I’m placing this recipe on the blog for the second time for an extremely good reason. It was requested again, and what was requested this time was a gluten-free crust recipe. So, being Chefzilla, I decided to give you two, which will follow, after the original recipe. This is the best dessert on the planet (chocolate included). It is the recipe used by a famous restaurant in South Beach, which is famous for its Key Lime Pie. I made those pies for them for many years, so I know 1) that it’s good; and 2) that this is the right recipe; even their web site gives you a different recipe, because they don’t want you to have the real one.
So, try this recipe, and if you need to make a gluten-free crust, use one of the two that follow, whichever one appeals to you. They’re different, but both terrific.
Chefzilla’s Key Lime Pie
Crust:
3/4 cup of Grahm cracker crumbs
3/4 cup toasted pecans chopped fine
1/4 cup light brown sugar
1 stick of melted butter (use margarine and I’ll take this recipe back!).
Filling:
5 room temperature egg yolks
2-14 oz. cans sweetened condensed milk. I use fat-free, and my family can’t tell the difference.
1/2 cup FRESH SQUEEZED lemon juice
1/2 cup FRESH SQUEEZED lime juice
grated zest of 1 lime
1. Preheat oven to 350 degrees.
2. For the crust, combine the cracker crumbs, chopped nuts and butter in a 9-inch straight sided pie plate. Pat firmly and shape the crust a half-inch up the sides of the pie plate.
3. Bake for 15 minutes or until the crust begins to brown on the edges of the sides. Allow to cool to room temperature.
4. Combine all the filling ingredients until they are well mixed. Pour into the crust.
5. Bake the pie for 15 minutes. Remove from oven and cool to room temperature.
6. Cover with plastic wrap, patting down so that the wrap is in contact with the pie surface, and freeze the pie for at least six hours, and preferably overnight.
7. Remove the pie from the freezer 1 half hour before serving. NO MORE!!!!!
8. Serve with a big dollop of fresh-made whipped cream. DO NOT USE READY WHIP OR MERENGUE. PLEASE!!
9. Serve to someone who will repay you handsomely for the most incredible treat you have ever prepared. They will respond, “Damn, this is the best key lime pie I ever ate. It’s better than any I ever got in a restaurant.
Gluten-Free Pie Crust #1
Ingredients:
¾ cup Pamela’s Pecan Shortbread cookies, crushed
¾ cup pecans, toasted and chopped fine
1 stick butter, softened
Preparation:
Mix the crushed cookies and chopped pecans with the butter until the whole mess sticks together and can be pressed flat into a 9″ pie pan or springform pan, with the crust coming up the sides about a half inch. Preheat oven to 325 and bake this crust only for about 5 to 10 minutes, until it just begins to turn brown; then remove from the oven and cool. Pour in the filling and finish the pie as directed above.
Gluten-Free Pie Crust # 2
Ingredients:
1 cup crushed Pamela’s Lemon Shortbread cookies, crushed
2 tablespoons light brown sugar
½ cup sweetened shredded coconut
1 stick butter, softened.
Preparation:
Process the cookies and brown sugar until they are fine crumbs. Sprinkle the coconut evenly over the crumbs and pour in the melted butter. Pulse a few times until blended. Turn the crumb into a 9-inch pie pan or springform pan and press flat and up the sides about a half inch. Bake 5-10 minutes until lightly browned. Remove from the oven and allow to cool completely. Pour in the pie filling and complete the pie as directed above.
YUM!!!
Thanksgiving With a Lighter Touch
For anyone watching their weight, Thanksgiving has become a day filled with potential pitfalls and dietary disappointments. The original Pilgrim celebration of gratitude for having enough food to survive the coming winter has evolved into an all-day, all-you-can-eat extravaganza. Many families spend the day parked on their couches, watching parades followed by football, snacking whether they are hungry or not, before sitting down to an enormous meal.
Contrary to popular opinion, it is possible to prepare and serve a light, healthy Thanksgiving dinner without depriving your guests of their traditional favorites or letting them go hungry. By making a few simple changes to your menu, it is easy to make a meal you and your guests will enjoy and remember, without the morning-after regret that too often accompanies this special day
Suggestion One: Cut the fat.
The centerpiece of Thanksgiving dinner is almost certainly the turkey, which is an easy place to cut fat without cutting flavor. Unless you are entertaining a dozen or more people, a turkey breast may be a better choice than a whole turkey. White meat is far leaner than dark meat, and turkey cooked on a grill (breast or whole bird) will release much of its internal fat during the cooking process. Brining a turkey can compensate for any moisture lost through decreasing the fat. This recipe is for a 12-15 pound turkey. If you have a larger turkey, double the brine recipe.

Grilled turkey
Ingredients:
Brine:
1 gallons water
1 ½ cups apple cider
¾ cup kosher salt
1 cups brown sugar
2-3 bay leaves
2 branches fresh rosemary, stripped from the branch
5-10 whole pepper corns
2-3 cloves fresh garlic
Peel of 1 navel orange, coarsely chopped
Preparation:
The day before cooking, bring one-half gallon of water and all other ingredients to a brisk boil; immediately turn off the heat, cover and allow the brine to cool to room temperature. Half way through the cooling process, add the remaining half-gallon of cold water.
When the brine is completely cooled, place the turkey, breast side down, in a brining bag, a food-grade bucket or large soup pot. Pour the brine over the turkey and refrigerate covered for 8-16 hours, turning the turkey over two-thirds of the way through. Leaving the turkey in the brine for more than 16 hours may leave the turkey mushy when finished.
Before cooking, remove the turkey from the brine and pat dry.
Dry Rub:
2 tablespoons kosher salt
1 1/2 teaspoons finely ground white pepper
2 tablespoons granulated garlic
1 tablespoon ground ginger
1 teaspoon Bell’s poultry seasoning
1 teaspoon smoked paprika
Olive oil in a spray can
Preparation:
Start with a dry rub. Wash the turkey and pat dry. Rub the turkey inside and out with this rub or any favorite combination of spices. Spray the turkey with the olive oil, then place it, unstuffed, on the grill with the coals or burners not directly underneath. Include a pan to catch the drippings. Cook the turkey until the legs can be jiggled loosely from the thighs, (180°F on a thermometer inserted into the thigh) or in the case of a breast, until a meat thermometer inserted deep into the meat (but not touching the bone) reads 180° F. Remove the turkey from the grill, cover with foil, and allow to rest 15 minutes before carving.
Suggestion Two: Slow down and enjoy the company.
Many families load the Thanksgiving table with multiple options for entrees and side dishes. Dinner begins with the circulation of bowls and platters around the table, allowing each guest to take their portion before passing it on. By the time everyone is served, the food is cold and everyone is tired of waiting to eat.
By serving Thanksgiving dinner in courses, it is easy to fill up on low-calorie, vegetable-based dishes before confronting the tempting entrees and side dishes. An added benefit will be the wonderful conversations your family and guests will have in between each course.
Start with a soup course (a corn soup is perfect for Thanksgiving), serving it in cups or small bowls. Then serve an autumn salad, made with butternut squash, cranberries, pumpkin seeds and fresh greens, with a tangy-creamy dressing.
Try these recipes, which use traditional ingredients that were used in the 1600s.

Curried Corn Soup
Ingredients:
2 tablespoons olive oil
½ cup finely chopped green bell pepper
½ cup finely chopped red bell pepper
¼ cup minced shallots
2 teaspoons curry powder
½ teaspoon kosher salt
3 cups fresh corn or one 16-ounce bag frozen corn, thawed
1 cup vegetable stock
½ teaspoon freshly ground pepper
3 cups soy milk, 2% milk or evaporated skim milk, divided
½ cup shredded reduced fat cheese, divided (optional)
Preparation:
Heat the oil in a large soup pot over medium-high heat. Add the bell peppers, stirring occasionally, until soft. Add the shallots and stir 2 minutes. Add the curry powder and salt, and stir to combine. Stir in the corn, stock, and pepper; bring to a boil, reduce the heat to medium, cover and cook ½ hour.
Transfer 2 cups of soup to a blender, add 1 cup milk, and process until smooth. Return the blended corn soup to the soup pot, add the remaining milk, and stir gently until the soup is hot.
Serve immediately, garnished with the optional cheese and some chopped chives or parsley.
Adapted from soyfoodcouncil.com

Roasted Squash Salad with Tahini Dressing
Ingredients:
1 medium butternut squash
Olive oil spray in a can
½ teaspoon paprika
4 tablespoons pumpkin seeds
¼ cup dried cranberries
8 ounces feta cheese, crumbled
2 tablespoons fresh parsley, chopped
2 cups spring mix
2 tablespoons plain Greek yogurt
1 ½ tablespoons tahini
2 tablespoons fresh lemon juice
1 small garlic clove, finely minced
½ cup boiling vegetable stock
Preparation:
Preheat the oven to 375°F. Peel the squash, halve, remove the seeds, and cut into 1-inch cubes. Lightly spray a roasting pan with olive oil, spread the squash on the pan, sprinkle with paprika, salt, and pepper, and spray with oil. Roast 35 minutes, stirring halfway through, until the squash is tender. Put the pumpkin seeds on baking sheet and bake for the last five minutes of the cooking time.
While the squash is roasting, make the dressing: whisk together the yogurt, tahini, lemon juice, and garlic. Slowly stir in 1-2 tablespoons stock, until the dressing reaches the consistency of buttermilk.
Plate the salad greens, top with the squash, pumpkin seeds, cranberries, feta cheese, and parsley, and sprinkle the dressing on top. Season with salt and pepper and serve immediately.
Adapted from redonline.co.uk
Suggestion Three: Limit options and focus on vegetables.
In order to make your dinner lighter and healthier, consider limiting the number of options you present your guests, featuring one or two interesting new recipes in which vegetables play the starring role rather than laying out the full cast of customary starchy favorites. No one needs stuffing, mashed potatoes and sweet potato casserole, after all. New flavors may encourage new behaviors, as serving old favorites can entice your guests to heap too-large portions on their plates simply because they are accustomed to doing so.
Here is a vegetable dish that is out of the ordinary, yet made with many of the familiar ingredients of traditional Thanksgiving dinners. It is easy to make, beautiful to serve, nutritious, and much more interesting than the customary green-bean casserole with cream of mushroom soup and canned onion rings. And so much better tasting!

Polenta Dome with Roasted Autumn Vegetables
Ingredients:
4 cups vegetable stock
1 ½ teaspoons salt
2 teaspoons olive oil
Olive oil spray in a can
2 cups diced onions
3 garlic cloves, minced or pressed
2 cups cornmeal
1 medium butternut squash, peeled, seeded, and shredded
1 tablespoon fresh sage, chopped (1 teaspoon dried)
2 teaspoon ground fennel seeds
½ teaspoon freshly ground black pepper
Preparation:
In a covered pot, bring the stock and 1 teaspoon salt to a boil. Spray a medium-sized mixing bowl.
While the stock heats, heat olive oil in a heavy skillet on medium heat. Cook the onions, garlic, and remaining salt for about 25 minutes, until the onions are caramelized. Stir the squash, sage, fennel, and pepper into the sautéed onions and cook for 3-4 minutes. Remove from heat and cover.
When the stock boils, gradually pour in the cornmeal, stirring vigorously. Reduce the heat until the thickening cornmeal simmers gently. Cook, stirring frequently, until the polenta is thick (but still pourable), adding hot water as necessary, and tastes done. Fine cornmeal cooks in a few minutes; courser meal takes longer. The consistency is key.
When the polenta is done, stir in the sautéed vegetables and cheese. Pour into the oiled bowl and set aside to cool for at least 30 minutes, until set.
About a half hour before serving, turn the cooled polenta dome onto a baking pan or ovenproof platter sprayed with olive oil and bake for 30 minutes, until hot. Serve on a bed of steamed spinach or Swiss chard and surround with toasted autumn vegetables.
Roasted Autumn Vegetables
Ingredients:
Marinade:
1/3 cup olive oil
2 tablespoons Balsamic vinegar
5 cloves garlic, minced
½ teaspoon kosher salt
¼ teaspoon freshly ground black pepper
1-2 teaspoons fresh rosemary or sage, chopped
Vegetables:
2 medium onions, peeled, cut into 8 pieces
1 cup baby carrots
2 sweet potatoes or ½ seeded butternut squash, cut into 1-inch pieces
1 red and 1 yellow bell pepper, cut to 2-inch squares
2 cup tiny patty pan squash or 2 medium zucchini, 1-inch slices, halved
8 ounces fresh whole cremini, baby portabella or white mushrooms, halved
6 firm, fresh plum tomatoes, halved
Preparation:
Preheat the oven to 425°F.
In a bowl mix together the marinade. Toss the hard vegetables (onions, carrots and potatoes) in the marinade, and spread on a baking sheet. Roast for 20 minutes, turning once. Toss the remaining vegetables in the marinade. Lower the heat to 400°F, place on a second baking sheet and roast another 20 minutes, turning once, and turning the hard vegetables again. Serve on a large platter around the polenta dome. Watch carefully that the vegetables don’t burn.
Adapted from Moosewood Restaurant Celebrates
Suggestion Four: Change Your Thinking about Stuffing and Gravy
Probably the most troublesome parts of the Thanksgiving meal for people endeavoring to eat light and healthy are the stuffing and the gravy. The notion that stuffing and gravy are integral to the meal is deeply ingrained in our consciousness. A simple way to cut some of the fat from stuffing is to bake it outside of the turkey. Likewise, traditional gravy can be made without calorie-laden pan drippings. Even better, try a new approach to stuffing and gravy altogether, replacing bread cubes with high-fiber whole grains such as quinoa or barley and combining interesting new flavors into an almost fat-free gravy.

Wild Mushroom Barley Stuffing
Ingredients:
2 tablespoons kosher salt, divided
1 ½ cups uncooked pearled barley
2 teaspoons olive oil, divided
1 medium onion, chopped
5 slices turkey bacon
2 small carrots, diced
1 pound fresh wild mushrooms, assorted varieties
2 cloves garlic, minced
2 tablespoons fresh thyme, minced
2 tablespoons fresh sage, chopped
¼ teaspoon freshly ground pepper
2 cups vegetable broth, heated to a simmer
1 tablespoons fresh parsley, chopped
Preparation:
Bring eight cups of water and 1 ½ teaspoons salt to a boil in a large saucepan; add barley. Cover, reduce the heat, and simmer until tender, about 30 minutes; drain.
Meanwhile, heat 1 teaspoon oil in a large pot over medium-high heat; add onion, bacon, and carrots. Cook, stirring often, until onion is lightly browned and almost tender, about five minutes. Add mushrooms and garlic; cook, stirring often, until the vegetables are tender, about five minutes more.
Stir in herbs, pepper, remaining salt and olive oil. Reduce heat to low, stir in broth and barley, toss to coat. Remove from heat, transfer to a serving bowl, and sprinkle with parsley.
From weightwatchers.com

Caramelized Onion Gravy
Ingredients:
2 teaspoons olive oil
6 cups thinly sliced sweet or Spanish onions
1 tablespoon sweet paprika
½ teaspoon salt
¼ teaspoon dried thyme or ¾ teaspoon fresh thyme, chopped
½ teaspoon fresh rosemary, minced
½ teaspoon dried marjoram
¼ teaspoon nutmeg
3 tablespoons dark soy sauce
2 cups vegetable broth
¼ cup dry sherry wine
2 tablespoons cornstarch
¼ teaspoon freshly ground pepper
Preparation:
Warm the oil in a large saucepan on medium-high heat. Add the onions and sauté for 2-3 minutes, until the onions are coated with oil. Add the paprika, salt, herbs, and nutmeg. Reduce the heat to medium and continue to cook, uncovered, stirring occasionally, for about 30 minutes, until the onions are limp and very brown. You should have about a generous cup of caramelized and very sweet onions.
Add the soy sauce, 1 ¾ cups broth, and the wine to the onions; bring to a simmer. Dissolve the cornstarch in the remaining broth and mix into the gravy in a slow but steady stream. Stir constantly until the gravy is thickened.
From Moosewood Restaurant Celebrates
Suggestion Five: Serve smaller plates and individual portions
A cherished part of Thanksgiving for many is filling one’s plate with heaps of good food. Slow everyone down a bit by serving your meal on smaller salad plates rather than dinner plates. Your guests will retain the pleasure of combining delicious foods together without committing themselves to more than they can – or should—eat in one sitting. If, by some chance, they are still hungry after cleaning their plate, they are welcome to come back for more.
 The same strategy works well with dessert. Instead of baking a pumpkin pie, bake the pumpkin custard (substituting egg whites and evaporated skim milk to lower the fat) in ramekins. Serve each guest their own portion with a ginger snap in a ramekin, saving them the fat and calories of the crust and the temptation to eat more dessert than they should.
The secret to losing weight or maintaining a healthy weight is to make a series of small changes and then be consistent in retaining those changes; but in the end, food and the experience of sharing a meal with loved ones should still be pleasurable. This Thanksgiving, try one or two of these tips to save yourself unnecessary fat and calories without losing any of the enjoyment of spending this special day with the people you love. Who knows? Maybe you will be creating new, healthier traditions for years to come.
Nutty Pumpkin Bread
 Here’s the pumpkin bread recipe I promised in my October 7 column. Morgan made it last week, and it’s wonderful. A great complement to a fall soup.
Ingredients:
1 1/2 cups all-purpose flour
1 12 cups whole wheat flour
1 cup wheat germ
1 cup white sugar
1 cup brown sugar
2 teaspoons baking soda
1 1/2 teaspoons salt
2 teaspoons ground cinnamon
1/2 teaspoon EACH ground ginger, nutmeg, and cloves
2 cups cooked pumpkin (1 14- to 16-oz. can)
1/2 cup unsweetened applesauce
4 eggs, lightly beaten
1/2 cup canola oil
1/2 cup chopped pecans
1 cup golden raisins
Preparation:
1. Soak the raisins 1/2 hour in warm water. Preheat the oven to 350 degrees Fahrenheit.
2. Combine the first nine ingredients (AP flour thru spices) in a large bowl, mix well, then form a well in the center of the mixture.
3. Add the remaining ingredients into the well of the dry mixture and combine gently until the dry ingredients are moist. Do not overmix.
4. Pour the batter into two 9x5x4 loaf pans that have been sprayed with baking spray or canola oil.
5. Bake until the tops are browned and a toothpick inserted into the center comes out clean, about 45 – 50 minutes. Cool the loafs on a wire rack for 10 minutes, then turn them out onto the rack to cool completely before serving.
Possible substitutions: Brown raisins or dried cranberries can be used instead of golden raisins; walnuts can be used in place of pecans, and cooked butternut squash can replace the pumpkin.
Serve with a nice thick, hot soup or toasted with butter or cream cheese, or just plain plain.
Yummy.
Apple Fritters from America’s Test Kitchen
Anyone who’s followed my work for any length of time knows my allegiance to America’s Test Kitchen, the kitchen/laboratory attached to my favorite cooking periodical,  Cooks Illustrated. My experience is that any recipe they post, if followed to the letter, produces the best product in any food class. I feature stuff from America’s Test Kitchen a lot, because I have come to trust their effort and their results. I have several recipes here in Jeff’s Kitchen that are ATK-tested and recommended, and a couple of notes about stuff that is not.
Today, we’re featuring ATK’s apple fritters. I’ve scoured the Internet and looked at hundreds of apple fritter recipes, and I can say, without worrying about the recommendation, that these are the best ones I’ve come across. There are some pretty good fritter recipes out there, including one that includes fresh orange zest (I may feature that one down the road), but in terms of foolproof, great-tasting, great-looking, these are the ones to try. If I have one quibble with this recipe (and I usually have no quibble with ATK), it is that I like to mix up a sweet apple with a tart apple, so I make mine with a mixture of Granny Smith and HoneyCrisp apples (when the HoneyCrisps are in season), or Gala apples when they’re not.
Ingredients
FRITTERS
- 2 Granny Smith apples , peeled, cored, and cut into 1/4-inch pieces
- 2 cups all-purpose flour
- 1/3 cup granulated sugar
- 1 tablespoon baking powder
- 1 teaspoon Salt
- 1 teaspoon ground cinnamon
- 1/4 teaspoon ground nutmeg
- 3/4 cup apple cider
- 2 large eggs , lightly beaten
- 2 tablespoons unsalted butter , melted
- 3 cups peanut or vegetable oil
GLAZE
- 2 cups confectioners’ sugar
- 1/4 cup apple cider
- 1/2 teaspoon ground cinnamon
- 1/4 teaspoon ground nutmeg
Instructions
- 1. Spread prepared apples in single layer on paper towel–lined baking sheet and pat thoroughly dry with paper towels. Combine flour, granulated sugar, baking powder, salt, cinnamon, and nutmeg in large bowl. Whisk cider, eggs, and melted butter in medium bowl until combined. Stir apples into flour mixture. Stir in cider mixture until incorporated.
- 2. Heat oil in Dutch oven over medium-high heat to 350 degrees. Following step 1, use 1/3-cup measure to transfer 5 heaping portions of batter to oil. Press batter lightly with back of spoon to flatten. Fry, adjusting burner as necessary to maintain oil temperature between 325 and 350 degrees, until deep golden brown, 2 to 3 minutes per side. Transfer fritters to wire rack set inside rimmed baking sheet. Bring oil back to 350 degrees and repeat with remaining batter. Let fritters cool 5 minutes.
- 3. Meanwhile, whisk confectioners’ sugar, cider, cinnamon, and nutmeg in medium bowl until smooth. Top each fritter with 1 heaping tablespoon glaze. Let glaze set 10 minutes. Serve.
Jacques Pepin’s Apple Fritters
Here’s the simple approach to making killer apple fritters, the full monty, system-killer variety. You can try it difficult or you can try it simple. I prefer simple.
When I was the producer of the Larry King show in Washington, D.C., I had the pleasure of meeting Jacques Pepin, and then interviewing him several times. Each time he brought wonderful foods with him to share with us and to talk about. It being radio, it was pointless to demonstrate cooking techniques, so rather he simply brought with him those things about which he would talk, and let our enthusiasm for the food carry the narrative. Needless to say, he was one of our most requested guests. Radio carries with it such a strong component of conjuring up visions in each listener’s imagination that a wonderful man like Jacques and his sensory-overload recipes played incredibly well on the radio. Try to imagine Jacques Pepin discussing the making of apple fritters in his inimitable charming French accent and his over-the-top personality.
Serves 4 to 6 (makes about 12 fritters)
Apple fritters sprinkled with confectioners’ sugar and eaten piping hot are simplicity itself. The fruit can be cut into sticks or slices or fan shapes and dipped into the batter and fried, or it can be coarsely chopped or cut into julienne.
If you are making the fritters ahead, be sure to cook them until they are crisp and well browned. Then reheat and recrisp them in a toaster oven or under the broiler just before serving them heavily dusted with sugar.
1 cup all-purpose flour
1 large egg
1 cup ice-cold water
1 pound apples (any variety; about 3)
1 cup canola oil
½ cup confectioners’ sugar
Vigorously mix the flour, egg, and 1/3 cup of the water in a bowl with a whisk. The mixture will be fairly thick. When it is smooth, add the remaining
2/3 cup water and mix again until the water is incorporated and the batter is thin and smooth.
One at a time, stand the unpeeled apples upright on a cutting board and cut each one vertically into 1/2-inch-thick slices, stopping when you reach the core; pivot the apple and cut again, and repeat until only the core remains. Stack the apple slices and cut them into 1/2-inch-thick sticks. (You should have 4 cups.) Stir the apple sticks into the batter.
Heat the oil in a large heavy skillet. When it is hot, pour about 1/3 cup of the batter into the pan for each fritter, making 4 or 5 at a time. Using two forks, spread the batter out so the fritters are no more than 1/2 inch thick. Cook for about 4 minutes on one side, until brown and crisp, then turn and cook for about 3 minutes on the other side. Drain the fritters on a wire rack. Repeat with the rest of the batter. Sprinkle the fritters liberally with the sugar and serve.
Why I’m Here…
 Why I’m here…
Welcome to Jeff’s Kitchen. Inspired by friends who have sampled my cooking and by my years working at the famous gourmet shop in South Beach, this is the place where I will post those fabulous recipes we all know and love–or simply something that just moves me–along with a picture, a story, an event, a person, place or thing, or whatever I feel the need to unload. The operative pieces of equipment here are my brain, a saute’ pan, a piping bag, and the desire to make the world better because of the food I–WE–prepare with our own two hands.
Tell Me Why…
But this isn’t just about me. I want to hear from you! Don’t just post. Tell me a story. Tell me where you found the recipe, tell me what appeals to about it, tell me who you dazzled with your best moves in the kitchen (or elsewhere–as long as food is involved). I’m not just the best virtual chef you know, but also a pretty good storyteller. But I want to know yours. I do like stories with my recipes, and storytellers in the kitchen. Join me in the fun.
And if this isn’t enough to whet your whistle, Here’s the best damn Key lime pie recipe on the planet. I got this from an old guy who ran a donut shop on Key Largo, a weathered old guy who looked like he just stepped out of a Carl Hiaasen novel; he shack where he made and sold the donuts looked even worse. On any day, between the hours of six and ten a.m., he sold more Key lime-filled donuts out of that rundown shack, on the southbound side of A1A, than all the donuts sold at the local Dunkin’ Donuts down the road. He gave us the recipe–a long-held family recipe–in trade for a six-year-old Harley Softtail. He wouldn’t give it up for anything less. We turned this recipe into a legendary sweet-tart pie, which we’ve been selling at our place, and at a world-famous South Beach crab house, for more than fifty years. The pie has become the signature dessert for that crab house. It’s our recipe. We made it for them. To use with their own name attached to it. And I saw it on The Food Network.
And now, You can make it yourself. DO IT! And then, write me. Tell me the story about the results. That’s what Jeff’s Kitchen is all about. Let’s share our best recipes and make this the coolest food place on the planet. Or any planet.
Thanks,
Cheffzilla
Chefzilla’s Key Lime Pie
Ingredients:
Crust:
1 cup of Grahm cracker crumbs
1/2 cup toasted pecans chopped fine. (If you’re allergic to nuts, sub more GC crumbs)
1/2 cup white sugar
1 stick of melted butter (use margarine and I’ll take this recipe back!).
Filling:
5 room temperature egg yolks
2-14 oz. cans sweetened condensed milk. (You can use fat-free SCM if you must, but PULEEZE!!!)
1/2 cup FRESH SQUEEZED lemon juice
1/2 cup FRESH SQUEEZED Persian lime juice (you could use 1 cup of fresh key lime juice in place of the lemon and lime juices, but the world-famous restaurant doesn’t–they’re tiny, hard to find, very hard to work with, and you won’t know the difference)
Grated zest of 1 lime
Whipped cream:
2 cups heavy whipping cream
2 tablespoons 10X confectioners’ sugar
1/2 teaspoon pure vanilla extract
Preparation:
1. Preheat oven to 350 degrees F. Line the bottom tray of a 9-inch springform pan with parchment paper, secure the tray, and trim away the excess paper. Brush the paper and sides of the pan lightly with a bit of the melted butter.
2. For the crust, combine the graham cracker crumbs, chopped nuts, sugar, and the remaining butter in a medium bowl, until well blended. Place in the springform pan. Pat firmly and shape the crust on the bottom and a half-inch up the sides of the pan.
3. Bake for 12-15 minutes or until the crust begins to brown on the edges of the sides. Allow the crust to cool to room temperature before resuming the recipe.
5. Combine all of the filling ingredients until they are well mixed. Pour into the crust.
6. Bake the pie for 15 minutes. Remove from oven and cool to room temperature.
7. Smooth plastic wrap onto the cooled filling, and freeze the pie for at least six hours, and preferably overnight.
8. Remove the pie from the freezer 15 – 20 minutes before serving. NO MORE!!!!!
9. Serve with a big dollop of fresh-made whipped cream (whip the ingredients in a very cold metal bowl until stiff peaks form, but don’t overbeat, or you’ll make sweet butter). DO NOT USE READY WHIP OR MERENGUE. PLEASE!!
10. Serve to someone who will repay you handsomely for the most incredible treat you have ever prepared. They will respond, “Damn, this is the best key lime pie I ever tasted. It’s better than any I ever had in a restaurant.”
11. Duh!!!
