Blog Archives
Meyer Lemon Marmalade
E posted a photo on her Pinterest page suggesting that Meyer lemon marmalade  is one of her favorite things, even as she spread a wonderful Trader Joe’s rendition of orange marmalade on her rosemary-olive-oil bread from Thom’s. Given that whatever E thinks is a “favorite thing” ought to be made a reality, I decided to make a batch of the jelled gold for her. Not a marmalade fan myself, I needed to learn how marmalade is made, and I discovered how simple it is.
So off to market I go, ISO ripe Meyer lemons. The good news is that I knew just where to find them–at John and Ethel Stoner’s little stand in the middle of our local jewel, the Lancaster Central Market.
The Meyer lemon, in case you’re not familiar with it, is rounder than a true lemon. The skin is fragrant and thin, colored a deep yellow with a slight orange tint when ripe. Meyer lemons have a sweeter, less acidic flavor than the more common supermarket lemon varieties. The Meyer lemon is commonly grown in China in garden pots as an ornamental tree. It became popular as a food item in the United States after being rediscovered by chefs such as Alice Waters at Chez Panisse in San Francisco at the end of the 1990s, and even more so when Martha Stewart began featuring them in her recipes.
Citrus marmalades are basically reductions of the fruit, water, and sugar, cooked slowly until the sugars begin to caramelize. Orange marmalade has been a staple of British and American breakfasts for generations, certainly around here. So the idea of Meyer lemon marmalade seemed like such a natural for us, given E’s sudden “pinterest” in the stuff and my constant desire to please her with surprising cooking choices.
Ergo Meyer lemon marmalade. Sweet, tart, and tasty, it’s wonderful on English muffins and any good artisan bread you can imagine.
Here’s my take:
Meyer Lemon Marmalade
Ingredients:
6 Meyer lemons (about 1 1/2 pounds)
4 cups water
4 cups sugar
Preparation:
Quarter the lemons and separate the seeds (save the seeds!). Remove the ends and slice the lemons as thinly as possible, and reslice any larger bits of lemon rind to small pieces. Place all the lemon seeds in a cheesecloth bag and tie off the ends. Combine the lemon slices, the seed bag, and water in a large non-reactive pot, stir to mix well, cover and allow to stand at room temperature for 24 hours. (I used an enamel-coated cast-iron pot–Le Creuset–but you could also use a stainless-steel pot. I actually have a favorite stainless-steel pot I will use in the future,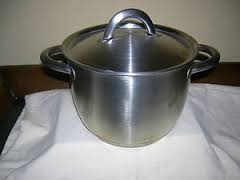 a $15.00 gem from Ikea. It holds five quarts, and has quart- and liter- markings etched ON THE INSIDE OF THE POT: BRILLIANT! This feature will work you your amazing advantage for this recipe, as you will see).
After the lemons have rested in the water for 24 hours, remove the seed bag and bring the mixture to a boil, reduce the heat and simmer slowly until the mixture is reduced to 4 cups (or 1 quart! See why the inside-the-pot etchings on the Ikea pot are so terrific for this recipe?). Add the sugar to the lemons, stir well to dissolve the sugar, and boil over moderate heat, stirring occasionally and skimming off any foam that develops, for 15-20 minutes, until a teaspoonful of the marmalade dropped on a cold plate gels (you can skip this test if you wish, it really works).
In the meantime, prepare six 1/2-pint jars for canning: wash and rinse the jars, lids, and rings, set them in a large pot of water and bring to a boil; allow the jars to simmer at a slow boil for 30 minutes, then turn the fire off under the pot.
When the marmalade is ready, ladle hot marmalade into the hot jars to within 1/4 inch of the rim, wipe the rim of the jar with a damp towel, and seal the jars with the hot lids and rings. Set the jars back into the hot water, bring to a boil, cover the pot and boil the jars for ten minutes, then turn off the heat, remove the cover, and allow to rest in the hot water five minutes more. Using jar tongs, transfer the jars to a wire rack and allow the marmalade to cool completely, then rest unmoved for twenty-four hours. Check to ensure that the lids have popped inward and the jars have sealed. If any jars haven’t popped, refrigerate them and use immediately. The sealed jars will keep in a cool, dark place for 1 year.
Next batch I’ll make will include 1 teaspoon of finely chopped fresh rosemary.
Just sayin’.
Why I’m Here…
 Why I’m here…
Welcome to Jeff’s Kitchen. Inspired by friends who have sampled my cooking and by my years working at the famous gourmet shop in South Beach, this is the place where I will post those fabulous recipes we all know and love–or simply something that just moves me–along with a picture, a story, an event, a person, place or thing, or whatever I feel the need to unload. The operative pieces of equipment here are my brain, a saute’ pan, a piping bag, and the desire to make the world better because of the food I–WE–prepare with our own two hands.
Tell Me Why…
But this isn’t just about me. I want to hear from you! Don’t just post. Tell me a story. Tell me where you found the recipe, tell me what appeals to about it, tell me who you dazzled with your best moves in the kitchen (or elsewhere–as long as food is involved). I’m not just the best virtual chef you know, but also a pretty good storyteller. But I want to know yours. I do like stories with my recipes, and storytellers in the kitchen. Join me in the fun.
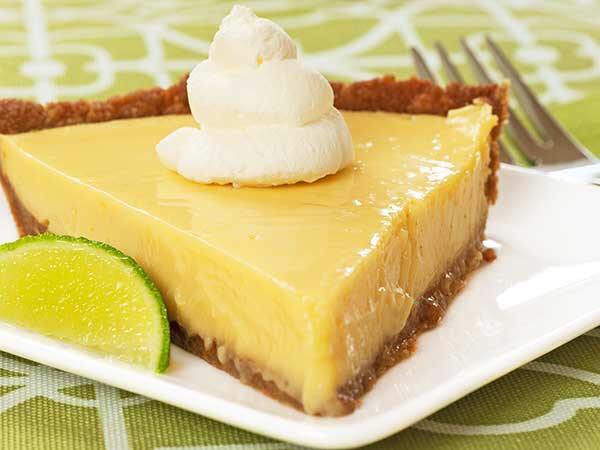
And if this isn’t enough to whet your whistle, Here’s the best damn Key lime pie recipe on the planet. I got this from an old guy who ran a donut shop on Key Largo, a weathered old guy who looked like he just stepped out of a Carl Hiaasen novel; he shack where he made and sold the donuts looked even worse. On any day, between the hours of six and ten a.m., he sold more Key lime-filled donuts out of that rundown shack, on the southbound side of A1A, than all the donuts sold at the local Dunkin’ Donuts down the road. He gave us the recipe–a long-held family recipe–in trade for a six-year-old Harley Softtail. He wouldn’t give it up for anything less. We turned this recipe into a legendary sweet-tart pie, which we’ve been selling at our place, and at a world-famous South Beach crab house, for more than fifty years. The pie has become the signature dessert for that crab house. It’s our recipe. We made it for them. To use with their own name attached to it. And I saw it on The Food Network.
And now, You can make it yourself. DO IT! And then, write me. Tell me the story about the results. That’s what Jeff’s Kitchen is all about. Let’s share our best recipes and make this the coolest food place on the planet. Or any planet.
Thanks,
Cheffzilla
Chefzilla’s Key Lime Pie
Ingredients:
Crust:
1 cup of Grahm cracker crumbs
1/2 cup toasted pecans chopped fine. (If you’re allergic to nuts, sub more GC crumbs)
1/2 cup white sugar
1 stick of melted butter (use margarine and I’ll take this recipe back!).
Filling:
5 room temperature egg yolks
2-14 oz. cans sweetened condensed milk. (You can use fat-free SCM if you must, but PULEEZE!!!)
1/2 cup FRESH SQUEEZED lemon juice
1/2 cup FRESH SQUEEZED Persian lime juice (you could use 1 cup of fresh key lime juice in place of the lemon and lime juices, but the world-famous restaurant doesn’t–they’re tiny, hard to find, very hard to work with, and you won’t know the difference)
Grated zest of 1 lime
Whipped cream:
2 cups heavy whipping cream
2 tablespoons 10X confectioners’ sugar
1/2 teaspoon pure vanilla extract
Preparation:
1. Preheat oven to 350 degrees F. Line the bottom tray of a 9-inch springform pan with parchment paper, secure the tray, and trim away the excess paper. Brush the paper and sides of the pan lightly with a bit of the melted butter.
2. For the crust, combine the graham cracker crumbs, chopped nuts, sugar, and the remaining butter in a medium bowl, until well blended. Place in the springform pan. Pat firmly and shape the crust on the bottom and a half-inch up the sides of the pan.
3. Bake for 12-15 minutes or until the crust begins to brown on the edges of the sides. Allow the crust to cool to room temperature before resuming the recipe.
5. Combine all of the filling ingredients until they are well mixed. Pour into the crust.
6. Bake the pie for 15 minutes. Remove from oven and cool to room temperature.
7. Smooth plastic wrap onto the cooled filling, and freeze the pie for at least six hours, and preferably overnight.
8. Remove the pie from the freezer 15 – 20 minutes before serving. NO MORE!!!!!
9. Serve with a big dollop of fresh-made whipped cream (whip the ingredients in a very cold metal bowl until stiff peaks form, but don’t overbeat, or you’ll make sweet butter). DO NOT USE READY WHIP OR MERENGUE. PLEASE!!
10. Serve to someone who will repay you handsomely for the most incredible treat you have ever prepared. They will respond, “Damn, this is the best key lime pie I ever tasted. It’s better than any I ever had in a restaurant.”
11. Duh!!!
