Category Archives: Uncategorized
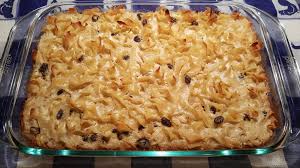
Epicure Market’s Famous Noodle Pudding
It’s a holiday classic!
The legend is that this was my grandmother’s signature recipe–the elusive Jennie Small-Thal-Robinson, mother of five and inspiration for everything that is/was the Epicure Market in Miami Beach, from the late 1940’s until its sad closing following the disastrous hurricane Irma, which ripped through South Beach in 2017. By that time the Epicure had passed into the hands of the LA deli kings Isaac Starkman and Jerry Seidman, the renowned Jerry’s Famous Deli, which had locations all over the LA metro.
The Epicure is gone, and now, and so, I believe are most, if not all, of the Jerry’s locations. But the Epicure had a long and loyal following, famous as one of the originators of cooked foods in grocery stores, which have become a staple of most stores now. I worked as a chef in one of the Miami Beach stores back in the 1970’s, and still use many of their most popular recipes, some of which have been published here, and are available through messaging–assuming I can remember any of them beyond the few I still regularly use.
This recipe for sweet noodle pudding was one of our most popular, and we made batches of 60 1-pound aluminum pans three days a week, and they never lasted in the display cases more than a day or two, so it was always fresh, as if you’d made it at home.
And now you can make it at home, exactly the same recipe we used back in the day, scaled down to family size. Because no one wants to make 60 pounds of noodle pudding at one time–except maybe some adventurous places that still cater to the deli crowd. But if you love a good sweet noodle kugel, this is the one to make. Here’s the plan…
Epicure’s Famous Noodle Pudding
Ingredients:
- 12-ounce bag wide egg noodles (I use No-Yolk)
- 1 tsp kosher salt
- 6 TBSP unsalted butter
- 4-ounces cream cheese, room temp
- 3/4 cup sugar
- 3 eggs
- 1 cup sour cream
- 1 lb. small-curd cottage cheese or ricotta
- 1 tsp pure vanilla extract
- ½ cup raisins, soaked in 1 cup hot water for ½ hour, then drained well
- 1 TBSP ground cinnamon
Preparation:
- Boil noodles in salted water for 7 minutes (no more!). Drain, return to pot and toss with 3 TBSP butter. Butter will melt.
- Preheat oven to 350℉.
- In a large bowl, combine cream cheese and 3 TBSP melted butter. Beat until smooth.
- Add eggs, sour cream, cottage cheese, vanilla, and raisins. Stir well until all the ingredients are well mixed. Add noodles and mix well.
- Generously butter a 9×13 glass baking dish (or 9×9 for a thicker kugel).
- Pour noodle mixture into the baking dish and jiggle the dish to smooth the top.
- Sprinkle cinnamon over the top.
- Bake in preheated oven for 50 to 60 minutes, until the kugel looks firm and the outer edges beginning to turn golden. Do not overbake. The kugel should jiggle a bit when first taken from the oven. It will tighten a bit as it cools, but should be moist and creamy in the center.
Garlic Season is Here!
I grow my own garlic.
Of course I do. I know, I know, obnoxious, right? Are you tired yet of reading about the stuff I do beyond the ordinary, the unusual stuff? I hope not.
I do it because I like trying different stuff, the things my cooking sensei, the extraordinary Martin Betonio, late of the Fountainbleau Hotel and the Epicure Market in Miami Beach, encouraged me to try—and occasionally fail—to make me a better and more rounded chef.
Martin was my spirit guide.
So…garlic…
First off, you should try it. Doesn’t take much space; my garlic patch is four feet by four feet, with about 50 fragrant hard-neck heads, due to harvest in mid to late June. With very little effort. And there’s plenty of sources of seed garlic, at your local garden center or on the Internet. And do a little bit of research. Just a little, and don’t be afraid.
Simply jam a bunch of seed cloves about six inches deep into composted soil about six to eight weeks before the ground freezes (I’m in central PA), cover with soil and lots of mulch; I use a straw bale, plentiful and cheap in late fall. The cloves will sprout leaves; leave ’em be. Then wait till spring. A couple of feedings with blood meal and lots of spring rain, and before you know it, it’s garlic season.
Can’t wait till late June? It’s still April here, and any day now the scapes will appear. Scapes, you say? What’s that? The scapes are the plant’s flower buds, like the flowers that shoot out of tulip bulbs. They’re attractive, but don’t let them grow. When the buds appear, cut them off at the base; the plant will turn its energy toward the bulbs, so that they grow fat. The bulbs are the gold, anyway—big heads of lovely, tasty garlic, ready when most of the green shoots turn yellow and brown. Then dig ‘em up (carefully, so you don’t damage them, clean most of the dirt off, and hang them by the greens to dry in a cool basement. They’ll keep a long time; mine last mostly through the winter, and the flavor and aroma are vastly superior to that grocery-store stuff—which probably comes from China on boats (imagine how much Chinese garlic will cost this fall (thanks, Donald).
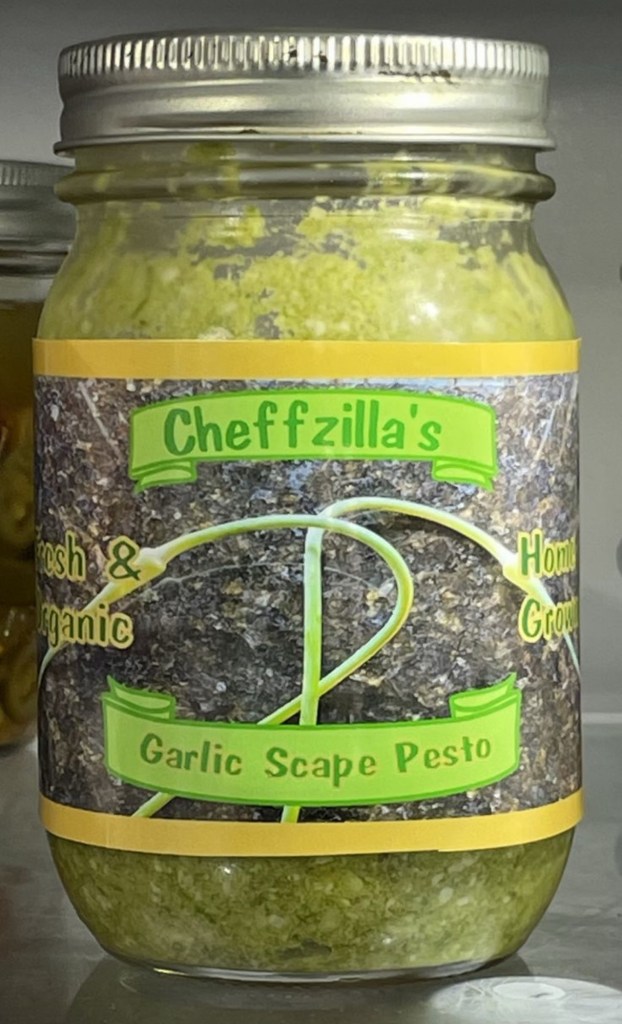
But wait…what to do with the scapes you just cut? Heavens, don’t throw them away. They make the most delicious pesto, with or without basil—I make mine without basil, and what a surprise. Just cut off the buds (toss them—not much you can do with them) and whizz them up with your usual pesto ingredients—Parmesan, lemon juice, salt, pepper, olive oil, and dip with chips or smother a bunch of pasta and enjoy.
Here’s the plan:
Ingredients:
- 1 pound garlic scapes, cut into 2-inch pieces
- 1 ¼ cups grated Parmesan cheese
- 1 cup olive oil
- 1 tablespoon lemon juice
- Kosher salt andground black pepper to taste
Preparation:
- Blend garlic scapes, Parmesan cheese, olive oil, lemon juice, and pepper together in a food processor until smooth.
Recipe tip:
Garlic scapes are abundant at farmers’ markets and CSAs (community-supported agriculture shares) in spring.
Prep Time: 10 mins
Total Time: 10 mins
Servings: 28
Yield: 3 1/2 cups
Yet Another Focaccia, Starring Sourdough Discard

I’ve mentioned before, and posted recipes for, sourdough bread, using my wonderful aged and active San Francisco-born starter. I keep my starter small, to reduce the amount of discard (having worked in a large commercial production kitchen, I hate discarding ANYTHING!). My starter regimen is this: from my daily starter feeding, I retain 5 grams of starter, add 20 grams whole-wheat flour, and 20 grams of spring water, and save the remaining starter in a 1-pint Mason jar. When I have about 200 grams of discard I make something with it, like lemon and olive oil quick bread, zucchini-and-carrot quick bread, banana bread, or my favorite, herb-and-garlic focaccia. Adding the discard to my focaccia recipe produces an incredible extra layer of flavor that sings, and it keeps me from wasting beautiful ingredients. In addition, making foccacia allows me to experiment with flavor combinations using other concoctions I make myself, such as garlic-infused olive oil, lemon-and-fennel coarse salt, tomato sauce, jalapeno relish, pickled red onions, and home-grown pepperoncini peppers.
But here’s the basic focaccia platform, based on a recipe from Grace in My Space, which has become one of my go-to sources of all things sourdough.
INGREDIENTS:
- 170 grams sourdough discard (preferably fed at some point in the last 72 hours)
- 284 grams lukewarm water (90-105 degrees F)
- 1 tsp instant yeast
- 225 grams high-protein bread flour
- 280 grams all-purpose unbleached flour
- 2 tsp fine pink Himalayan or sea salt
PREPARATION:
- Begin by dissolving 170 grams of sourdough discard in 284 grams of warm water in a mixing bowl. Mix in 1 tsp of instant yeast and let sit for 10-15 minutes to let the yeast bloom.
- Add 225 grams of bread flour (spooned) and 280 grams unbleached all-purpose flour. Turn your mixer onto level 1 and mix ingredients with a dough hook attachment. Once the water-and-flour mixture is combined, add 2 tsp (11 grams) fine salt and continue mixing on level 3-4 until the dough is smooth and pulling away from the sides of the mixing bowl (the amount of time you allow your dough to mix will depend on your mixer, starter hydration, and temperature. Start with 4-5 minutes and then check your dough. When it is ready, it will not be too sticky to the touch and will stretch easily.
- Cover your mixed dough with plastic wrap and let it rise for 1-2 hours until it has doubled in size. I do this in the oven with the light turned on.
- Once your dough has doubled in size, line a 9×13 pan with parchment paper. Drizzle 2 tbs. of high-quality extra-virgin olive oil in the bottom of the lined pan and spread with a basting brush.
- Dump your dough into the oiled pan, allow it to rest for 10 minutes, and use your fingers to spread it evenly to all four corners of the baking pan. Add 2-3 more tablespoons of olive oil to the top of the dough.
- Then, add your fresh herbs and lightly dimple the dough further with wet fingertips to push the herbs into the dough.
- Once the herbs are added, cover the pan with plastic wrap and let rise another 1 hour.
- When the dough has completed its second rise, top with flaky salt, red onion, and minced garlic. Preheat the oven to 500 degrees Fahrenheit and bake for 15 minutes.
- After 15 minutes, lower the temperature to 450 degrees and rotate the pan 180 degrees, to help it bake evenly. Bake at 450 for 7-12 more minutes, until the top of the dough is nicely browned.
- Remove the focaccia from the oven and allow to cool on a wire rack before slicing.
TOPPINGS:
- 5 tbs high-quality olive oil, divided
- Flaky sea salt (I use Maldon salt, sometimes the smoked variety)
- 1/8 of a red onion, sliced thin lengthwise
- 3 cloves minced garlic
- 3 sprigs chopped fresh thyme (1 tsp dried thyme alternative)
- 2 sprigs chopped fresh oregano (1 tsp dried oregano alternative)
- 1 sprig fresh rosemary, coarsely chopped (or not!)
NOTES: Some alternative foccacia toppings, or use your imagination for others.
- Freshly harvested home-grown rosemary and garlic, using garlic-infused olive oil
- Butter, cinnamon, brown sugar, and raisins (often soaked in rum or brandy), and glazed with a milk-and-10X sugar glaze
- Kalamata olives, cherry tomato halves, and rosemary
- Freshly made tomato sauce, mozzarella, oregano, and assorted pizza toppings of your choice
Turmeric Chicken Stew

There’s not much better than a big, warm bowl of stew on a cold and snowy February evening. The good news is, my sweet partner has conjured up such a treat, which I have just feasted on as I watch the snow sprinkle down on my driveway. It’s thick and hardy and filled with the goodness from the produce department–Sweet potatoes, carrots, onions, spinach, and maybe tomorrow, peas. Yum!
On a cold, gray day this one’s bright yellow and dotted with green and orange, steaming hot and as tasty as I could possibly hope for. And all warmed by a wonderful combination of herbs and spices that just sing together like the birds we hope will survive this cold snap and grace our feeders in the next few days, after the piles of snow have been cleared. Alas, the Punxatawney groundhog promised this weather, and more on the way. Who knew?
So I’ll get right to the recipe, so you can read and imagine this bowlful of sunshine on a cloudy day. Here’s the roadmap…
Ingredients:
2 Tablespoons olive oil
1 1/2 pounds boneless, skinless chicken thighs, cut to 1-inch pieces
1 medium onion, diced
2 carrots, diced
1 stalk celery, diced
4 cloves garlic, minced
1-inch piece fresh ginger, peeled and minced
2 teaspoons ground turmeric or 2-inch piece of turmeric root, peeled and minced
1/2 teaspoon ground cumin
1/2 teaspoon ground coriander
1 teaspoon kosher salt, plus more to taste
1/2 teaspoon coarsely ground black pepper, plus more to taste
2 Tablespoons all-purpose flour
2 medium sweet potatoes, peeled and cubed, 1/2-inch cube
2 1/2 cups chicken broth
1/2 cup unsweetened coconut milk
3 cups fresh spinach, roughly chopped
1-2 cups cooked brown rice or barley (optional)
fresh cilantro, chopped, to garnish
Preparation:
- Dice chicken thighs and season generously with salt and black pepper.
- In a large pot preheated to medium-high, warm the olive oil and add the chicken, stirring constantly to brown on all sides (work in batches if necessary). Remove to a bowl and set aside.
- In the same pot, reduce heat to medium and add the onion, carrots, and celery, and cook 3-4 minutes, until the vegetables are just tender.
- Add the garlic, ginger, turmeric, cumin, coriander, salt, and pepper and cook for an additional 1-2 minutes, until the pot is fragrant.
- Return the chicken to the pot, sprinkle with flour, and stir vigorously until all the flour coats the chicken. Add the sweet potatoes and broth, scraping up any bits that have stuck to the bottom of the pot, and stir to well combine all the ingredients.
- Bring the stew to a low boil, then reduce to a bare simmer and cool 30 minutes, stirring occasionally, until the chicken is tender and the potatoes can be easily pierced with a fork.
- Add the spinach and coconut milk, and grain, if using, stir to combine, and cook for 5 more minutes, until the spinach is wilted. Taste and season with additional salt and pepper to taste.
- Serve immediately with a delightful fresh bread or (as I did) a tasty focaccia (see a couple of my focaccia recipes below). Leftovers can be stored in an air-tight container for up to 5 days or frozen for up to 3 months.
Notes:
This recipe can be made in a slow cooker. Brown the chicken and mirepoix (onions, celery, carrots, and garlic) as directed. Place in the crock, add the remaining ingredients except the coconut milk and spinach, and cook 4 hours on high or 7 hours on low. Then add the coconut milk, grain (if using), and spinach, and stir into the hot stew until the spinach is wilted and the grain (if using) is hot, about 5 minutes. Taste and adjust the salt and pepper.
Cooked chicken can be used to replace the browned chicken. Use 4 cups of cooked, cubed chicken.
Ground ginger, garlic powder, and onion powder can be substituted for fresh (1 teaspoon each), but fresh will always be better.
Recipe courtesy of Stephanie Kay, www.kaynutrition.com
Crusty Cranberry-Nut No-Knead Artisan Bread
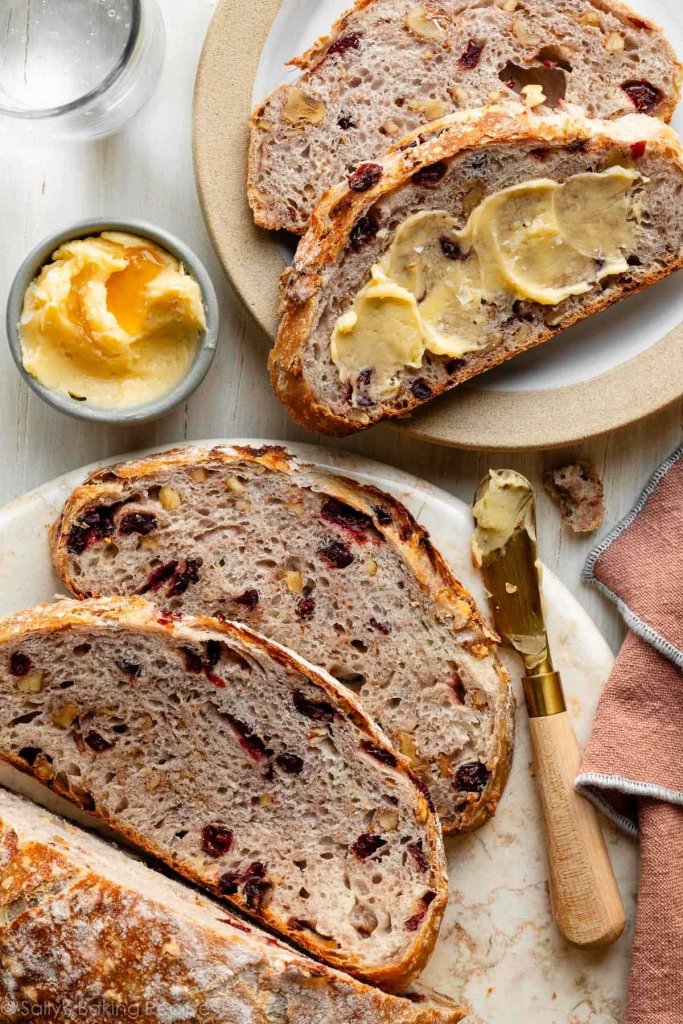
I’m making this bread for our Christmas Eve Swedish Smorgasbord feast. It is a variation on Jim Lahey’s famous no-knead crusty artisan bread, which has been featured, amended, and rebranded as the New York Times “Almost” no-knead bread loaf, which we’ve made on numerous occasions over the years. It is also the recipe on which most of my recent sourdough adventures have been based. It is a genuine holiday treat, and worthy of your time and attention. Try it sometime. You’ll like how easy it is and how wonderful it tastes. I also have a standard recipe for the bread without the fruit and nuts, which you can find by searching on “Jim Lahey bread” or “New York Times No-Knead bread.”
Crusty Cranberry-Nut No-Knead Artisan Bread
Ingredients:
3 cups + 2 Tablespoons (390 g) all-purpose flour, plus more for hands and bench
2 teaspoons coarse sea salt (10 g)
1/2 teaspoon instant yeast
3/4 cup (95 g) chopped nuts (walnuts or pecans)
3/4 cup (105 g) dried cranberries
1 Tablespoon honey
1 1/2 cups (360 g) warm water (95-100 degrees)
Preparation:
- Stir the first six ingredients (flour through honey) together in a large bowl. Stir in the water and mix well to incorporate and hydrate all the flour. Gather into a homogenous ball. Cover tightly and rest on the counter 12-18 hours.
- Turn the dough out onto a floured surface and shape into a ball. transfer to a 12×12 piece of lightly oiled parchment paper. Score the dough as desired with a lame or sharp knife 1/2″ deep. Cover lightly with plastic wrap and allow to rest for 30 minutes.
- While the dough is resting, place a covered Dutch oven in the oven and preheat to 475 degrees. After 30 minutes, remove the Dutch oven and carefully place the bread (on the parchment paper) into the pot. Cover and place in the oven and bake for 30 minutes covered. Remove the lid and continue to bake 8-10 minutes, until nicely browned. Remove from the oven, lift the bread from the pot and place on a cooling rack. Allow to cool at least 30 minutes before slicing/serving.
- The bread can be stored in a zip-close plastic bag for one week or frozen for up to 3 months.
Notes: The dough can be premade and frozen for up to 3 months, wrapped in plastic and placed in a freezer container after Step 2. To bake, allow the dough to thaw overnight in the fridge or 2-3 hours at room temperature, then resume at Step 3.
You can replace up to 1/2 the flour with whole-wheat flour for a chewier crumb and a slightly nutty taste.
Raisins can be substituted for cranberries, and
This recipe is published courtesy of Sally’s Baking Addiction, at www.sallysbakingaddiction.com
French Lentil and Swiss Chard Risotto
Okay, so the Sunday News won’t be carrying my column anymore, but that doesn’t mean you can’t access my kitchen. I plan to continue writing Talking Fresh, and hope all of you Facebook friends will Like Jeff’s Kitchen here, and share my posts with your friends, and encourage them to like my page as well. It takes a village, and all those six degrees and such can turn this into a movement, if you’re willing.
That said, I’m also going to put up a post on opposite Sundays featuring what I get in my CSA bag from Caitlin and EmmaKate at Blue Rock farm. Today I got lettuce, mustard and beet greens, beets, fresh dill, a perfect head of garlic, one yellow squash, snow peas and mixed (pole or bush?) beans, and chard.
Here’s what I’ll be making for supper tonight, all the fresh ingredients coming from the young women’s wonderful little farm in Willow Street, PA.
Thanks indeed to Martha Stewart for the inspiration for this recipe. I’ve altered it a bit from her original to make it my own, and to feature the fine ladies of Blue Rock Farm. By the way, it is wonderful cold, and reheats beautifully.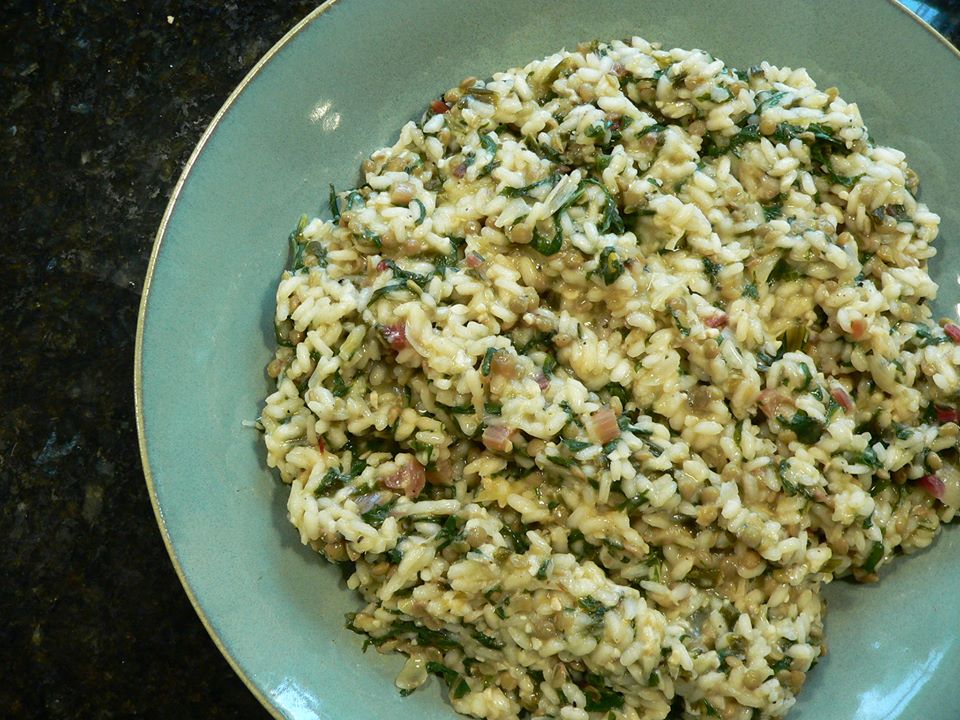
Please enjoy responsibly.
French Lentil and Swiss Chard Risotto
Ingredients:
1 bay leaf
6 sprigs fresh thyme plus 2 teaspoons leaves
1/3 cup French green lentils
1 bunch Swiss chard
1 cup finely chopped onion and the onion greens
4 cups low-sodium chicken stock
1 tablespoon olive oil
1 ½ teaspoons minced garlic
1 ¼ cups Arborio rice
½ cup dry white wine
1 teaspoon kosher salt
¼ cup freshly ground white pepper
¼ cup freshly grated Parmesan cheese
1/3 cup freshly shredded chard or beet greens, for garnish
Preparation:
1. In a medium saucepan, combine 6 cups water, bay leaf, and thyme sprigs and bring to a boil. Simmer for 5 minutes; add lentils, reduce heat to low and simmer until tender, about 20 minutes. Drain lentils and set aside; discard the rest.
2. Wash chard and remove stalks; slice leaves into very thin 2-inch strips, and dice the smaller stems into ¼-inch dice. Discard the larger stems. Sauté with a bit of olive oil in a large skillet, tossing constantly over high heat until just wilted; set aside in a colander.
3. Finely chop the onions and slice the greens into ½-inch rings.
4. Bring the stock to a boil, reduce the heat to low, and keep at a bare simmer.
5. Heat olive oil in a large heavy pot over medium heat. Add onion, onion greens, and garlic and cook, stirring frequently until soft but not browned, about 6 minutes. Add rice and thyme leaves and continue stirring until the edges of the rice become translucent, 3-4 minutes. Add the wine, stirring constantly, until nearly all the wine is absorbed.
6. Raise the heat to medium-high, add the salt and pepper and ½ cup stock and cook, stirring constantly until nearly all the stock is absorbed. Repeat this process, adding ½ cup stock at a time, until the rice is creamy but still a little firm, 15-20 minutes.
7. Remove the pot from the heat, and stir in the lentils, chard, and Parmesan. Season to taste with salt and pepper, plate and serve immediately garnished with the shredded greens.
Serves 6
Vegan Chocolate Gingerbread
 This is the vegan chocolate cake I made for dessert with last night’s supper for the in-laws. It’s perfect, simple, and surprising. Serve it with a small dollop of vanilla ice cream. My choice is Kim Zanni’s Vanilla Bean Gelato di Babbo. If you haven’t found Kim’s monstrously good gelatos, go out and find it, or demand your grocer get in into their store. Imagine this: it’s low-fat. On my Weight Watchers’ plan it is only three points, which offsets the hundreds of points the cake is (only kidding). Make sure you allow the cake to cool completely in the pan before you unpan it, as it is prone to breaking apart if you unpan it too soon. Still yummy, but you’ll be tempted to eat the broken parts (not necessarily a bad thing!).
Ingredients:
1/3 cup unsweetened cocoa powder
1 1/3 cups unbleached all purpose flour
½ teaspoon baking soda
½ teaspoon kosher salt
1 teaspoon ground cinnamon
2 ½ teaspoons ground ginger
1 cup dark brown sugar
1 cup strong brewed coffee, room temperature
½ cup vegetable oil
¼ cup crystallized ginger, coarsely chopped (optional)
2 tablespoons apple cider vinegar
Preparation:
- Preheat oven to 375 degrees F. Spray a square 8-inch baking pan with oil or baking spray or dust with cocoa powder.
- Sift the cocoa, flour, baking soda, salt, cinnamon, ginger, and brown sugar into a large bowl. Combine coffee and oil in a small bowl. Beat the liquid ingredients into the dry ingredients with a rubber spatula or whisk. Stir in the crystallized ginger (if using), and quickly stir in vinegar.
- Pour the batter into the prepared pan and bake until a toothpick placed into the center comes out clean, about 30 minutes. Cool 10 minutes on a wire rack, then turn the cake out onto the rack and cool completely. Serve, dusted with confectioners’ sugar or cocoa powder, with hot tea, cider, or mulled wine.
Roasted Savory Cauliflower
 I can’t believe how good this recipe turned out. It’s simple and delicious. I served this for supper last night, and incredibly, the kids ate all their vegetables! Use fresh Parmesan cheese for the last-step sprinkle.
Ingredients:
- 5 to 6 cups cauliflower florets, about 1 1/2 inches in diameter (from 1 medium cauliflower)
- 1/4 cup extra-virgin olive oil
- 1 tablespoon sliced garlic
- 2 tablespoons lemon juice
- 1 teaspoon salt
- 1/2 teaspoon black pepper
- 2 tablespoons grated Parmesan
- Chopped chives, for garnish
Preparation:
Preheat the oven to 500 degrees F.
Place the cauliflower florets in a large saute pan or a roasting pan. Drizzle the olive oil over the cauliflower, and season with the garlic, lemon juice, salt and pepper. Place the saute/roasting pan in the oven and cook for 15 minutes, stirring occasionally to ensure even roasting. Remove from the oven and sprinkle with the Parmesan. Garnish with chopped chives and serve immediately while still warm.
Pan-braised Chicken with Rosemary and Figs
 Here’s a recipe I tried last night for company. Really good, and really simple. What makes it work is fresh rosemary. I think dried rosemary would overwhelm the delicate sweetness of the fig sauce. Made it for the in-laws last night with garlic roasted cauliflower and sweet potato fries. Great supper. Great recipe.
Ingredients:
4 chicken breasts
2 tbsp olive oil
15 fresh figs, halved
1 tsp sweet paprika, divided
2 tbsp fresh rosemary, coarsely chopped
1 ½ cups red wine
2 tablespoons butter
salt and pepper to taste
Instructions:
Sprinkle chicken with ½ tsp paprika, salt and pepper.
Heat oil in a large pan. Add chicken breasts and brown both sides, about 3 minutes per side. Add wine and figs, and sprinkle rosemary (reserving 1 teaspoon) and remaining ½ tsp paprika on top. Turn heat to medium, cover, and cook until chicken is cooked through, about 12-15 minutes.
Move chicken from pan to a plate, and let it rest covered.
Whisk the butter into the pan sauce, turn the pan to low-medium, and let reduce without a cover for an additional 10 minutes, until thickened.
Divide chicken breasts among plates, place figs on top, and drizzle sauce over the chicken and figs. Sprinkle fresh chopped rosemary on top and garnish with a piece of a fresh rosemary sprig.
Way good!
Ellen and Babs’ Hearty Chicken Chowder
Here’s a terrific old family recipe for chicken chowder, passed down through my wife’s family. The only place I’ve seen it is on a stained recipe card. But it’s really good.
Hearty Chicken Chowder
Ingredients:
1 whole chicken, 3 pounds
5 cups water
1 cups sliced carrots
1 cup diced celery
1 medium onion, sliced
1 bay leaf
6 peppercorns
1 teaspoon parsley flakes
1 teaspoon kosher salt
¼ teaspoon freshly ground pepper
1 ½ cups milk
¼ cup butter (1/2 stick)
½ pound sliced mushrooms
2 teaspoons snipped chives
1/3 cup all-purpose flour
½ cup corn
¼ teaspoon dried (or ½ teaspoon freshly chopped) thyme
Shredded cheddar cheese
Preparation:
1. Place first 10 ingredients (chicken through ground pepper) in a soup pot; cover and bring to a boil, then simmer until the chicken is tender, (about 45 minutes). Strain broth, reserving vegetables, discarding the bay leaf, and picking the chicken off the bones. Discard bones.
2. Mix broth and milk. In a saucepan, melt butter; add mushrooms and chives and sauté until soft, 3-5 minutes; add flour and blend. Gradually stir in broth, continuing to stir until the soup thickens. Add salt and thyme, corn, chicken, and reserved vegetables.
3. Simmer 10 minutes longer; then serve in heavy bowls, topped with cheddar cheese.
